Sewing a Quilt Block

Sewing a Quilt Block
You have all the supplies, sewing school post 1. You have cut all the pieces, sewing school post 2. The machine is prepped and you have tested it out, sewing school post 3. So we are ready to dive right in to sewing a quilt block!
There is one last thing you need before you start sewing! A seam ripper (<—-click there for my favorite seam ripper)! Don’t be scared to rip it out! Rip often and rip early. If you don’t rip when you first make the mistake it will throw off the entire piece. I know it sucks and it is a bummer to have to use the seam ripper but I promise the end result will suffer if you don’t rip out a mistake! It is an unfortunate truth that your seam ripper is an often used tool!!
Let’s start with the striped block. Line up the pieces in the order you want them to be when they are finished.

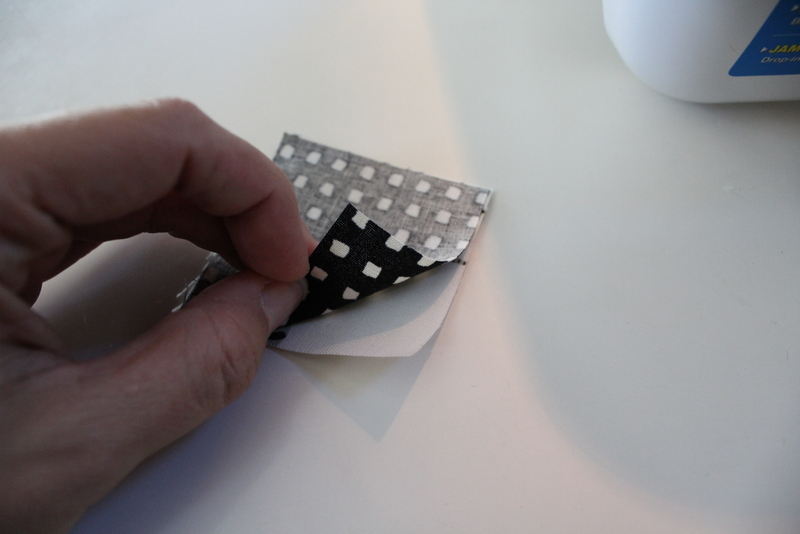
Now fold the topmost piece (the tiger fabric) over onto the second piece (the black and white squares). Line up the edge you are going to sew and make it as straight as you can. Pin. Then fold the third piece (the typewriter) down onto the fourth piece (the rabbit) line it up and pin. When you pin put the pins in up and down as pictured below. This makes it very easy to pull the pins out of the way of the needle as you sew.

Now sew a 1/4″ along each edge that you just pinned. Make sure you have done the test piece and are using an exact 1/4″ seam. This is really important so don’t skip it. Sewing is all about precision!

After you have sewed one set of pieces together don’t cut the thread. Just push the next piece in right after. This saves time and thread and also guarantees that all your pieces have the same seam allowance.

You now have two pieces instead of the four that you started with. Get out your ironing board and press the seams. Press to the dark side!

Sew the two pieces together using the same methods listed above. Place one piece face down on top of the other piece and sew them together with a 1/4″ seam allowance. In my case the black and white square went face down on top of the typewriter and was pinned in place. Press to the dark side, you can see how this looks in the picture below. It is not important that the seams are all pressed in the same direction it is only important that the dark fabric not show through the light fabric.

And that is it. The stripe block is done!

Alright on to block number 2. The Log Cabin block. Set your pieces out again so they are lined up the way you want them to look when it is finished.

For this block we are going to start in the middle and work our way out. So grab the two smallest pieces and we will start with those. The 2.5″ squares is what we are starting with. Put them together right sides facing each other. For this block the 1/4″ seam is crucial or it will not be the right size at the end! Make sure you are using the 1/4″ seam!
Press the two squares (to the dark side the same as the first block) and then we are ready to line it up with the next biggest piece. Line up the edge you are going to sew, you will also line it up all the way to one side. In my example you can see that I lined the tiger edge all the way to the right and there was a small bit of excess on the rabbit piece on the left side. That is ok we will fix it in the next step.

If you have used the 1/4″ seam allowance there shouldn’t be too much extra fabric but there may be a small amount regardless. Use your ruler and trim the excess (after you have pressed the seam.)
 Continue in this way all the way around the block. You are sewing the pieces together in almost a circular pattern.

Your finished block should look like this. I have to be honest that my kiddos got to my pieces and they got mixed up and I was distracted and they didn’t line up as I had originally planned them. I don’t love the idea of all the rabbits touching the other rabbits or the tiger on tiger. I will be going back and redoing this block because I really like the way it was laid out before I sewed them all together!


We have one more block to make but I want to give you time to get through these. The triangle block is by far the most complex and so we will tackle that next week, Sewing School – Triangle Quilt Block!!
Make sure and join Sewing School on Facebook to share your finished photos and get tips and help with troubleshooting! Can’t wait to see you all there!!
Already know how to sew? Check out these amazing Quilt Books for some fun inspiration!


Leave a Reply