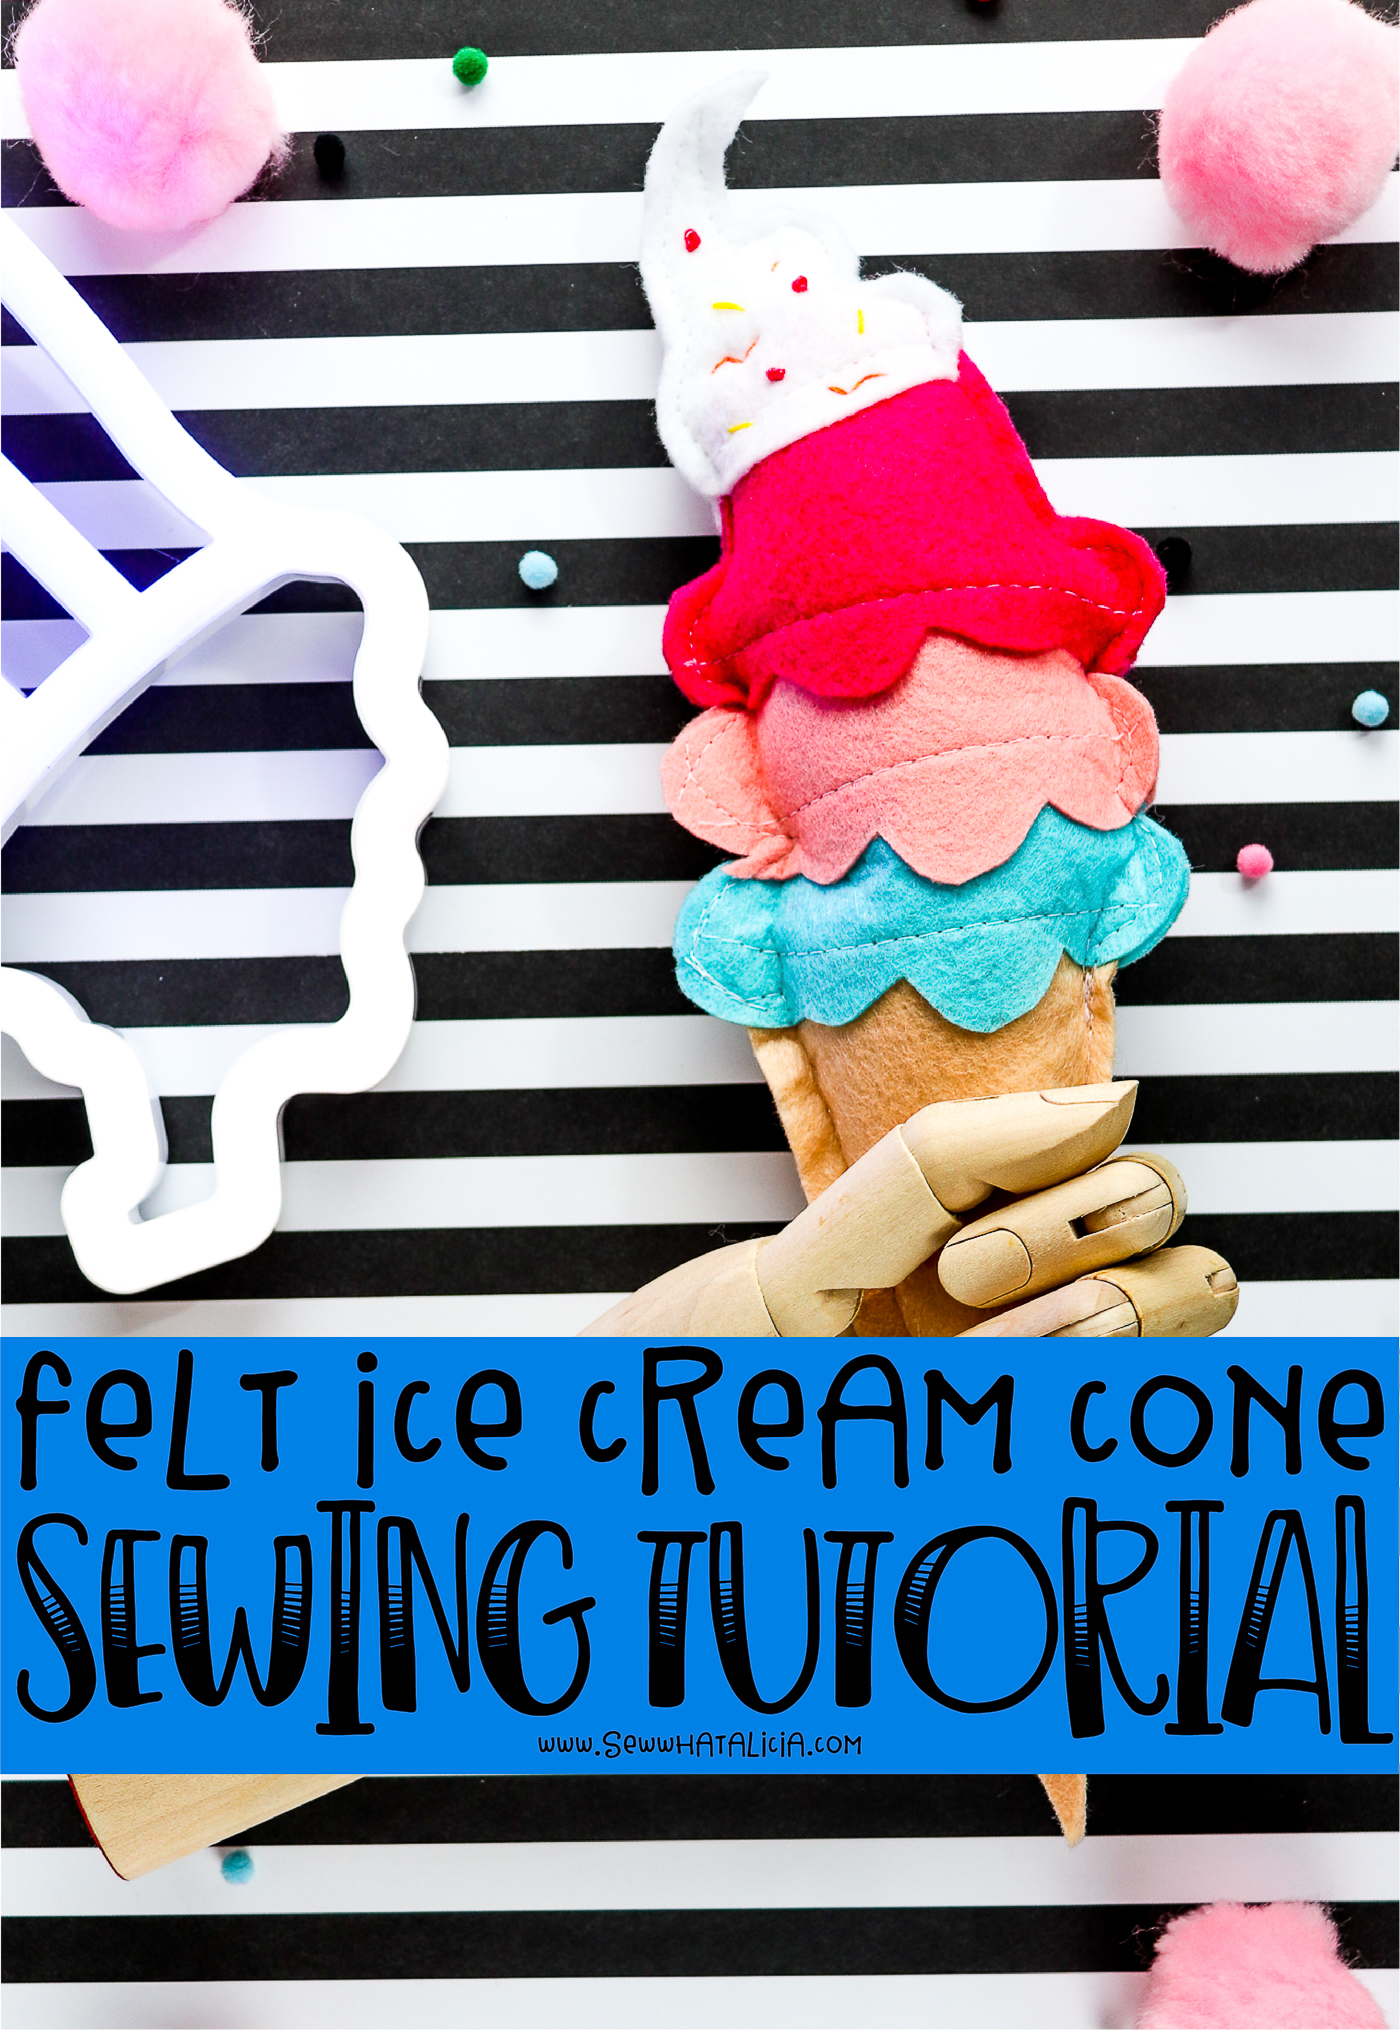
Felt Food Patterns – Ice Cream Cone
I have a small obsession with making felt food and now that the sun is sticking around longer and the days are getting warmer I thought it was time for some ice cream cones! This post will walk you through how to create a stuffed ice cream cone, and then find more felt food HERE. Plus I will even tell you how to scale the cone down to create ice cream cones for your dolls!
Felt Food Patterns – Ice Cream Cone
What material should I use?
Felt is really the best material to use for this type of project. It allows you to add small details and different shapes with ease. Felt is really forgiving and flexible. Cotton fabric will fray and be messy. Cotton is also much less flexible than felt which makes it more difficult to work with.
Felt is a really versatile material. There are several weights of felt. Craft felt is easy to find at your local craft store. It comes in 9″x12″ rectangles in loads of different colors.
You can buy felt by the yard as well at JOANN or the fabric store. This felt comes in a much wider cut so it is great if you are making a bigger project.
For this project just one sheet of craft felt in each color is more than plenty.
How should I cut the pieces?
There are two ways to cut your pieces.
You can print the template, trace the pattern pieces, and cut them by hand with scissors. I recommend using a small pair of scissors to cut the small details.
Or you can use your Cricut Maker with the rotary blade to cut the pieces even quicker. I recommend starting HERE if you plan to use the Cricut for all my tips and tricks for cutting felt. I have included an SVG pattern which will work with your cutting machine (see below.)
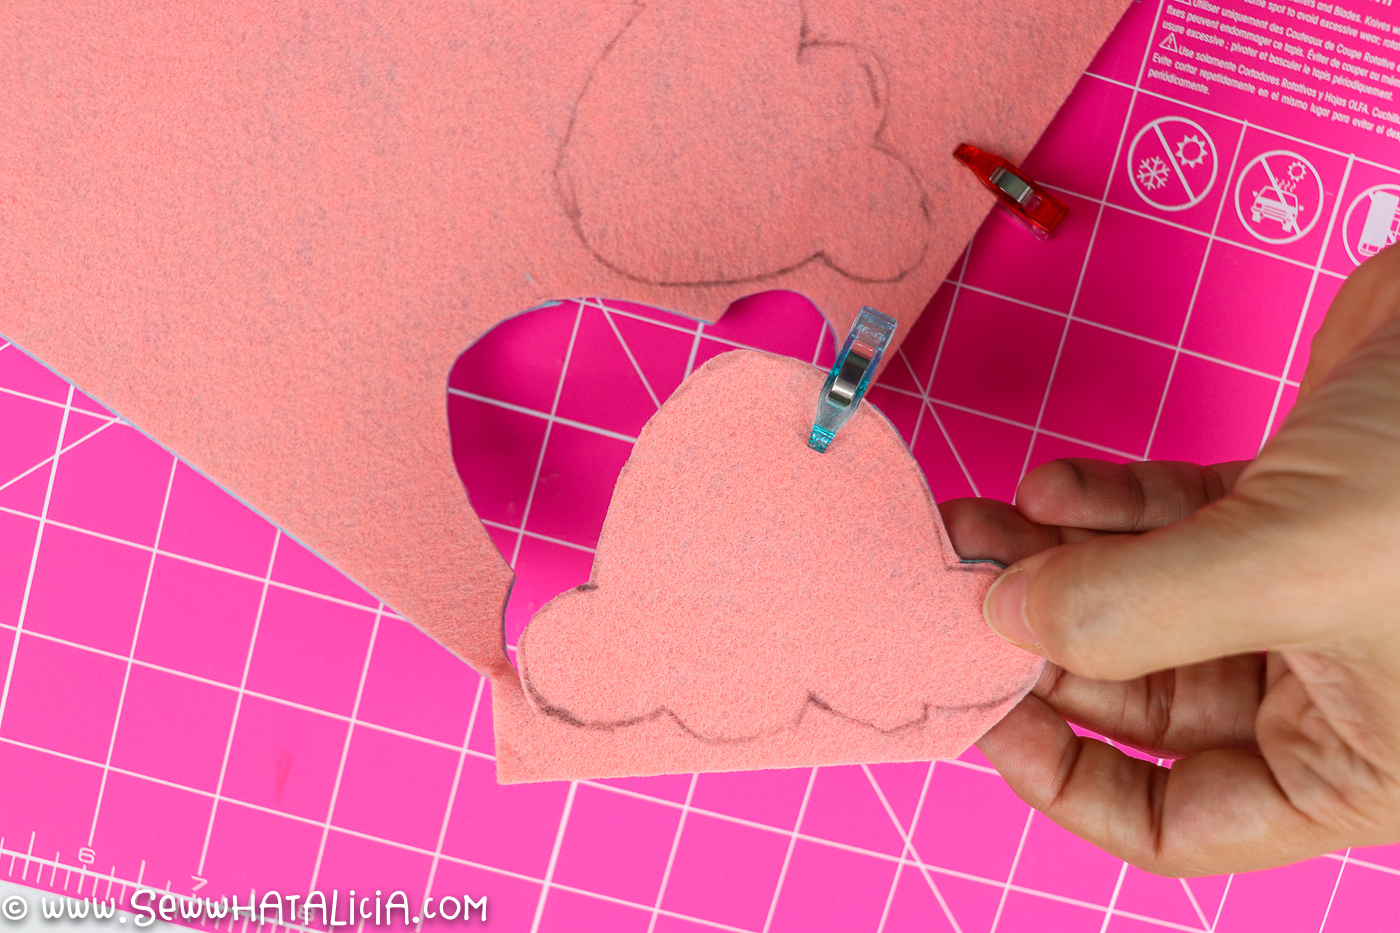
You need two of each piece for this stuffed ice cream cone. Fold the felt in half to cut both pieces at once. Or layer multiple colors of felt and cut them at the same time. Use clips to hold the layers of felt together.
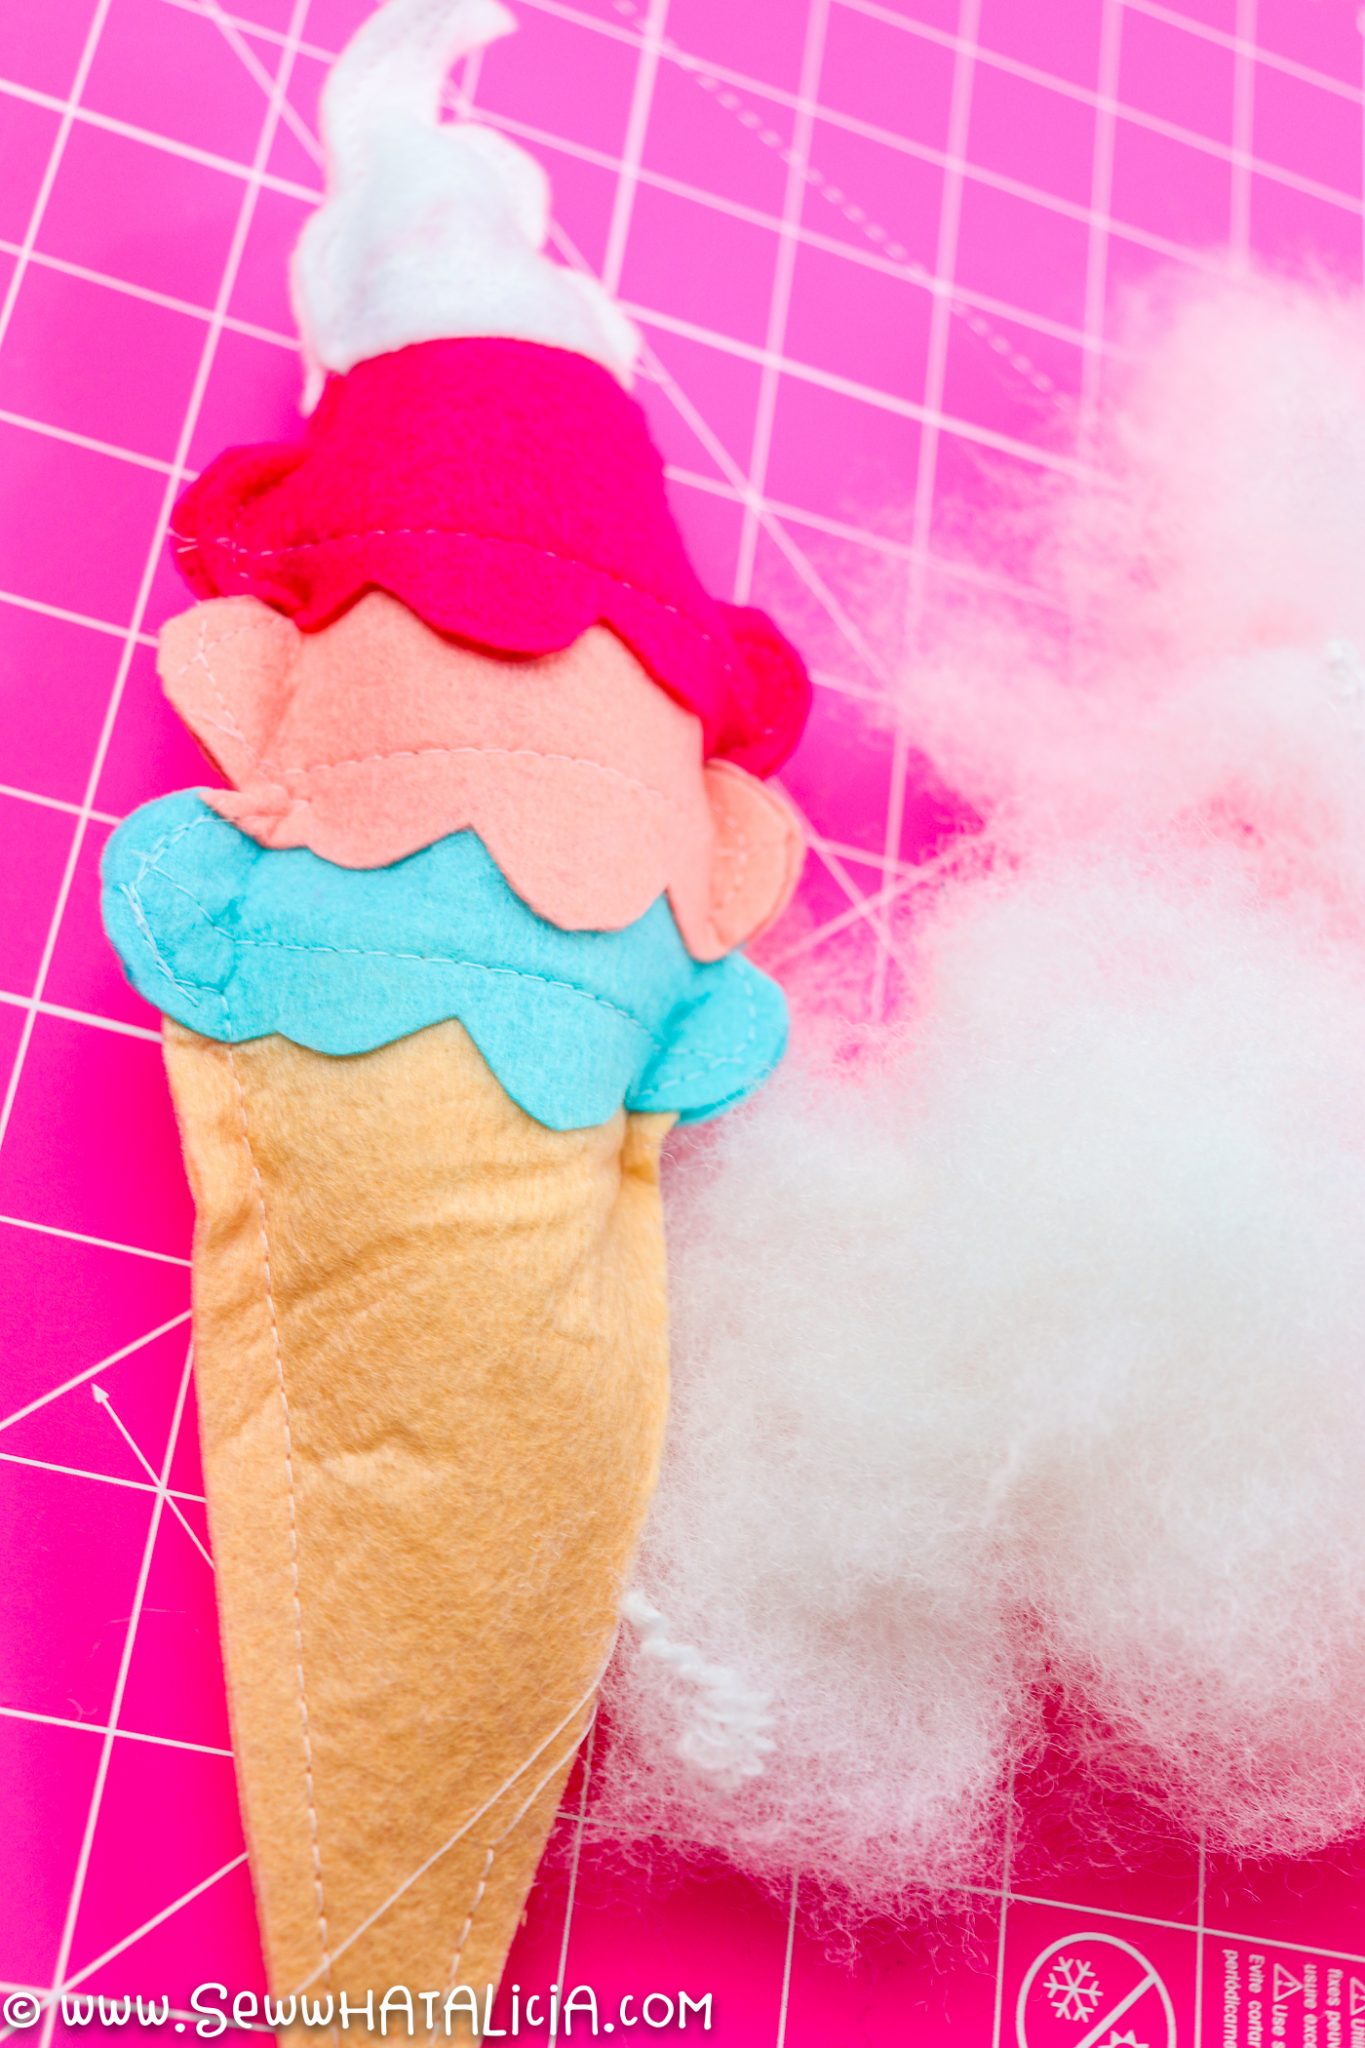
I made my cone with three scoops, but you can add as many scoops in as many colors as you want.
What Supplies do I need?
Felt – Brown or tan for the cone, white for the whip cream, and various colors for the ice cream scoops.
Add sprinkle details:
So honesty time…I created the entire large stuffed ice cream cone and then added sprinkles. I quickly realized this was the backwards way of doing it! So for the second smaller doll sized cone I added the sprinkles first.
What I am saying is that you should learn from my mistake and add sprinkles before attaching the whip cream to anything else.
To add sprinkles use embroidery floss and an embroidery needle to do simple stitches. Use a back stitch or a french knot to create your sprinkles.

How to Sew the Food
- Cut two of each pattern piece. One for the front and one for the back.
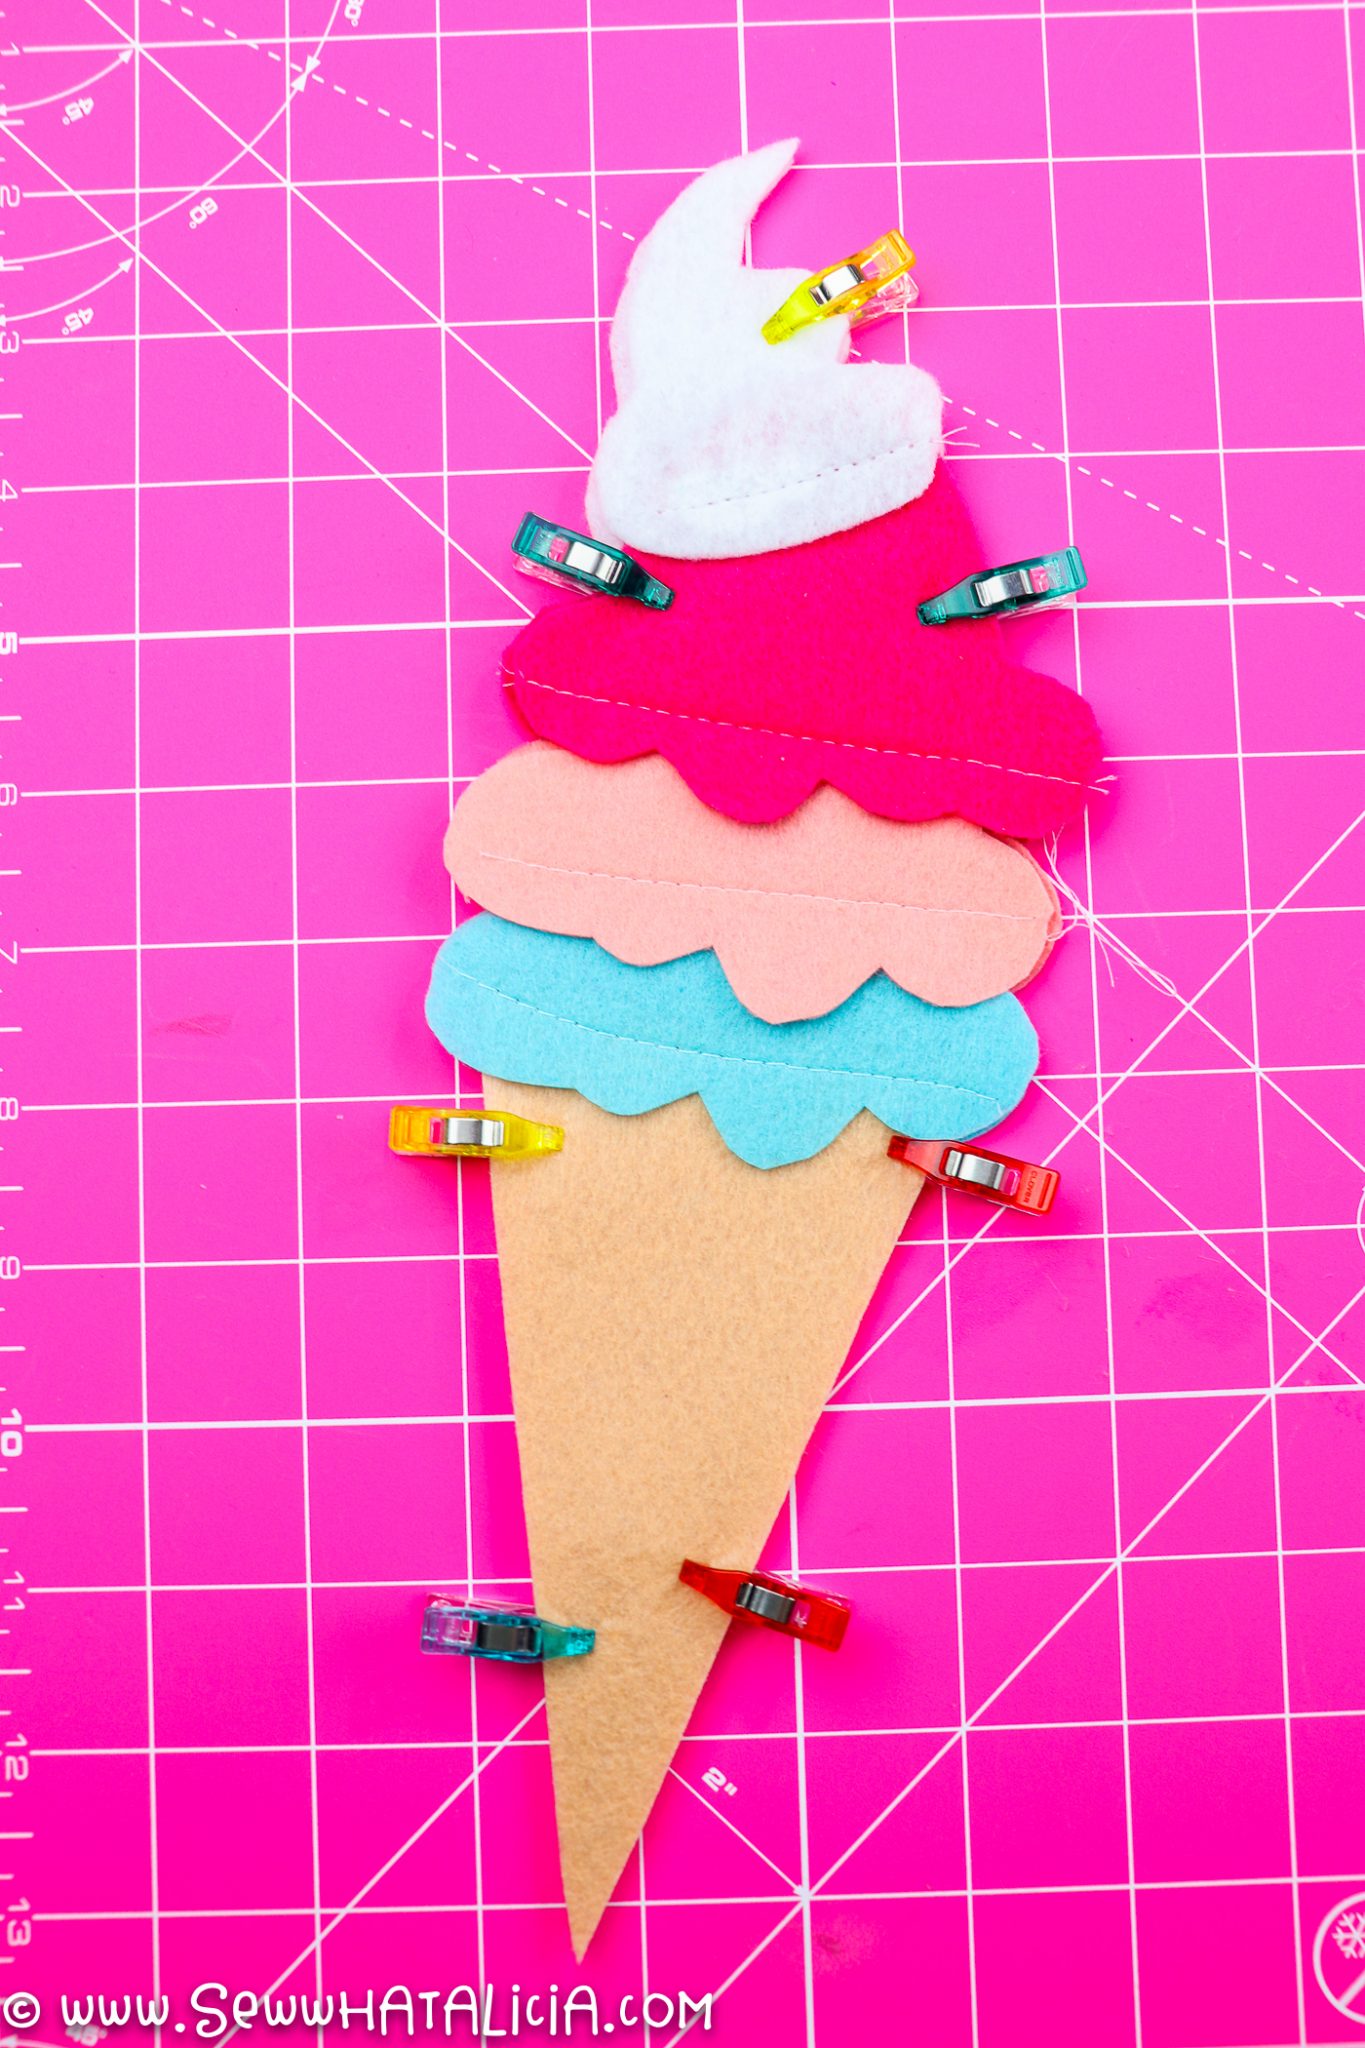
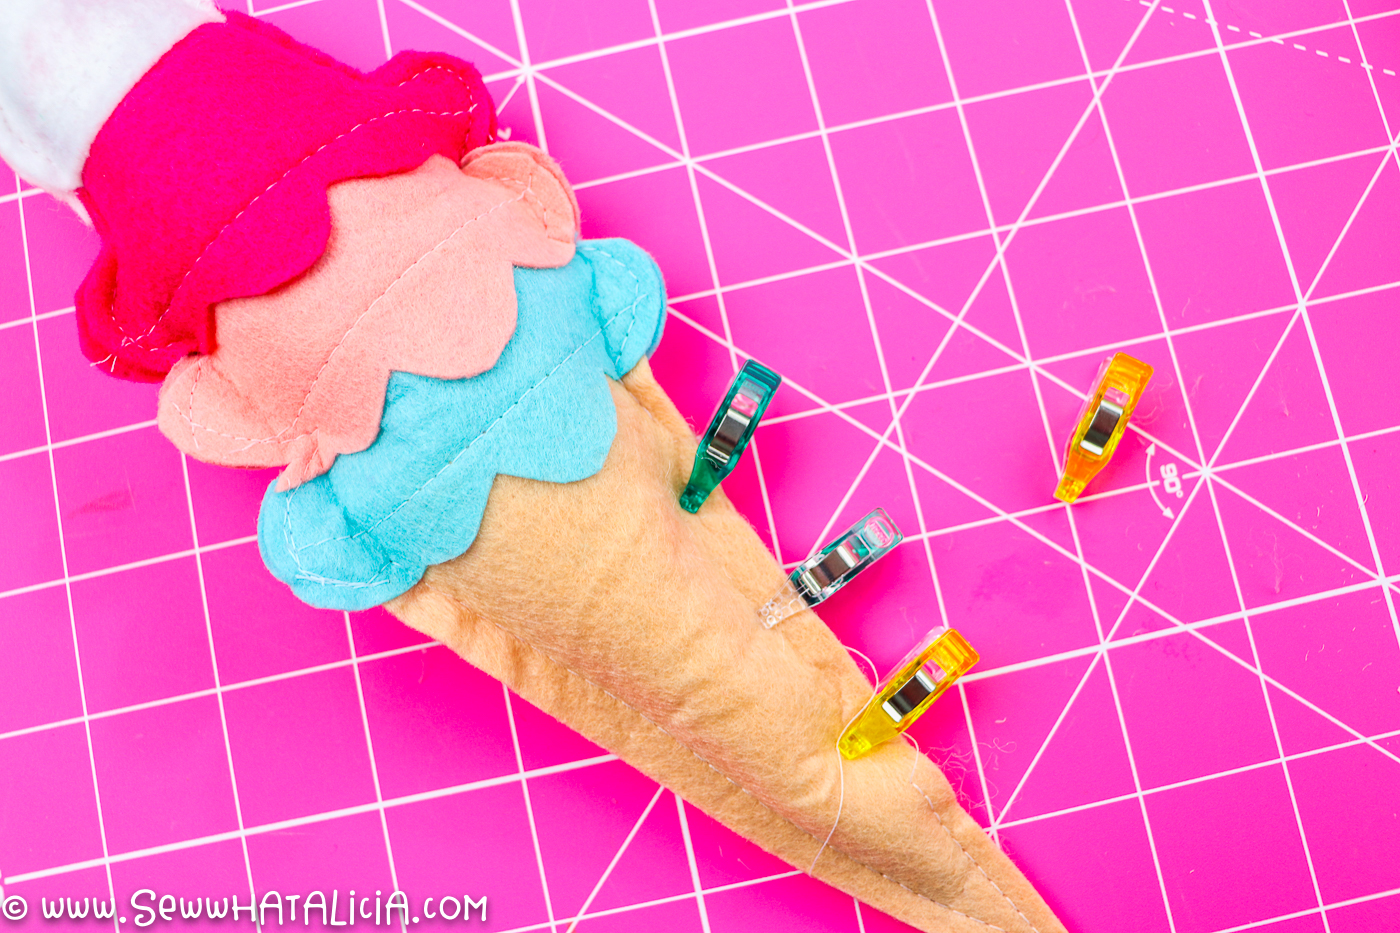
- Start assembling the ice cream cone at the bottom. First layer the cone and one ice cream scoop. Clip these together. Line up the second cone and scoop to make sure you have them in the same spot as the first set.
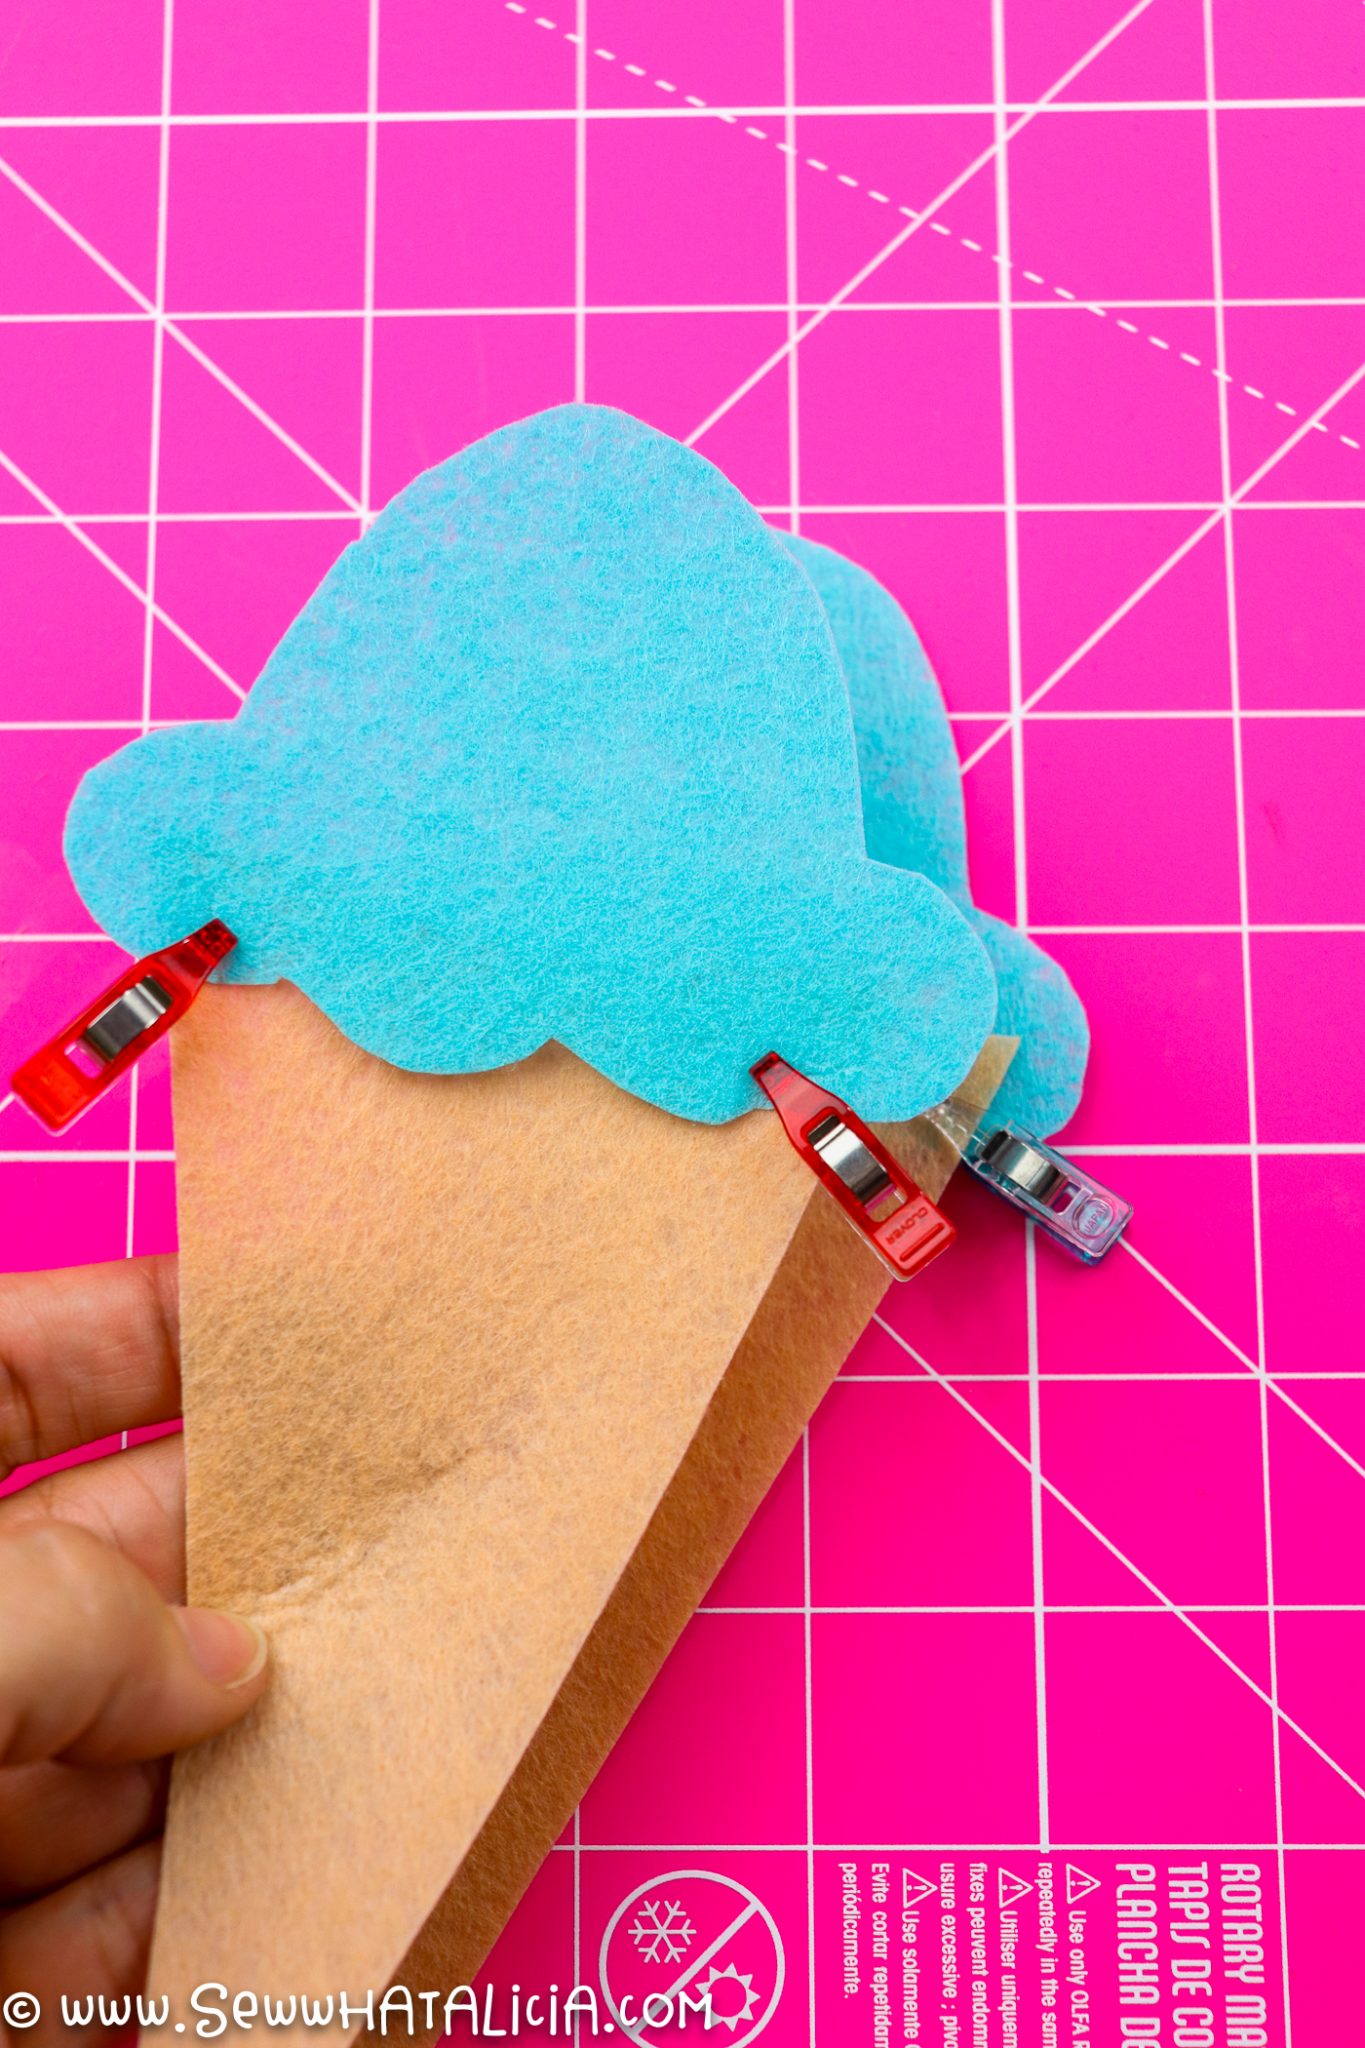
- Sew one line to attach the scoop to the cone.

- Keep attaching the scoops in this manner. Adding the whip cream on the very top.
- Clip the front and back pieces together. Sew around the majority of the cone. In the picture below I started sewing at the bottom red clip and then sewed around the entire cone and scoops, before stopping at the second red clip. This leaves one section open to stuff the cone.
- Stuff the cone with stuffing. Use a pencil or a tool to press the stuffing into the tight spots.
- Clip and sew the opening closed.
Finishing Tips
- Felt is very forgiving so if the front and back don’t line up perfectly you can simply trim any excess.

- Back-stitch thoroughly to be sure that the opening stays closed. Kids can be hard on their things so we want to make sure it stays sewn.
- Don’t use anything sharp as a tool to stuff the toy, this will cause issues, believe me I know from experience!
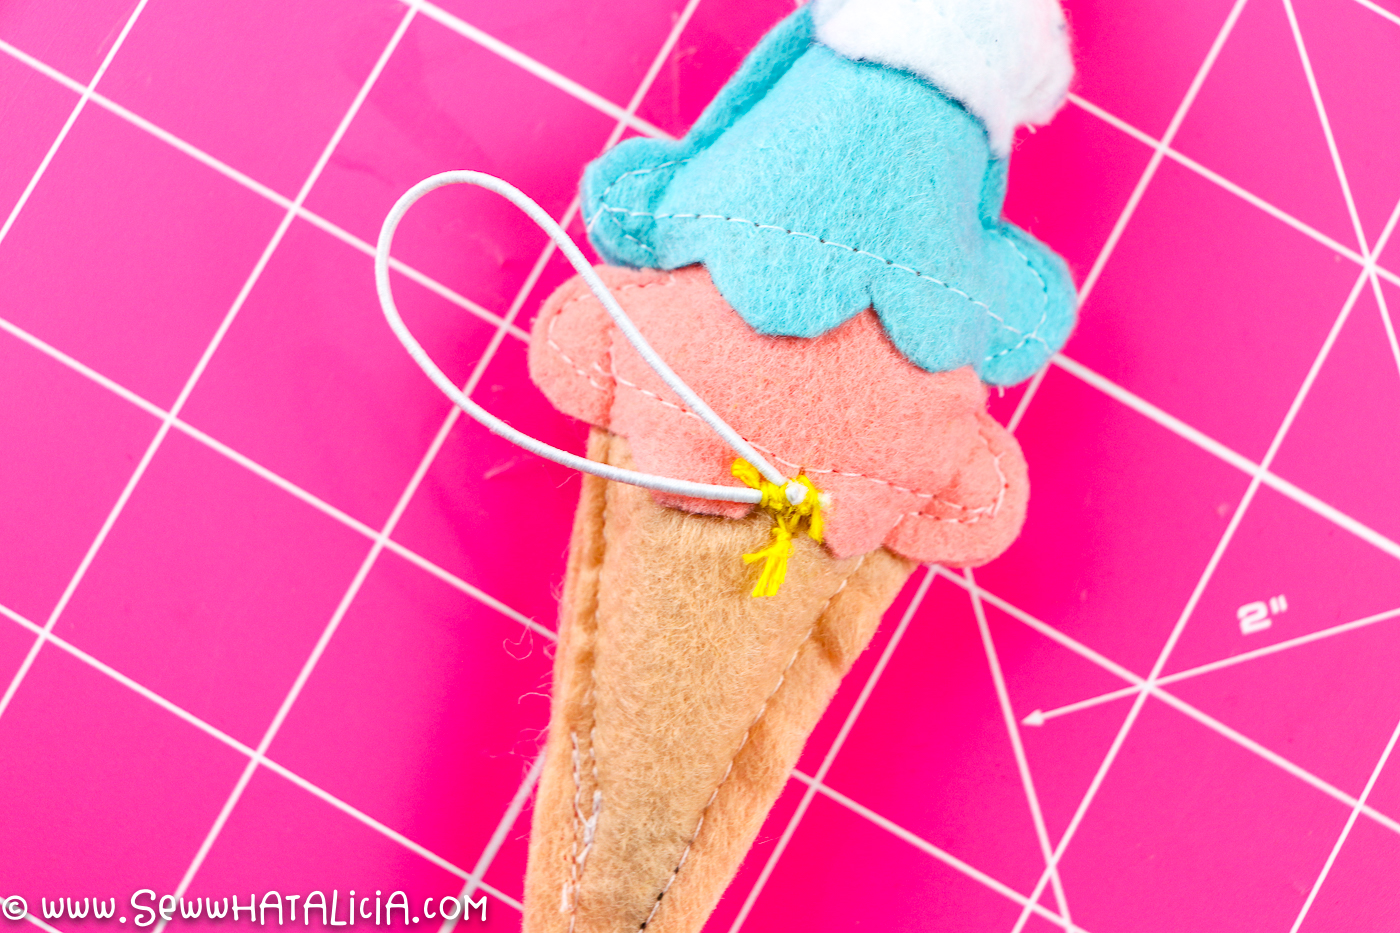
How to Scale the Pattern to Create Doll Food
Print the pattern at 60% scale on your printer. Then cut and sew in the same manner as described above.
Sew a piece of round elastic to the back of the ice cream cone to allow you to attach the cone to the dolls hands. I used more embroidery floss for this step, but you could also use plain sew-all thread.
If you’re looking for a doll, I actually have the Our Generation doll from Target. You can see them all HERE. Looking for more doll stuff? Check out THIS post for some fun clothes.

Ice Cream Cone Pattern
Grab the PDF pattern HERE.
Use the SVG pattern HERE with your cutting machine. The SVG is for the full size cone, you can make it smaller in your cutting machine design software. It should be 60% of the full size for the doll ice cream cone.
Pin Felt Food Patterns


Leave a Reply