This tutorial is for a small scale fabric DIY photo backdrop. These backdrops are perfect for taking photos of your handmade items. They would be perfect if you have an Etsy shop or like to take beautiful and fun photos of your creations.

DIY Photo Backdrop
I love having fun backdrops to take photos for the blog. But they are also great for taking photos even if you aren’t a blogger. Use them for Instagram or for your Etsy shop. Use them for your boutique or just to take cute photos of your kids artwork! The possibilities are endless! You’ll quickly become obsessed just like I am with this easy tutorial! Once you have the backdrops check out THIS post for tips on taking photos with your phone!
What do I need to make a DIY photo backdrop?
Luckily these are super easy and you just need a few things!
First you will need 28×20 foam core boards. I got mine from Target, but you could also look for them at the dollar store, Wal Mart, or Joann.
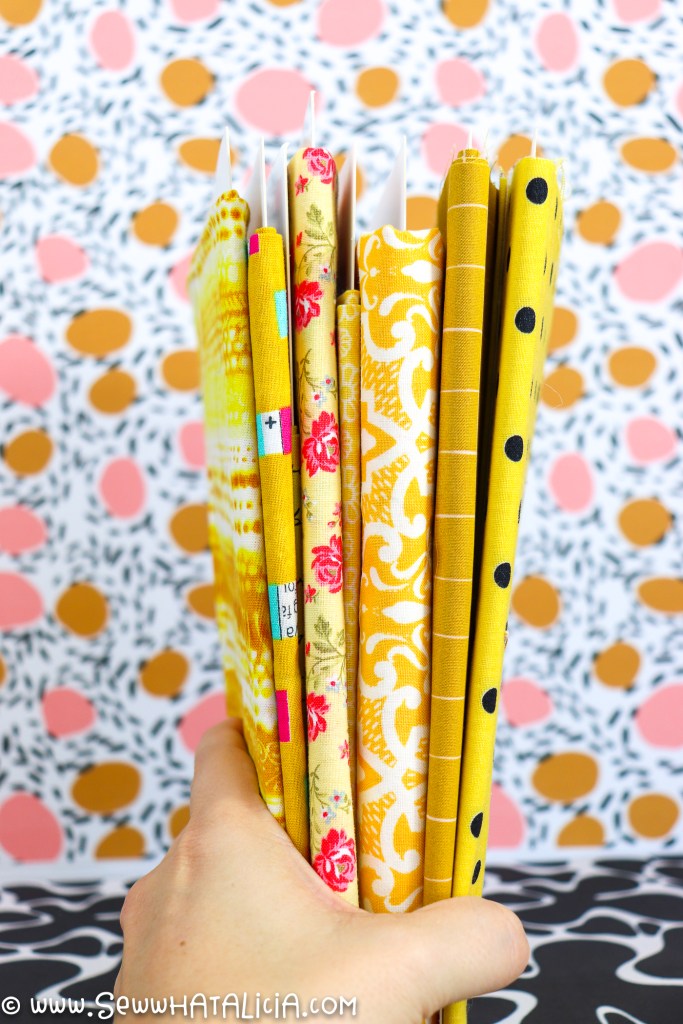
Next you’ll need fat quarters. You could use a larger cut of fabric but I wanted to get mine from Spoonflower (see all the designs I used HERE) and they had a sale on fat quarters. Plus a fat quarter is big enough for the purpose of these backdrops.

Last you’ll need a heat activated spray adhesive. I used this one from Thermoweb. You’ll also need a heat source to activate the adhesive. I use my Cricut EasyPress but you could also use a regular iron.

How do I make a cheap photo backdrop?
- Trim the selvage edges of your fabric. The Spoonflower fabric comes with white around the edges that will need to be removed.
- Remove stickers from foam core board.
- Press your fabric to remove all wrinkles. You can spritz any stubborn lines with water and then press to make the fabric as flat as possible.
- Spray the wrong side of the fabric with your fusible adhesive spray.
- Line the fabric up along a corner. This will allow you to put two boards together so the fabrics meet. It will also allow you to turn the board and use it horizontal or vertical.
- Press the fabric onto the foam core. Don’t leave the heat on the board for too long or you will scorch the board or cause warping. It doesn’t take much for the adhesive to set.
What should I do with these backdrops?
There are so many options for using these backdrops, here are just a few ideas.
- Use them for beautiful Instagram photos.
- Use them to take photos for your Etsy shop.
- Create fun zoom backgrounds by taking a photo of your backdrop and importing it into your computer!
- Use them as a backdrop for your kids artwork.
Visual Examples of Backdrops
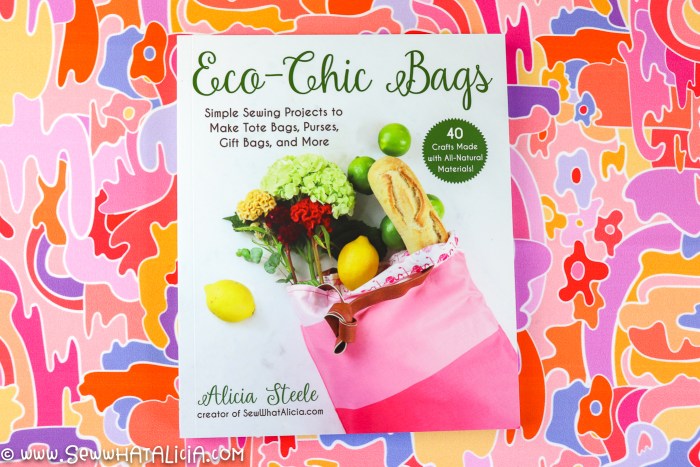
Here are just a few fun photos I have taken using these backdrops. Of course I had to throw this first one in, check out more about MY book HERE!


A few more tips:
- Use a different fabric on each side of the foam core. This will make the backdrop reversible and get the most use out of your board. Just make sure you are using two fabrics that you won’t want to use together!!
- Use a half a yard of fabric to cover the entire board if you want a slightly larger backdrop.
- Tape boards together and use an even larger piece of fabric for an even larger backdrop.
- Make sure you are using a light source, I use THIS light kit. Bonus this kit comes with a backdrop stand so you can use an even larger piece of fabric and the clips to take larger photos. Or place the backdrop in a room brightly lit with natural light (outside light not a yellow overhead light.)
- Be creative. Try creating a corner (like the ice cream photo above) to shake it up!
- Remember to keep thinking outside the box for your photos!
Pin Easy Fabric DIY Photo Backdrop
Don’t forget that the best way to help a blogger is to help people see their content! You can easily help by pinning their post or sharing them to your social media! This blog helps me to support my kiddos and allows me to stay home with them and take care of them! You can learn more about me and my kids HERE.


DIY Photo Backdrops
Equipment
- Cricut EasyPress
- Fusible Spray N Bond Adhesive
Materials
- 1 Fat Quarter Fabric
- 1 Piece Foam Core Board
Instructions
- Press fabric to remove wrinkles.
- Press fabric to foam core using spray adhesive.
- Use for awesome photos!


Leave a Reply