How to Photograph Your Crafts (with your phone!)
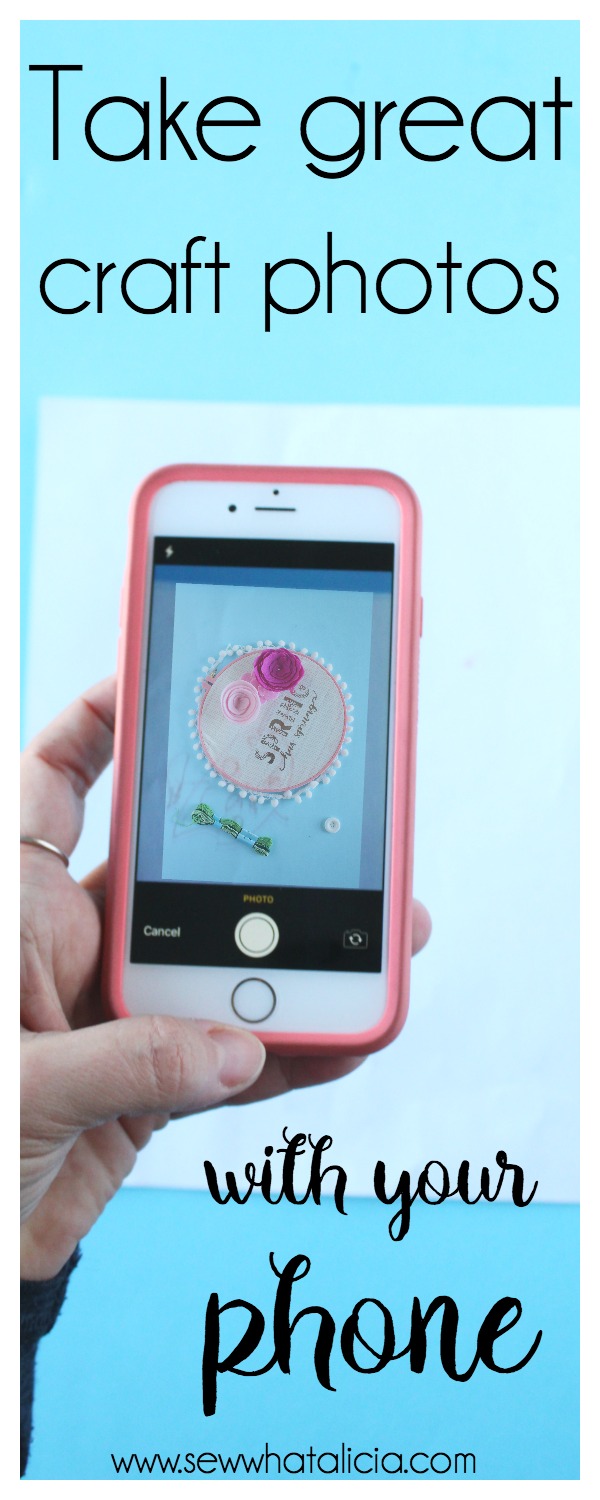
Ok I know most of you are not trying to take professional photos for a blog or to sell your products on Etsy. BUT you work really hard on your crafts and I want you to take photos that reflect the amazing quality of your work! Here are a few things you can do to take amazing photos of your crafts with your phone! It doesn’t even have to be a spankin new phone either. I use my old iPhone 6 so I promise it is doable with a basic smart phone. Here is how to photograph your crafts with your phone and without a lot of fancy equipment.
How to Photograph Your Crafts (with your phone!)
Location Location Location:
The first step is to be thoughtful about WHERE you are taking your photos. Natural light is your best friend when it comes to taking photos. Sometimes we finish a project in the middle of the night and we get excited to take a photo. Patience is key in this situation. Wait until morning when you have plenty of natural light. The light helps the beautiful colors pop. The yellow light from the lights in your house won’t do your work any favors.
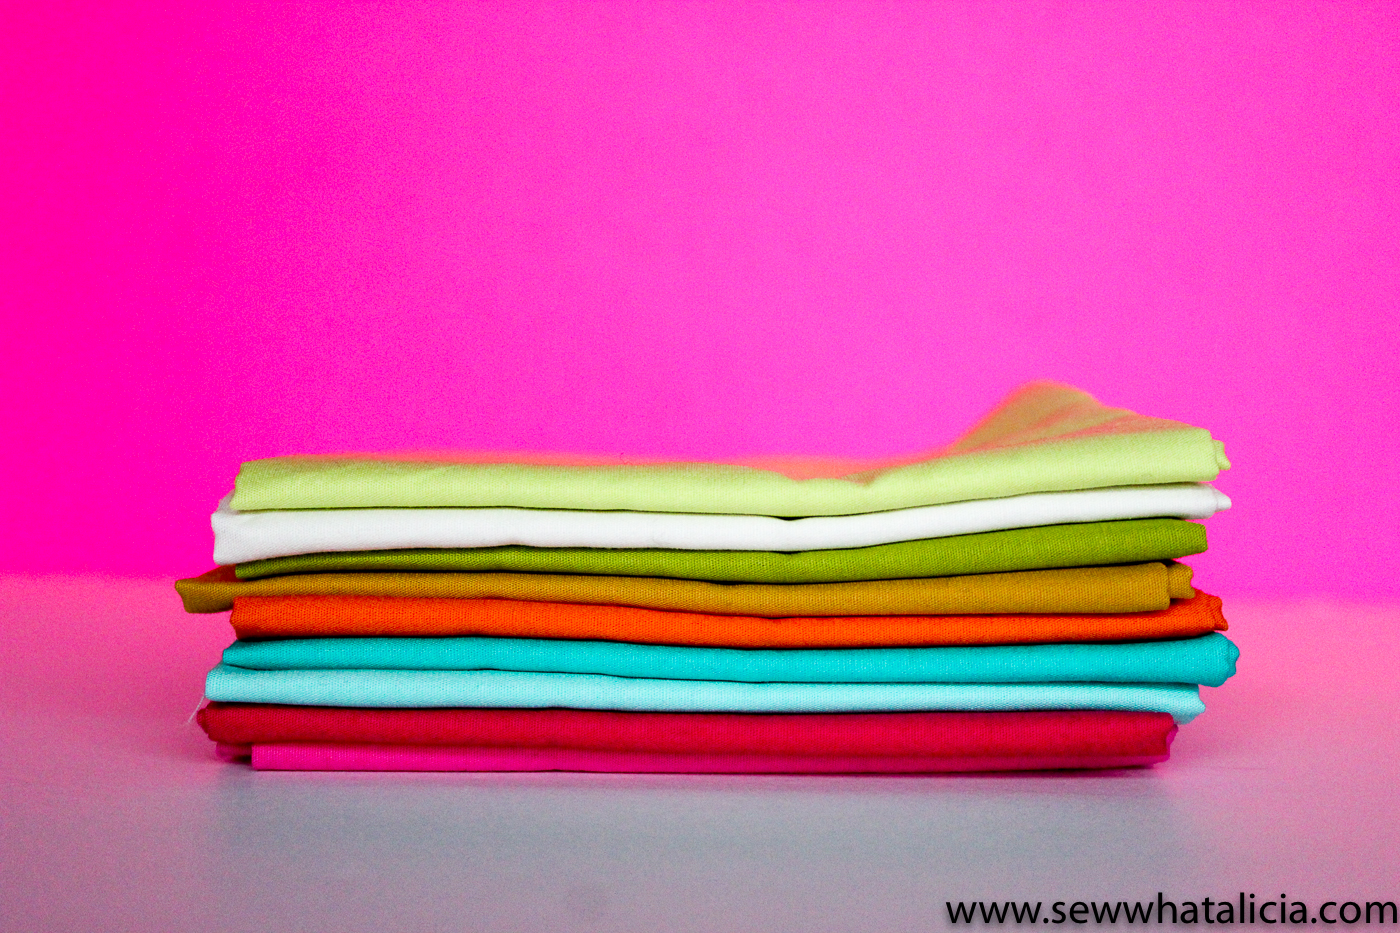
If you can get outside and photo your craft in a spot that has a lot of natural light (but not direct sunlight) you should make that your first option! The picture below is my front porch. It has the perfect light because it is not directly in the sun but it gets plenty of bright beautiful natural light. I don’t go anywhere fancy, just outside my front door. Plus it has the beautiful brick background which makes a pretty background for my smaller projects.

Outdoor Photos:
If you have a bigger project you can still get outdoors. Find a fence or a graffiti wall or anyplace that has lots of cool character and snap some photos. I love the photo below for all the nature (but you can see how the front has lots of shadows because it was in direct sunlight!)
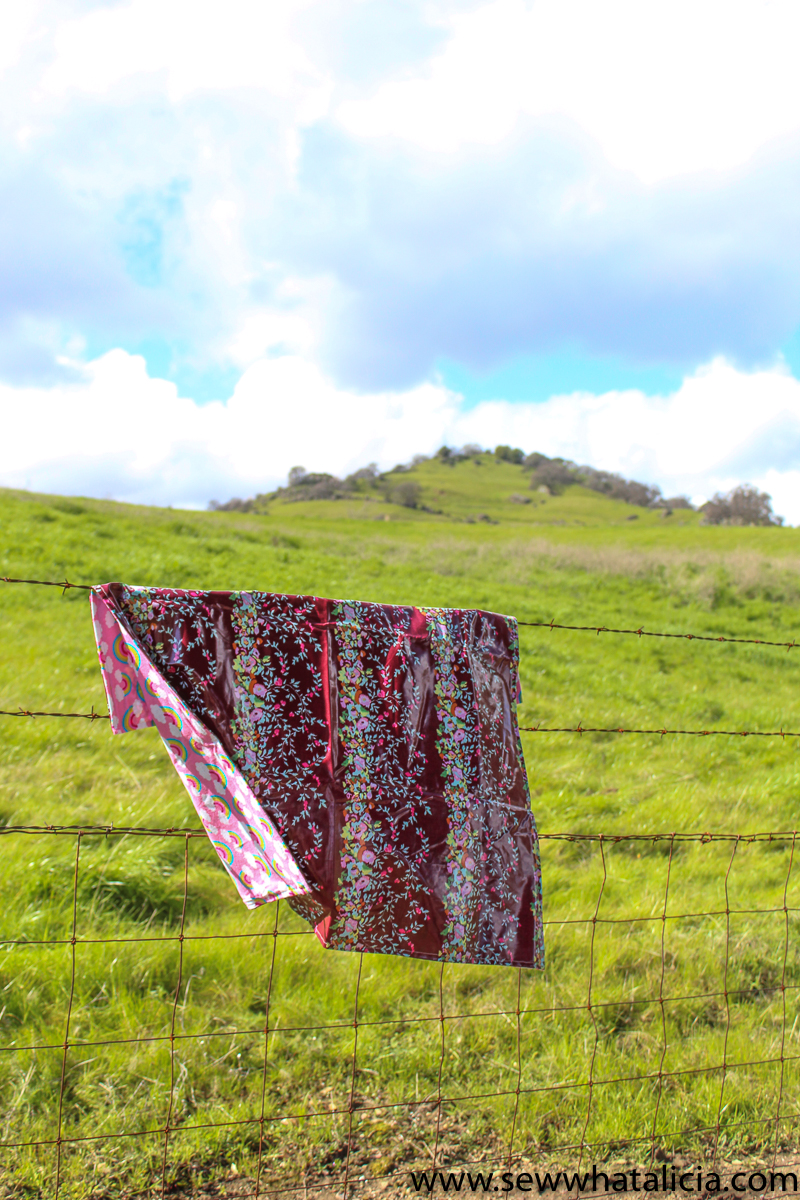
If you have a larger project you can also lie it flat on the ground. Think about the background. Use the pavement, grass, or asphalt to showcase your work. A white blanket would look great on the green grass but get lost on the sidewalk. A colorful quilt would pop on the asphalt but might not show up as well on the green grass. Taking a few minutes to be thoughtful about your subject and the background will take your photos to another level.
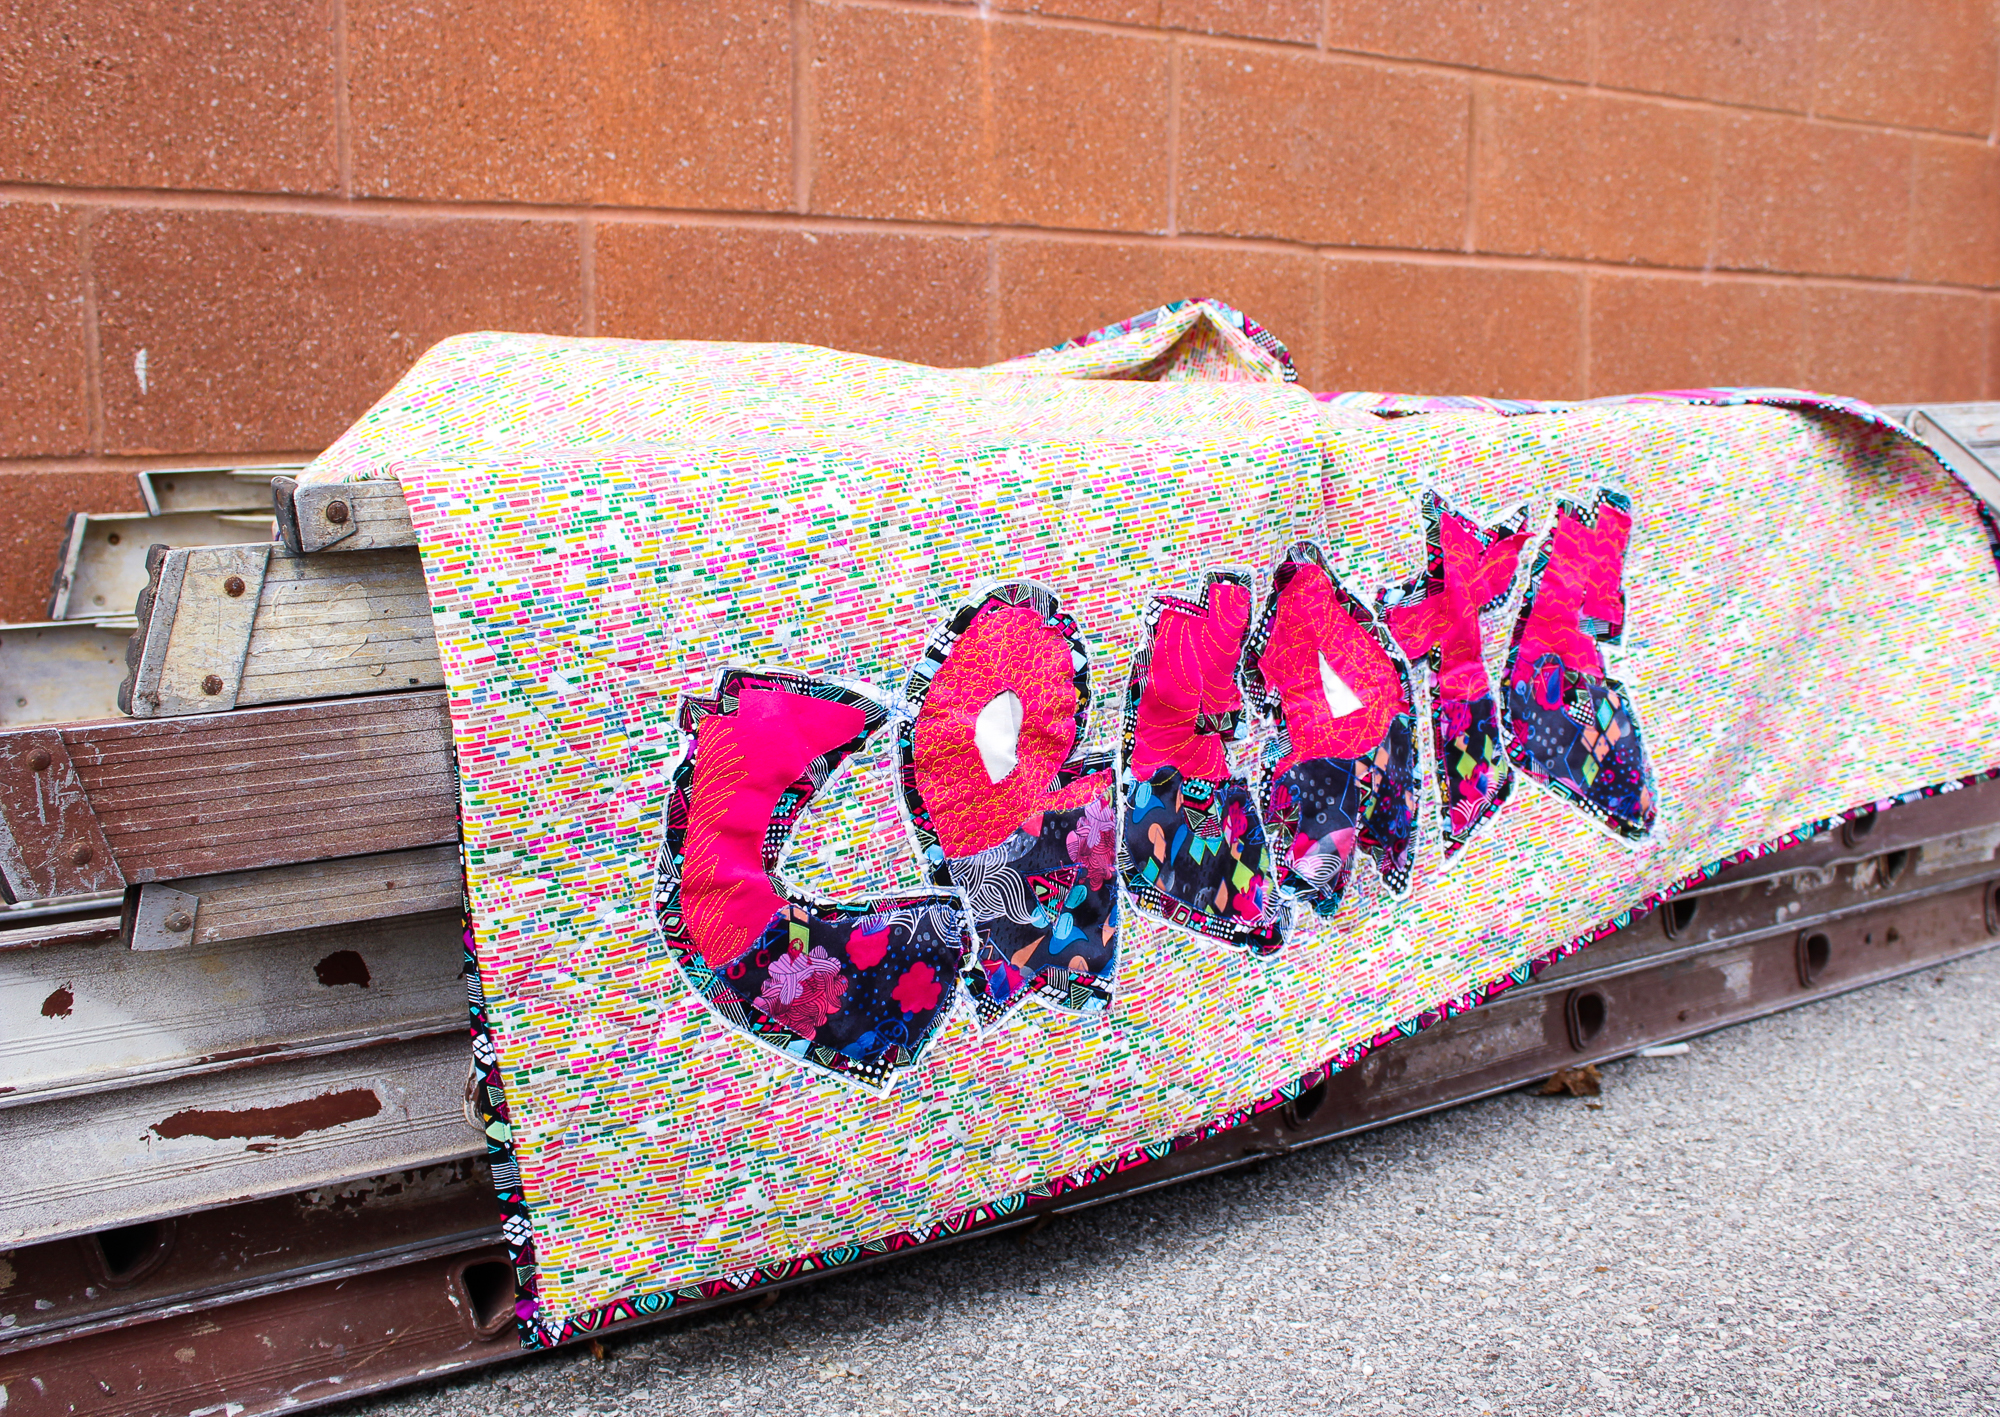
Be creative. I am constantly on the lookout for creative places to take photos. The photo below was taken behind the grocery store near the garbage can. But I loved the red bricks and the grungy ladders so I went belly down on the parking lot behind the grocery store.
If you don’t want to be that person lying on the ground in the middle of downtown trying to get the shot of your blanket with the graffiti wall don’t fear just scroll down and we will talk about tips for taking photos inside with your phone.
How to get Great Photos Inside:
So you aren’t the person who gets on the ground in the middle of a public place, that’s cool I wasn’t always that person either. You can still get great photos right from the comfort of your own home!
For the BEST indoor photos you need one (ok two) things. Run to the dollar store and grab yourself a few foam core boards. You’ll want to get several, I recommend you get a colorful one and a white one. I have several of each but you just need one of each. I like a colorful bottom board because white can easily look grey or yellow or blue depending on what else is in your house. It is really hard to get a perfect white in your pictures so I choose to just avoid trying at all!
It needs to be the foam board so that it will stand up on its own. Grab a chair and set them up as pictured below. You’ll want to find a window that gets lots of indirect light. You’ll also need a step stool so you can get above the shot. That’s me on the right in my slippers standing on another chair.
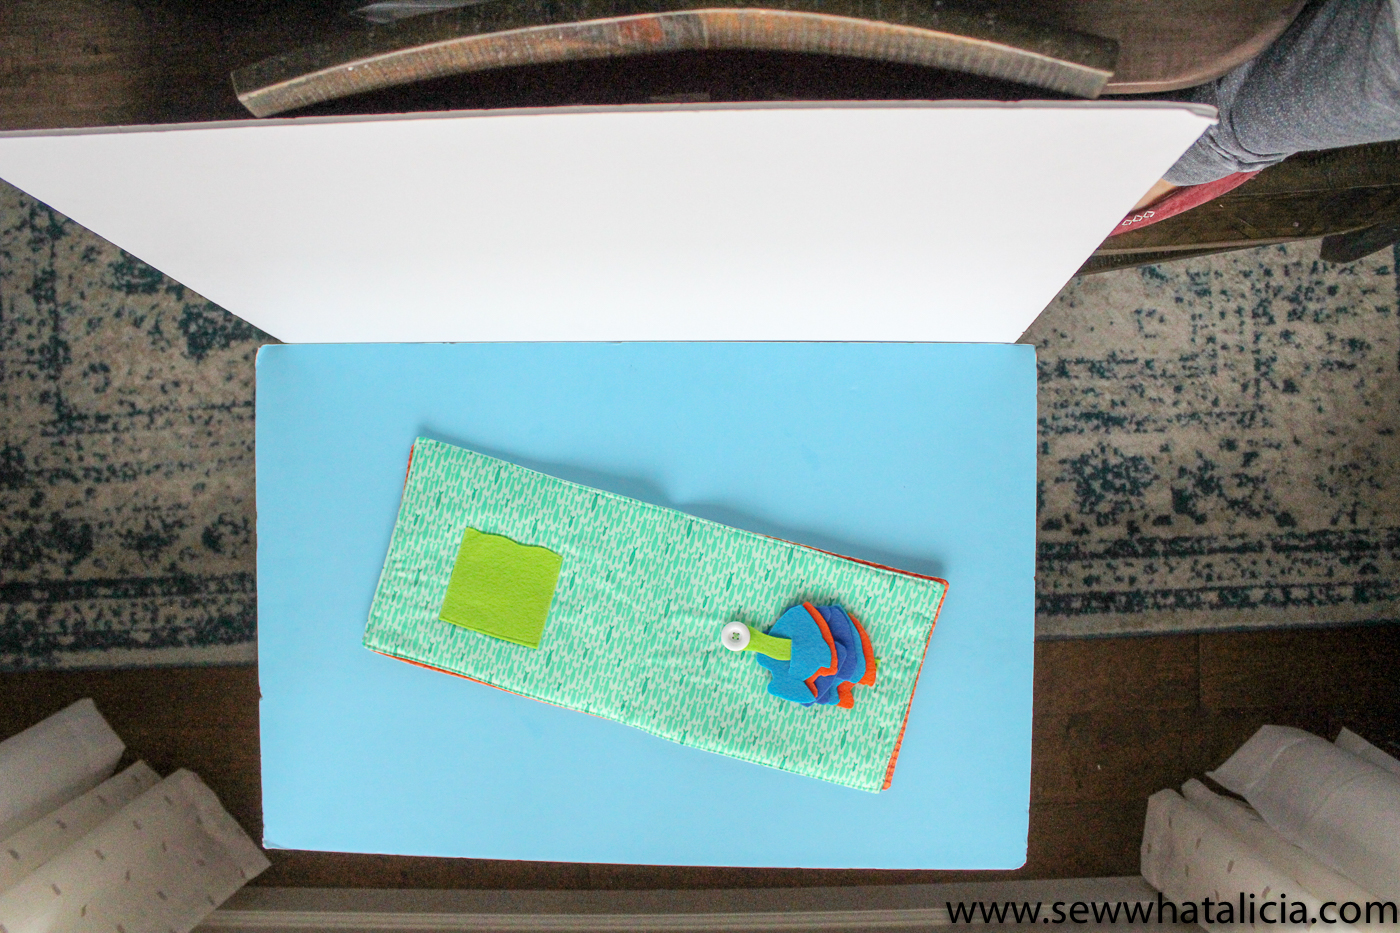
The white board in back is to remove the shadows so you can see your entire project. It helps a TON so don’t skip it for a small project like the one above. If you want to get a side on shot just flip the boards with white on bottom and blue on the side and then sit directly in front of the chair to take the photo. Notice in the photo below that the white isn’t truly white, you have to have special lights and equipment to get the white to be brilliant white. Depending on your phone and the photo subject you could mess with the white balance and play around with the editing but we aren’t trying to be professionals we are just trying to highlight our project so the whiteness of the board isn’t really that important.
Photograph your Crafts, Larger Projects?:
So what do we do if you have a larger project to photo that won’t fit on the foam board? Remember the tips we have talked about so far. Find a place with lots of great indirect light. You can set your foam boards just outside the shot to bounce more light. These larger shots will have more shadows but we are just focusing on your creation so as long as that is well lit we are happy. Use a chair, a ladder, a dresser, a basket, or the back of a couch as the vessel for your project.
When I am taking my inside photos I always turn all the lights off. If the light from outside isn’t enough then try taking the whole setup (shown below) outside. The yellow lights from the indoor lighting will really change the coloring of your photo so turn them off if you can. Oh and skip the flash, we don’t want that artificial light either.
Clutter?
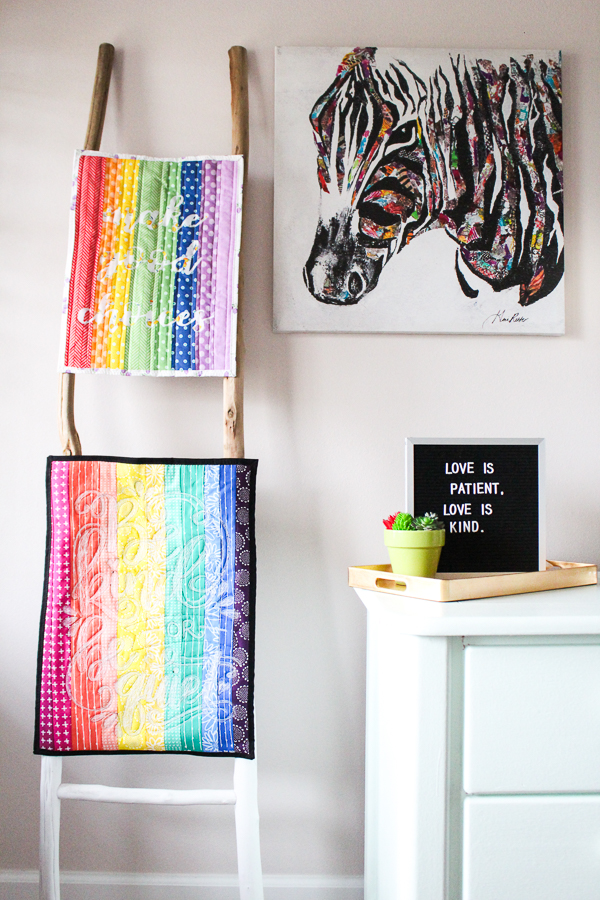
I am assuming since you are reading this that you are wanting to take your photo game up a notch so don’t be offended with these next paragraphs! A few props or decor objects are great if they make sense in the photo (like the letter board in the picture above.) But your feet, your kids toys, dirty dishes, whatever it might be don’t make a ton of sense in the photo and just serve as an unwanted distraction.
Take a few minutes to clean up the space around the area where you are going to take the photo. You want your craft to be the center of attention and while your clutter or personal stuff might not distract you it certainly distracts everyone else!
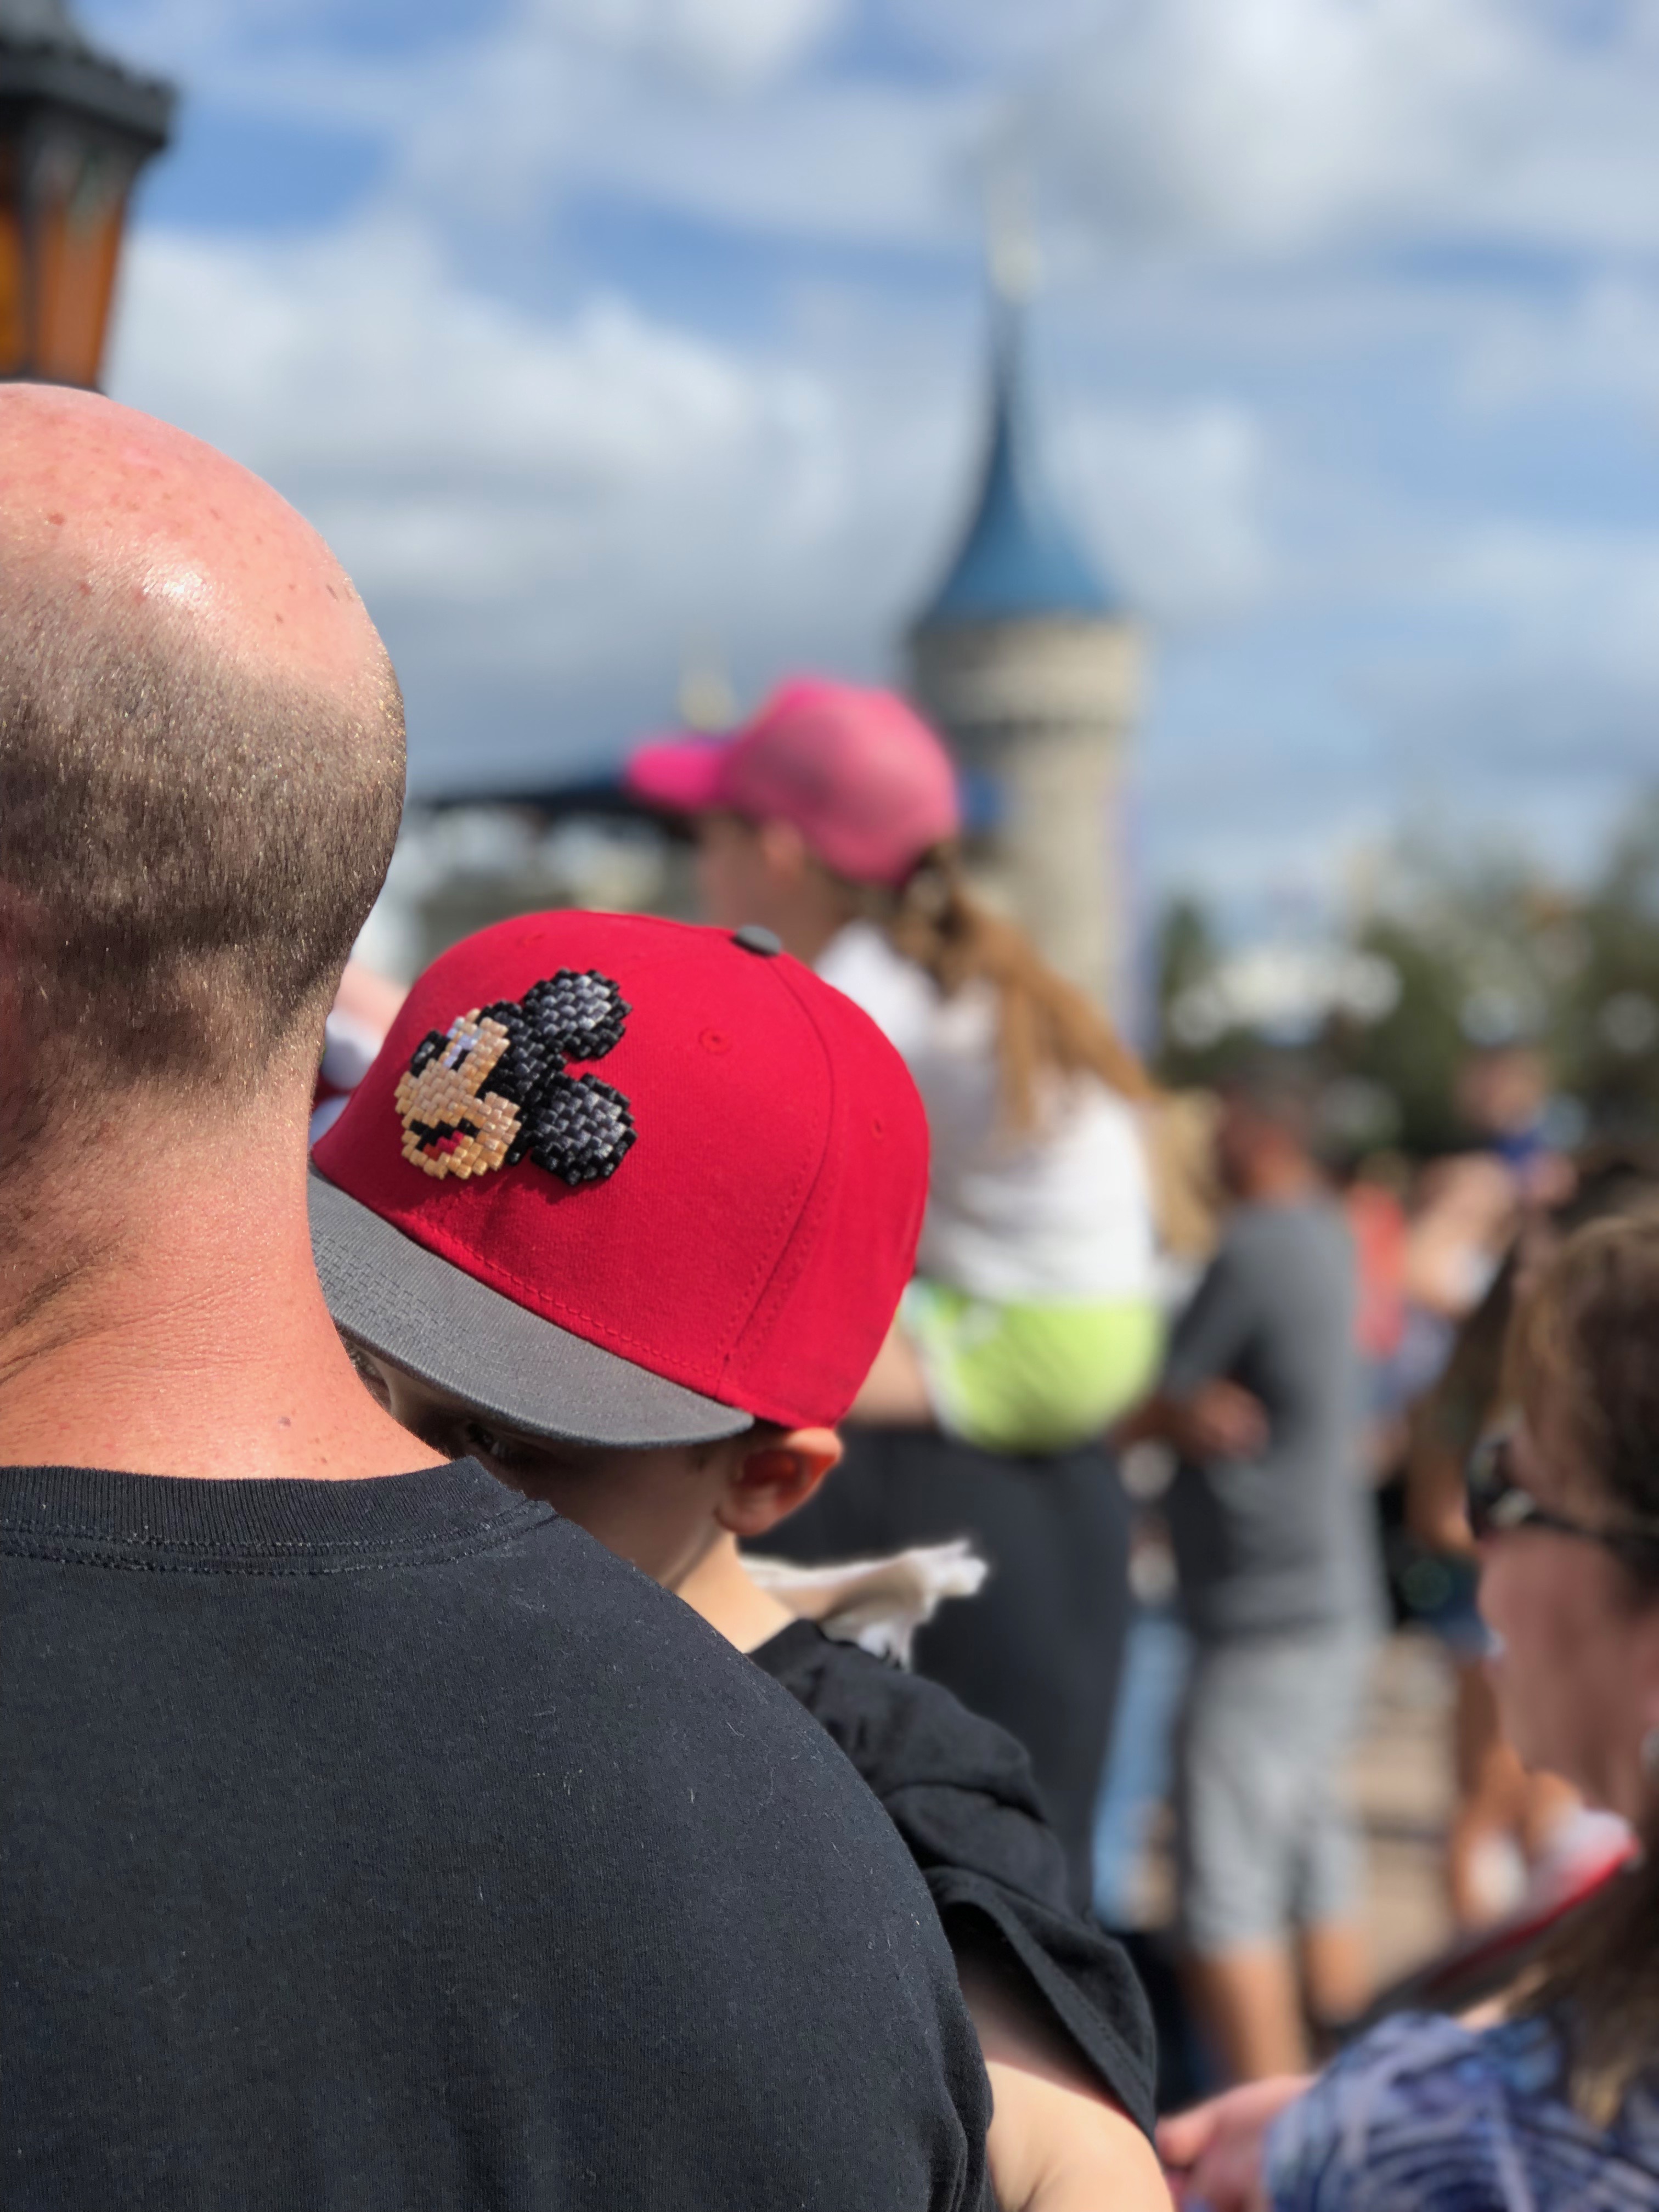
If you are taking a photo where you simply can’t remove all the distractions check and see if your phone has portrait mode. Lots of the newer phones have a portrait setting that will blur out the noise in the background and make your craft the center of attention. To use the portrait mode (on the iPhone) scroll to the portrait mode and then tap your subject. The picture below was taken with portrait mode. Your eye is drawn to the subject since the background is out of focus.
Phones now have amazing cameras on board so there is no reason you can’t take amazing photos. Take a few extra minutes of thought and you will be taking amazing photos in no time!
Photograph your Crafts, Next Level?:
Are you wanting to take your photos up a notch even more than above? The next level requires a few more supplies and you will be investing a bit more money.
Here are the things you will need:
Trifold foam core board (x2)
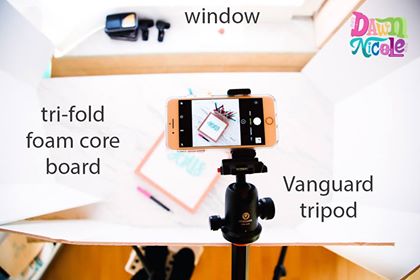
Set your flat foam core board on a table, a folding table is a good option so you can take the setup down if you don’t want it up permanently. Then place your trifold boards around three sides, leaving the window side open. The folding boards are great because they stay up on their own and you won’t have to prop them against anything to get them to stand. Arrange your tripod so the your cell phone points down into the makeshift light box you just created. Snap your photos! The photo above is from my dear friend Dawn Nicole, you can see her tips for photography for hand lettering artists, but this is the same equipment that I own and use.
What are your tips for how to photograph your crafts? Do you have any more questions about how to photograph your crafts? Share with me in the comments below.


Kathy E. says
Awesome tips that I will use, Alicia! I especially like the idea of using the foam boards for background and reflecting light…off to the dollar store today! Thank you!
sewwhatalicia says
Yay! I am so glad you found this useful Kathy!! Make sure you share photos with me, you can drop them in the visitor section on my Facebook page!! <3 <3
Melissa carson says
thank you Alicia – great tips. I DO have an etsy page, and I admit the photos of my items are HORRIBLE. I really think that is why some of my items languish and never sell, because customers who see the same items in person always buy them right away. Love your blog, and zipper tips last Swptember has been my halleluiah!!
Melissa