Sew What, Alicia?

Easy Fabric Projects for all Levels

  • Facebook
  • Instagram
  • Pinterest
  • Twitter
  • Home
  • About Me!
    • Signup!
  • All Things Sewing
  • Quilting
  • Cut Files
  • Christmas Sewing
Home » Sewing » Quick Wrist Cuff Sewing Tutorial
This post may contain affiliate links. I may receive a small commission from your purchase at no extra charge to you. See our full disclosures HERE.

April 24, 2017 by: sewwhatalicia

Quick Wrist Cuff Sewing Tutorial

  • Facebook
  • Twitter

Quick Wrist Cuff Sewing Tutorial

One of my favorite things is to repurpose old and unused things around my house. My husband wears a flight suit to work everyday and so I have a lot of old and worn out flight suits lying around. I used a piece of one of those old flight suits to create a cute cuff and I realized it would be so fun to share with all of you. You don’t have to have a flight suit you could use another canvas type fabric you have lying around the house or you can just order new fabric too (which is always a fun option!) Here is a quick wrist cuff sewing tutorial.

Quick Wrist Cuff Sewing Tutorial: This wrist cuff comes together really easily and is closed using snaps. Click through for the full sewing tutorial. | www.sewwhatalicia.com

Quick Wrist Cuff Sewing Tutorial

Supplies:

Strip of Canvas-like fabric

Strip of faux leather

Strip of cotton fabric

Kam Snaps

Coordinating Thread

Quick Wrist Cuff Sewing Tutorial: This wrist cuff comes together really easily and is closed using snaps. Click through for the full sewing tutorial. | www.sewwhatalicia.com

Instructions:

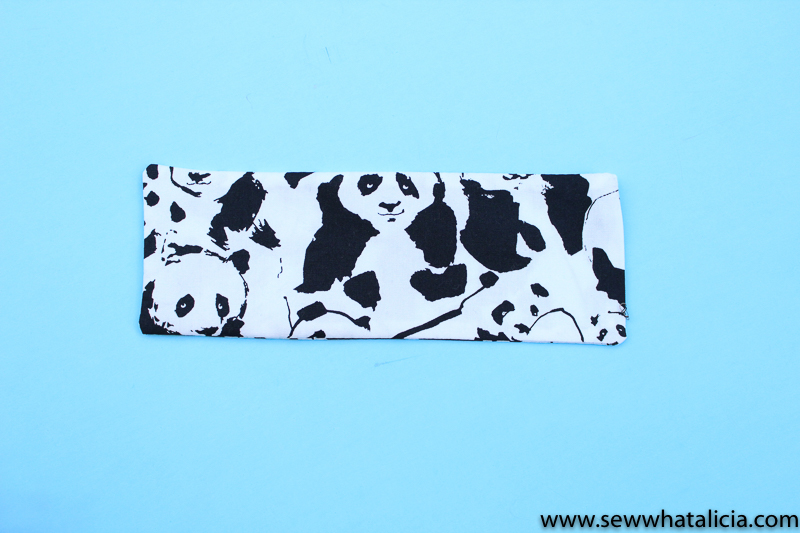
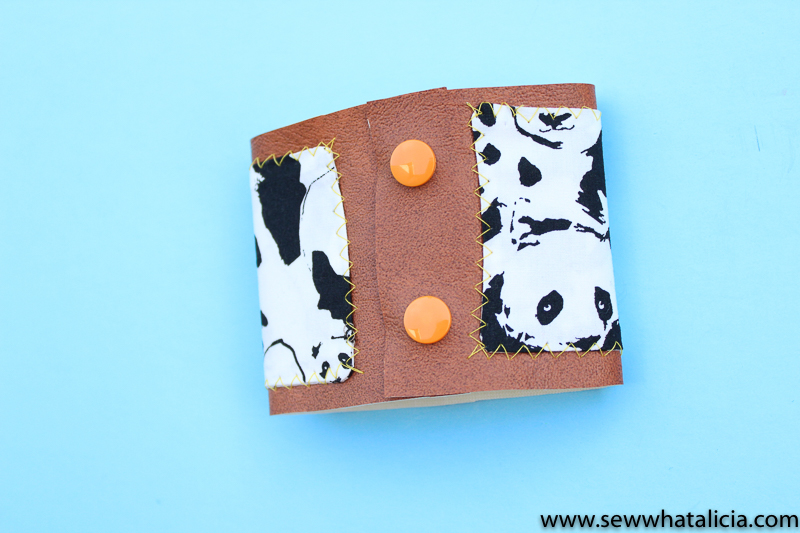
For this tutorial I will show you two different ways of making a cuff. First let’s make the panda cuff. Cut two pieces of your fabric that measures 3″. To find the length measure around your wrist and then subtract 3″. Place these two pieces of fabric right sides together. Then sew around three and a half of the sides.

Quick Wrist Cuff Sewing Tutorial: This wrist cuff comes together really easily and is closed using snaps. Click through for the full sewing tutorial. | www.sewwhatalicia.com

Turn the piece out and press the opening closed.

Turn the piece out and top-stitch the opening closed. 

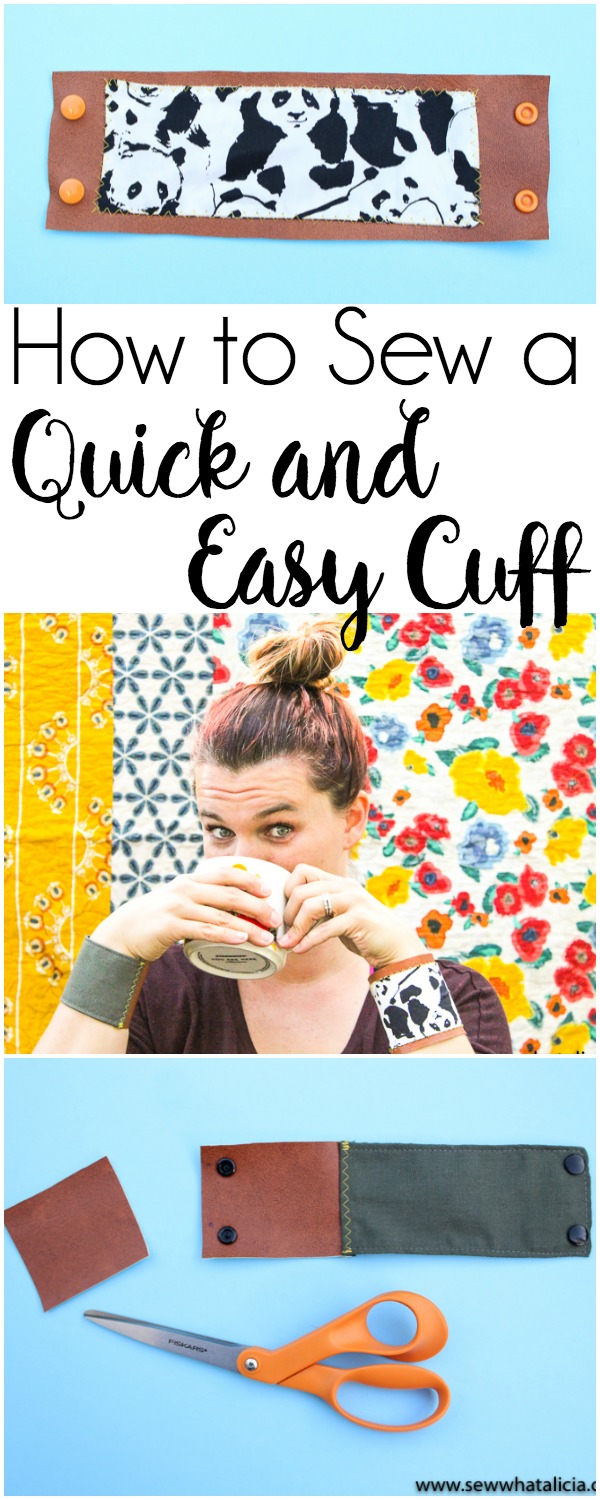
Cut a piece of faux leather that is the width of your wrist plus 2″. Center the panda rectangle on the leather and top-stitch it in place. I used a zig-zag stitch. Now wrap the cuff around your wrist and mark where you want to place the closures.

Turn the piece out and top-stitch the opening closed. 

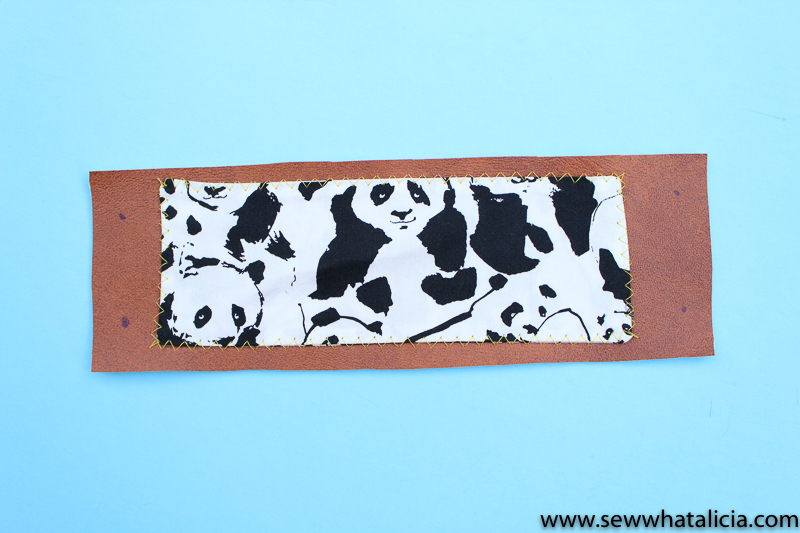
Add the snaps and this cuff is finished!

Quick Wrist Cuff Sewing Tutorial: This wrist cuff comes together really easily and is closed using snaps. Click through for the full sewing tutorial. | www.sewwhatalicia.com

The second cuff is a re-purpose using an existing strip of flight suit. The strip of flight suit was 3.5″ wide. If you don’t have a strip of existing canvas you will want to cut it 1/2″ wider and sew it together right sides facing so that when you turn it out you have a finished edge (just as we did above with the panda fabric.) Once you have a finished edge attach it to the faux leather. You can see below that I used a zig zag stitch. The last step is to wrap the cuff around your wrist and find where you want to place the snaps. Attach the snaps and snip the leather to the correct length.

Quick Wrist Cuff Sewing Tutorial: This wrist cuff comes together really easily and is closed using snaps. Click through for the full sewing tutorial. | www.sewwhatalicia.com

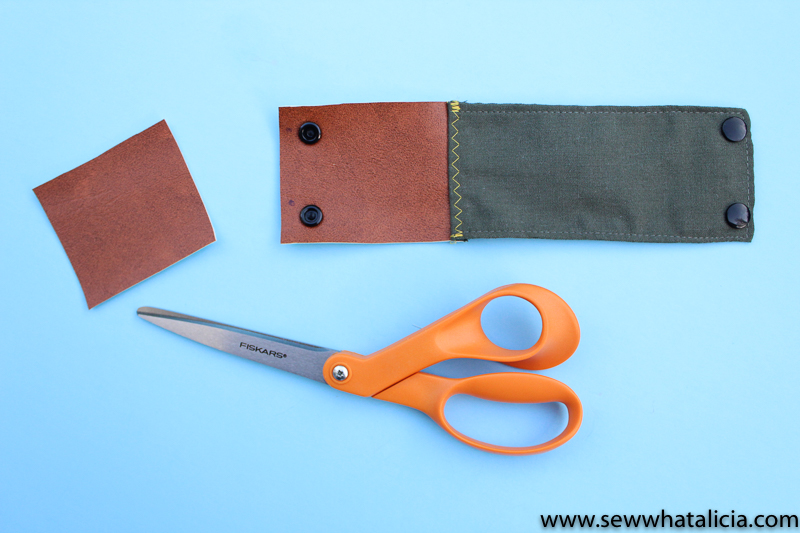
One final tip is that you can use a brown Sharpie to mark the edges of the faux leather and make it look more like real leather.

Quick Wrist Cuff Sewing Tutorial: This wrist cuff comes together really easily and is closed using snaps. Click through for the full sewing tutorial. | www.sewwhatalicia.com

If you want another fun cuff idea check out my No Sew Rainbow Cuff (it has a fun video showing how to make it!)

Quick Wrist Cuff Sewing Tutorial: This wrist cuff comes together really easily and is closed using snaps. Click through for the full sewing tutorial. | www.sewwhatalicia.com

Related

Never miss a stitch!

Never miss a stitch!

Signup be notified every time I stitch up something new!

You have Successfully Subscribed!

  • Facebook
  • Twitter
alicia

About Alicia

Hi I am Alicia thanks for taking some time out of your day to be with me! I am crazy about sewing and blogging! I love creating tutorials and patterns and sharing ideas with people! Read more...

How to Embroider on Coloring Sheets
10+ Must Have Cutting Tools for your Craft Room

Leave a Reply Cancel reply

Your email address will not be published. Required fields are marked *

Rate This Project!


I love to sew and I am passionate about teaching you everything that I know! Thank you for joining me on this journey!
READ MORE >>

Follow Me!

Signup be notified every time I stitch up something new!

You have Successfully Subscribed!


  • Home
  • About Me!
  • All Things Sewing
  • Quilting
  • Cut Files
  • Christmas Sewing

© 2023 sewwhatalicia.com. All rights reserved. Privacy Policy

  • Facebook
  • Twitter
  • Pinterest