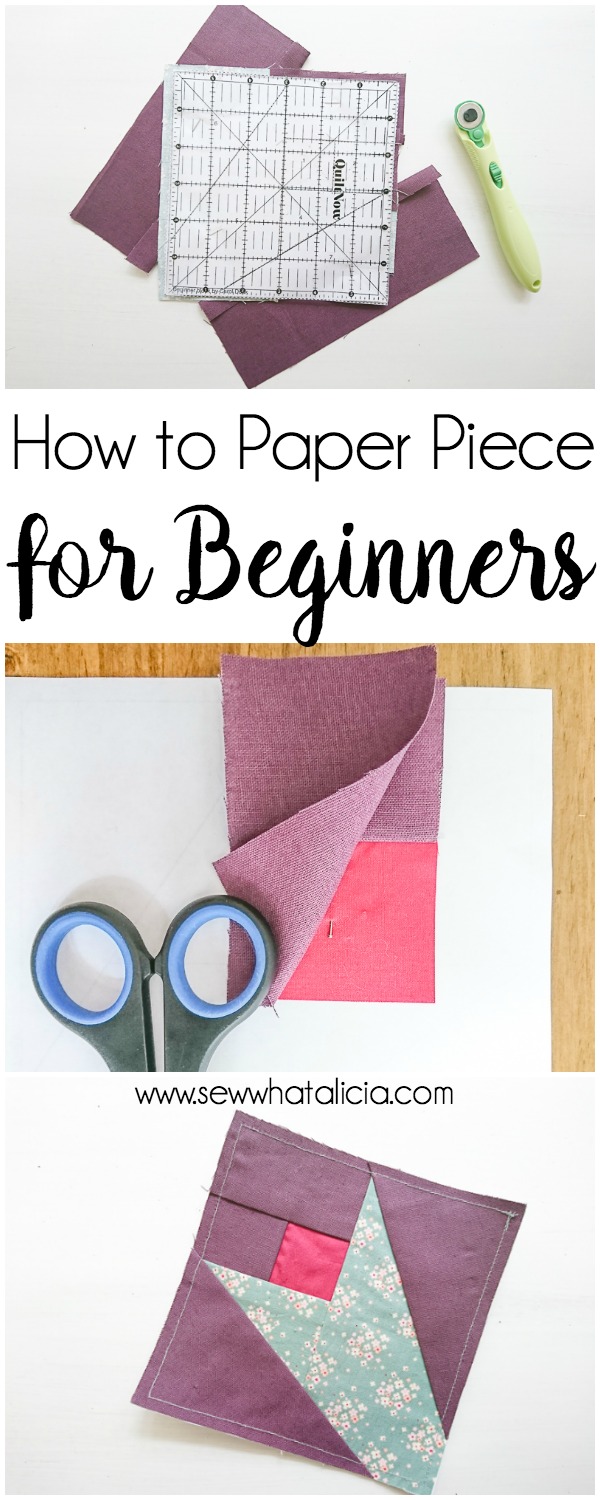
How to Paper Piece for Beginners
Foundation Paper Piecing is such a fun way to get detailed and intricately pieced quilt blocks. We are going to start at the beginning and go through the very basics of foundation paper piecing. I can’t wait for these fun tutorials! Here is how to paper piece for beginners. Make sure and check out these Paper Piecing Patterns for more fun paper piecing.
This is just one of my 50+ easiest sewing tutorials. Check out the rest HERE.
How to Paper Piece for Beginners
Try this DIAMOND paper piecing pattern from my March Quilt Block Challenge. See the full challenge HERE.
Supplies:
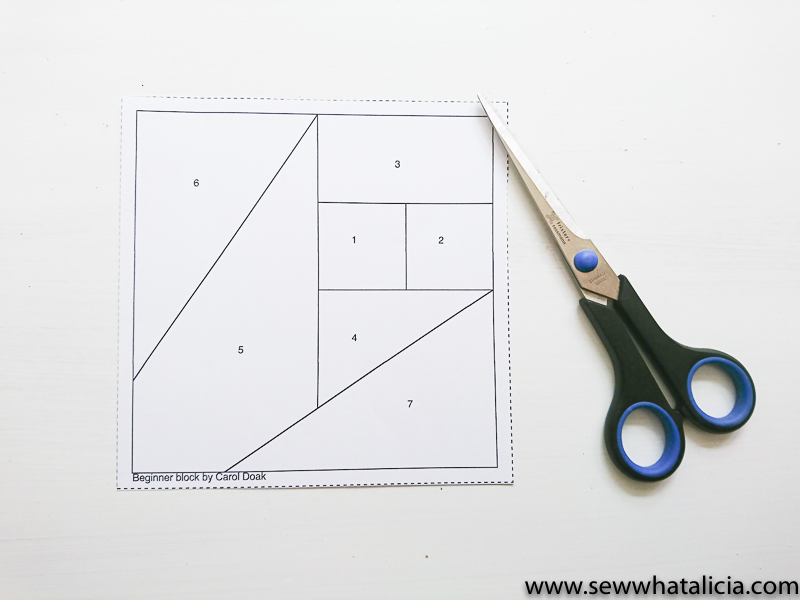
Printed Tulip Template (Scroll down on that page and grab the “New Beginner Block”)
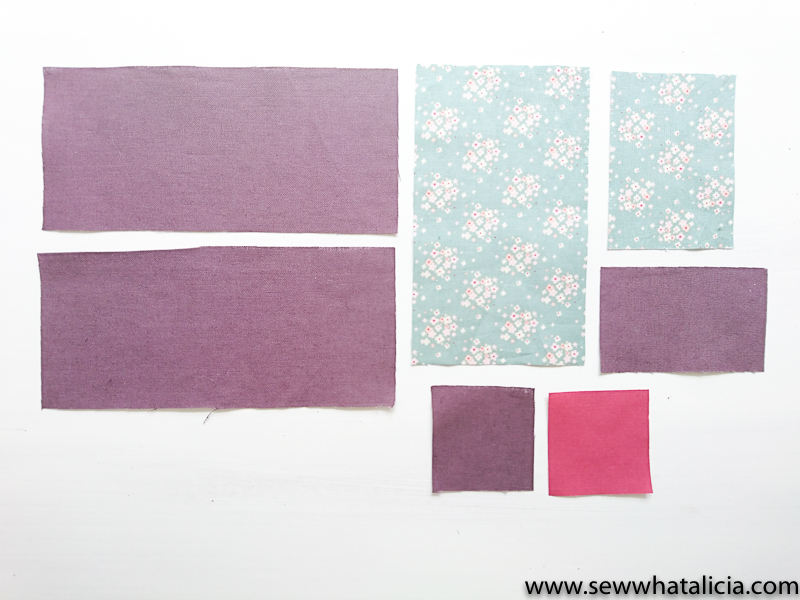
Fabric (The template is numbered, here are the fabric cuts that correspond to the numbers.)
#1 Pink 2 ¼” x 2 ¼”
#2 purple 2 ¼” x 2 ¼”
#3 purple 2 ¼” x 3 ¾”
#4 green 2 ¾” x 3 ¾”
#5 green 3 ¾” x 6 ¾”
#6 purple 3 ½” x 7 ½”
#7 purple 3 ½” x 7 ½”
Instructions:
Paper piecing is all about sewing through the paper template as you attach the fabrics, so first off, we need to print off the template. We also need to choose our fabrics and cut them to the dimensions listed above.The great thing amount paper piecing is, you don’t need to be too precise at cutting out your fabrics, as all the pieces are slightly bigger then needed, you can get more accurate as you go along and develop your skills.
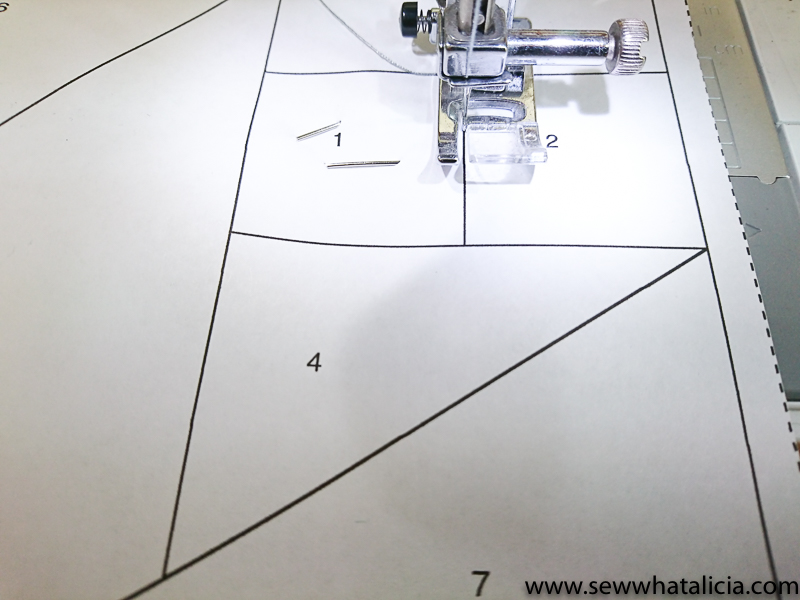
Take your template, and cut it out along the dotted line, this is your seam allowance so you can join blocks together or add an edging at a later stage.
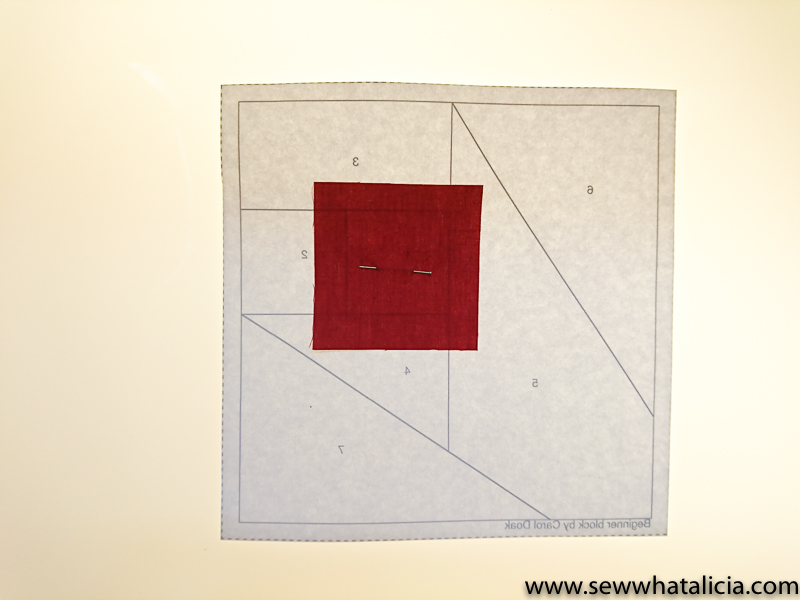
Place your template right side down on a light box, or you can use the window. You just need something where the light can shine through so you can see the lines.Fabrics are added in number order to the wrong side of your template, so that you can sew along the right side of the template. Pin #1 (pink) with right side of the fabric facing up and on the back of the template.
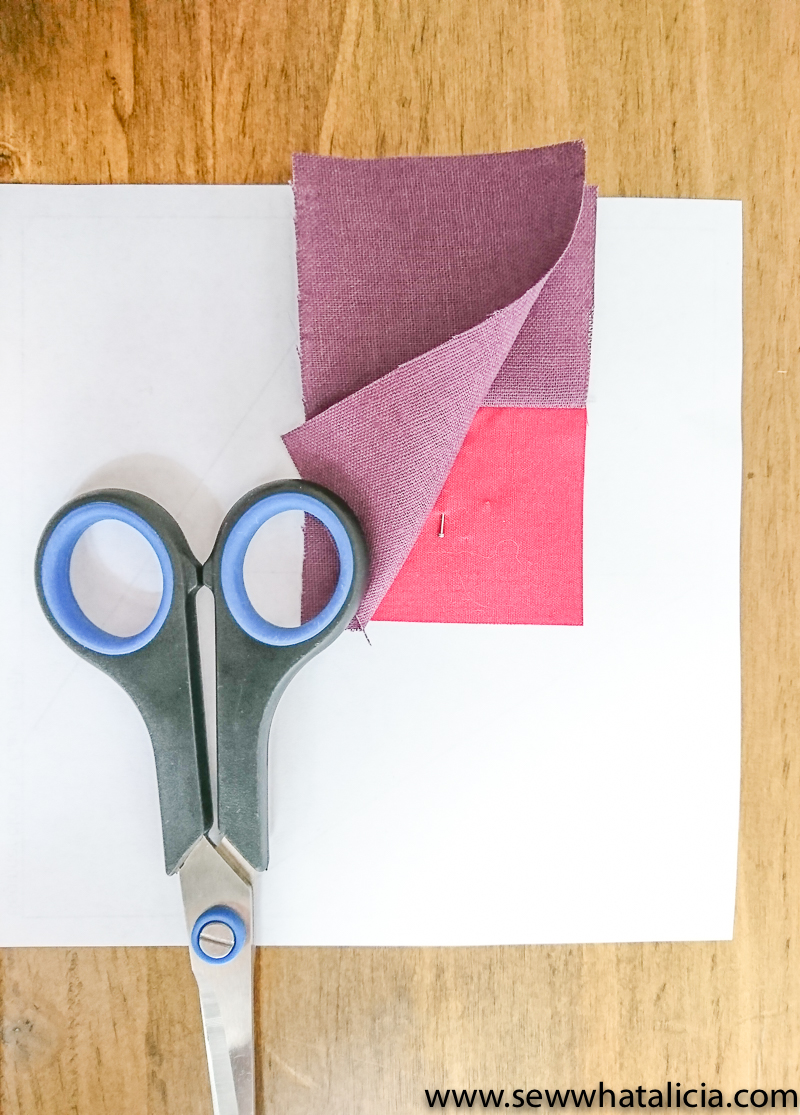
Take #2 purple piece and place the fabric right side down, directly on top of the pink fabric (right sides together) pin in place.

We are now going to turn our template over and sew along the line that connects #1 with #2.
Remove the pin in the purple fabric and finger press the seam open. Using the same process, take #3 purple piece, and lay it right side down, directly on top of the last two pieces, pin in place, turn the template over and sew along the line joining 1 and 2 with 3.
Pin #4 in place, turn your template over and sew along the line that joins 1 and 2 with 4.
Remove the pin and finger press the seam open, you can now start to see your paper piecing begin to take shape.
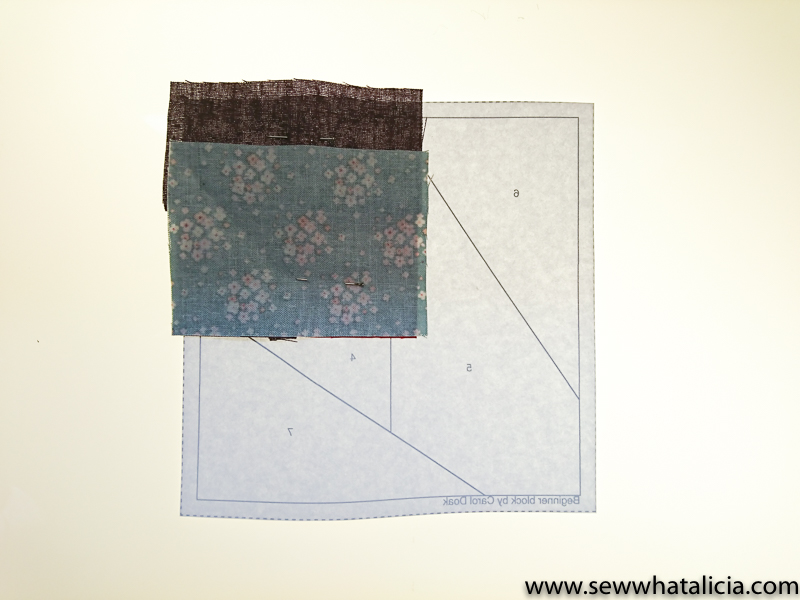
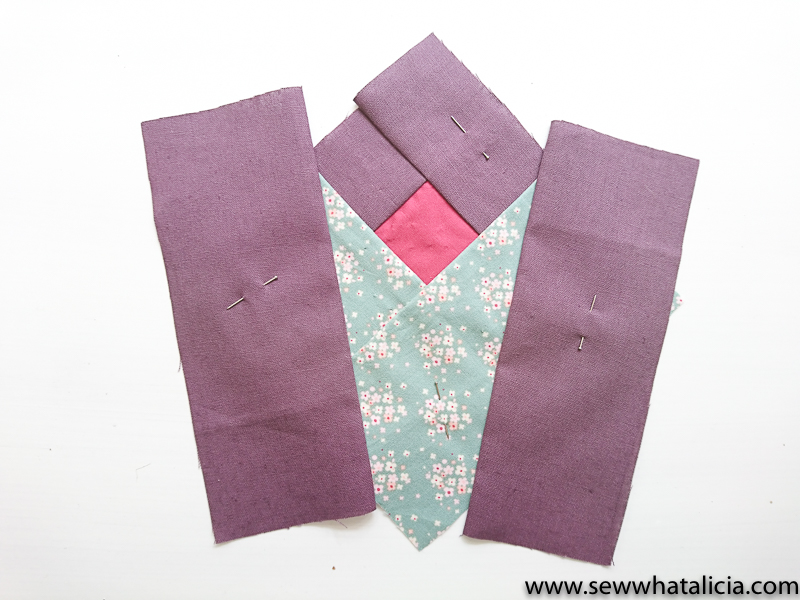
Pin piece #5 as shown in the photo, turn your template over and sew along the line joining 3,1 and 4 with 5.
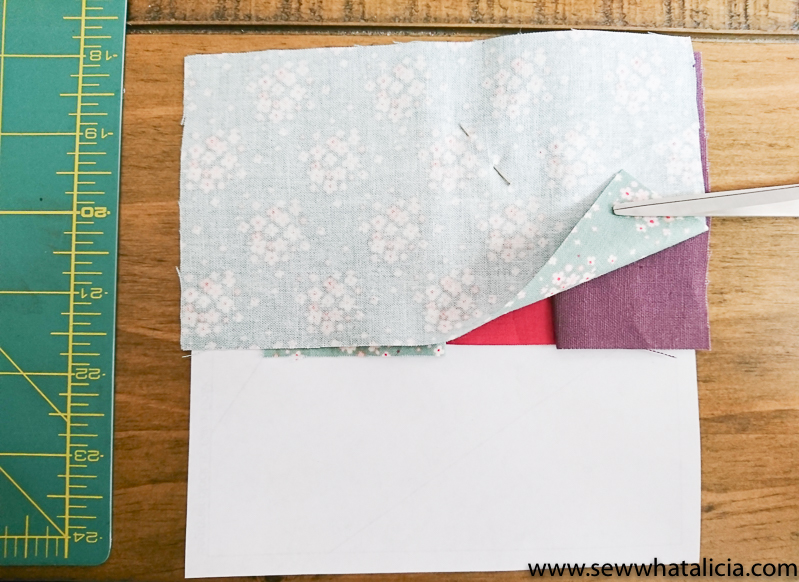
Almost there! Pin piece #6.
Once pinned in place, turn your template over (pattern side up) Sew along the line that joins 5 with 6. Finger press seam open and pin fabric flat.
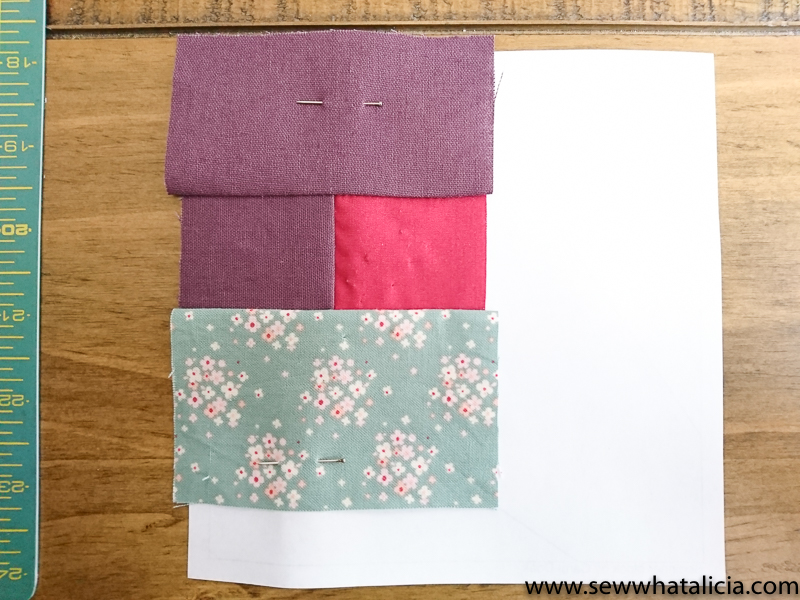
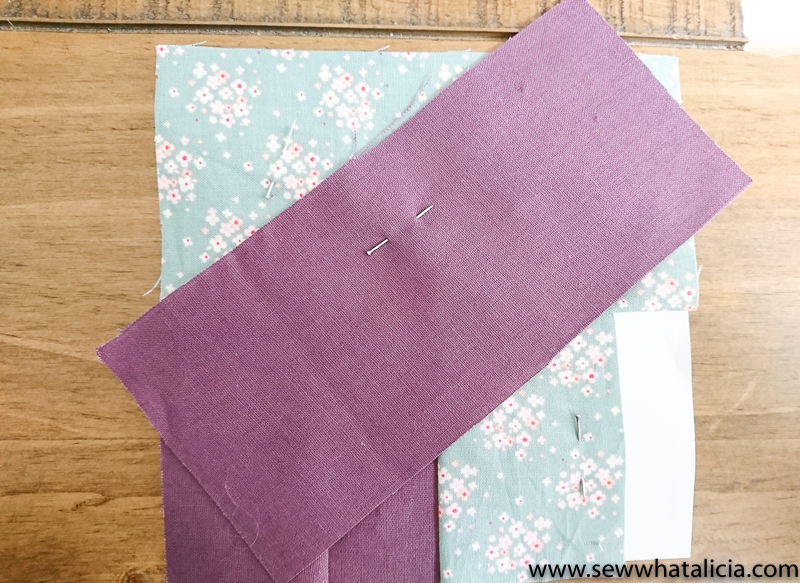
Pin your final piece, right side of the fabric facing down, with ¼” overlapping the line that joins 4 with 7.
Turn the template over and sew along this line (4 joins with 7). Finger press your final seam open and pin fabric in flat.
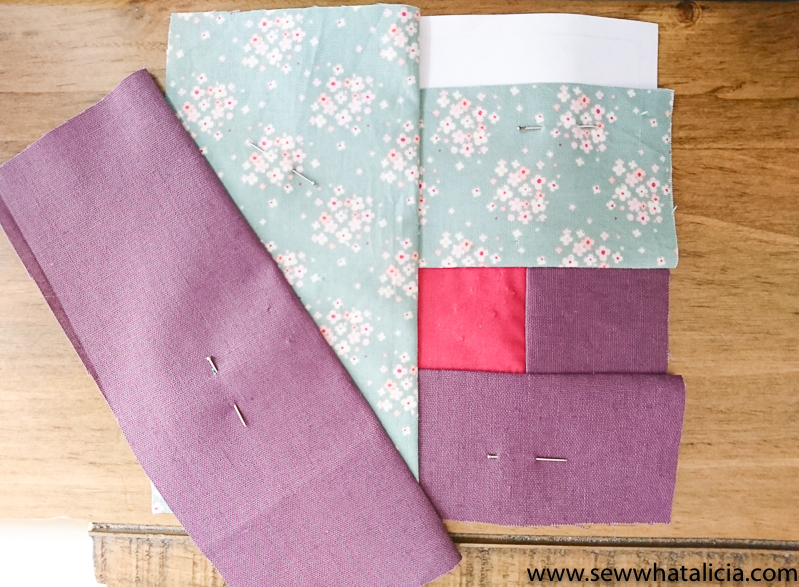
We now need to trim off the excess fabric, this can be done with scissors, but a rotary cutter with cutting mat makes this more accurate.
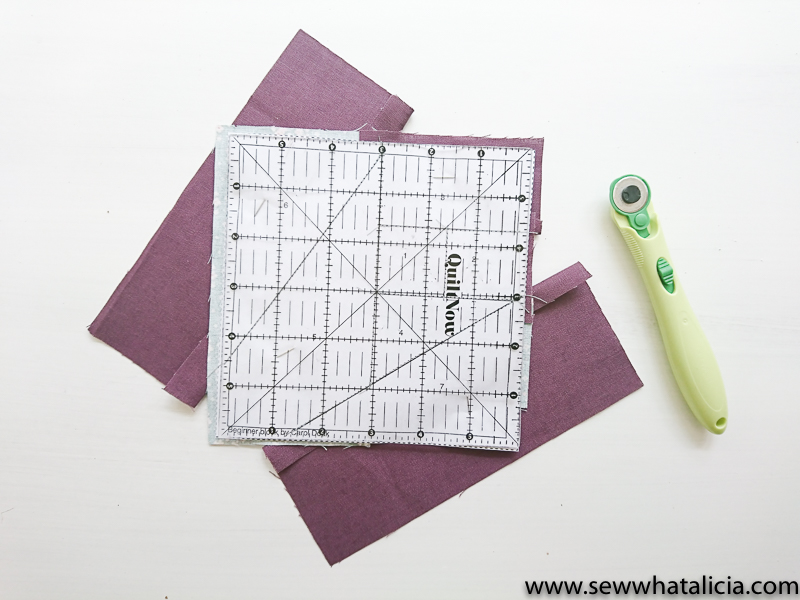
Sew along the solid black line that goes around the edge of the template.
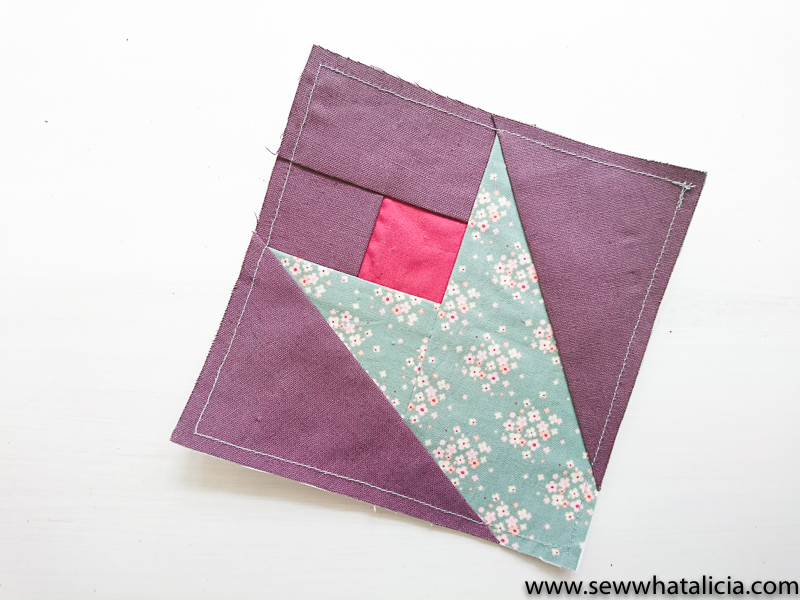
Using a seam ripper or a small pair of scissors, make a hole in the paper, then carefully tear all the paper away.

You’re finished – well done!
If you wanted to make another one and sew them together, just lay the two square right sides together and sew along your ¼” seam allowance line. (Do that about 1000 more times and you will have a full quilt!)
Be sure to show us your paper piecing tulip creations with us in the comments below. Was this tutorial “how to paper piece for beginners” helpful?? We would love your feedback!


Carol says
Yes it was wonderful. I need to make a Scotty dog block for a Friendship Day swap and seeing this tutorial put it all in place for me. Thanks Carol, Talbingo Australia
Anne Christine Shutt says
I have been having real trouble starting the sewing off, which side to put the papers and fabric together. This has made it really easy. Thank you very much
BEV says
Great TUTORIAL! It’s a definitely must try project. Thanks
Elizabeth says
Enjoyed your post. I have done EPP hexes but not foundation paper piecing as it makes me nervous but your post makes it more approachable. Thank you