How to Make a Crib Sheet
Quite a few years ago, before I started the blog, I made all the crib sheets for my boys. I just couldn’t find anything that fit my aesthetic. Being self taught I made my own way and figured out a crib sheet pattern. Fast forward to now. My neighbor was sitting on my couch chatting about how she couldn’t find anything she liked for her soon to be born son’s crib sheets. Sew What Alicia to the rescue! Of course I volunteered to make her sheets. I have learned many many things since creating my kid’s sheets. I have a few new tips and tricks up my sleeves to help ease you into the process! Here is how to make a crib sheet.

How to Make a Crib Sheet
What size is a crib sheet?
There are two main sizes of crib mattress. There is a mini crib mattress which measures 24 x 38 and the standard crib mattress that measures 28 x 52. To find the size of the crib sheet here is what you will need to know:
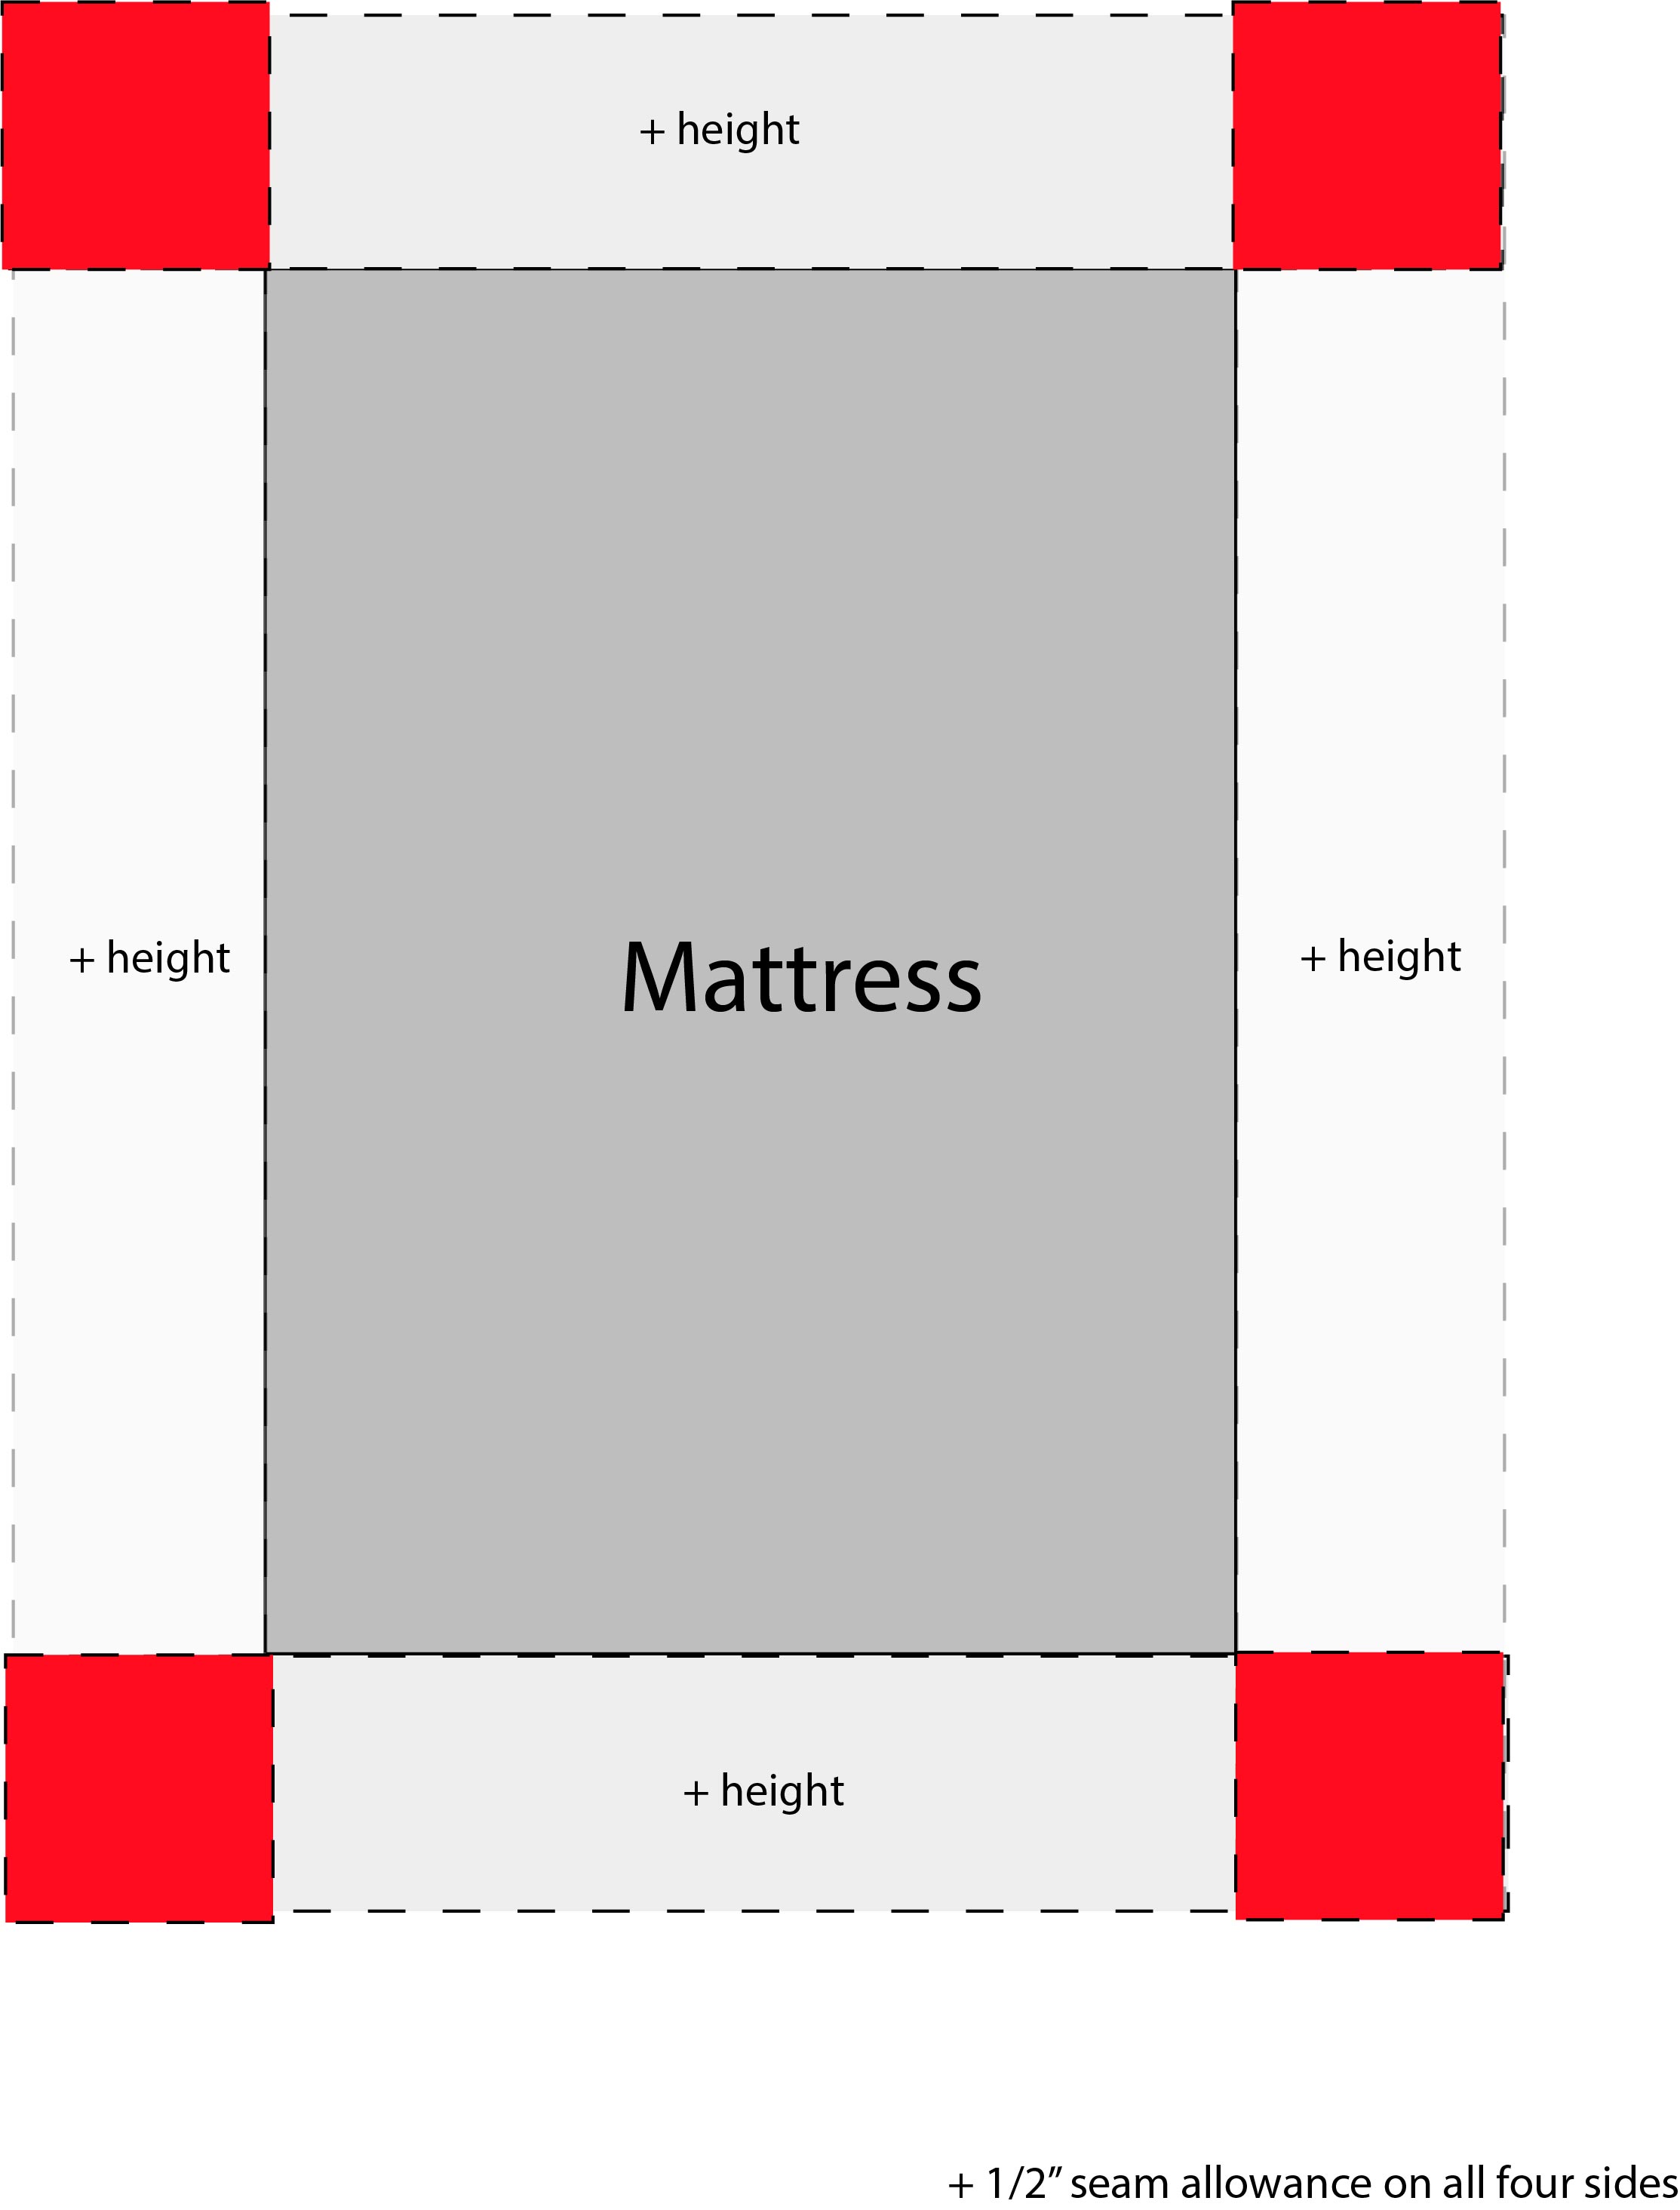
First measure the height of the side of the mattress. For a standard mattress this is about 6″.
Next add 12″ (6 for each side height) to the width of the mattress. Then add 12″ to the length of the mattress. So for a standard mattress you have 28 + 12 (40) and 52 + 12 (64)
Last add 1″ to both measurements to find the size of fabric that you will need. So 41″ x 65″ is our final measurement.
If you are using a mini crib sheet you will follow the same steps but insert the correct mattress height into your equation.
Crib Sheet Pattern
So if you are more visual here is what your fabric will look like.
What you need:
Cotton Fabric – April Rhodes Art Gallery Fabrics is used in this tutorial.
How do you make a crib sheet?
Cut your fabric to the correct size. (Use the pattern instructions above.)
Line up all four corners of the fabric. Cut a square from the corner that is equal to the side height of the mattress. For me this was a 6″ square.

Press all four edges under 1/2″ Sew in place using a zig zag stitch. The zig zag should cover the raw edge of the fabric. This will ensure that the fabric doesn’t fray.

Now work with one corner at a time. Place the two 6″ edges together right sides facing. Pin and sew in place. Repeat this step for all four corners.

Now cut 4 strips of elastic that measure 6″. Fold the elastic in half to find the middle. Pin the middle of the elastic to the wrong side of the corner of the fabric. Now measure 6″ to the left of the middle and 6″ to the right of the middle. Pin the elastic in place on these marks. Note that the fabric will need to fold away, it will not stay in place if you stretch the elastic to pin in place. Place a few straight stitches on the elastic on the left, middle, and right (the same places you just pinned the elastic) to tack the elastic in place.
Now set your machine to the widest zig zag stitch it will do. Start at the top of the elastic, using the zig zag stitch sew over the elastic. Stretch the elastic as you go so that the fabric lies flat against the elastic. You may need to place a hand above and below where you are sewing to stretch. The tack stitches you placed before will help to make this process smoother. The stitch in the middle of the elastic will also ensure that your elastic is even on either side of the middle. Repeat this step on all four corners.
You’re finished! Now you can create as many adorable sheets as you want!!!
Looking to make more things for the nursery. Try these:
How to make a fitted sheet:
So now that you have all of this info. You can totally make a fitted sheet for a larger mattress. The only limitation is fabric size. The crib mattress sheet is perfect because it is the exact width of a standard cut of fabric. So use the pattern and calculations above to figure out how much fabric you will need. For example I would have to use a 108″ fabric for my king size bed since I would need fabric that is at least 94″ wide. You can find a whole bunch of fun wide fabrics on JOANN, HERE.


Clarisse says
Hi. Thanks for your tutorial! All of the other tutorials say you need 44 or 45 inch fabric. I’ve just bought 42 inch flannel. Think I can make it work? I’m most concerned about shrinkage & fraying in the prewash. If you have any suggestions I’d love your input! Thanks!
sewwhatalicia says
I’m concerned for you with shrinkage and fraying too! Add a 2″ strip of cotton or flannel to each side to make it wider. Then you can add the appropriate hem and that part will fall under the mattress so it won’t show. Hope that helps! <3 Alicia
Clarisse says
Yes, that’s great. I just want to let my little one experience flannel bedding but it’s all 42″ at Joann. I just remembered I could try a zigzag stitch along the edges before the wash too (have never done that yet) so between that & your tip my daughter will be snuggling up cozy soon 🙂 Thanks so much for taking the time to help me out!