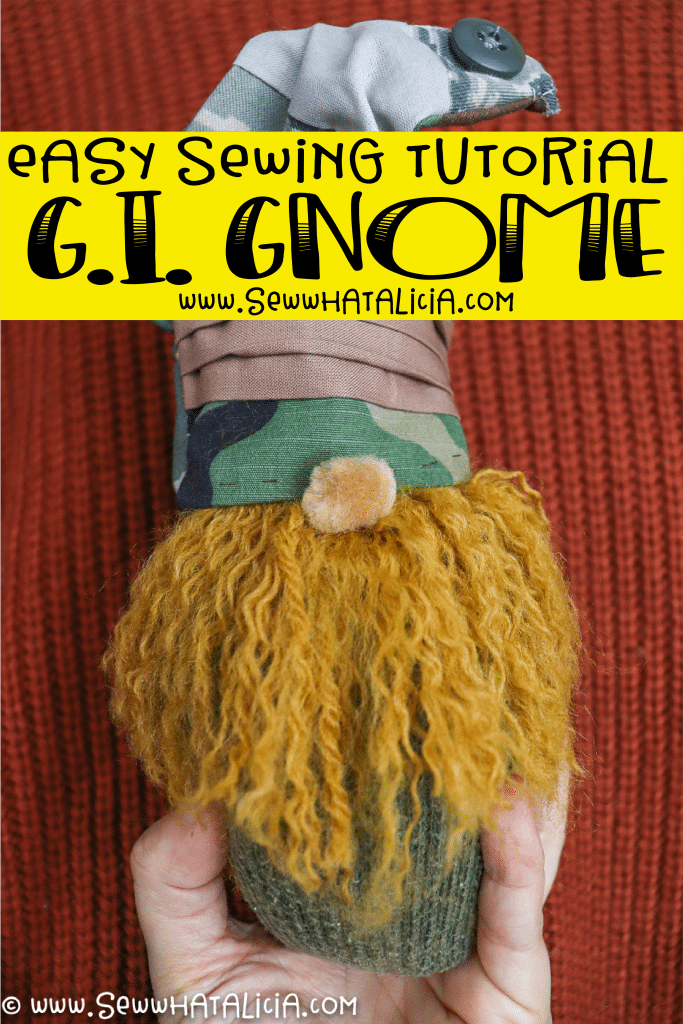
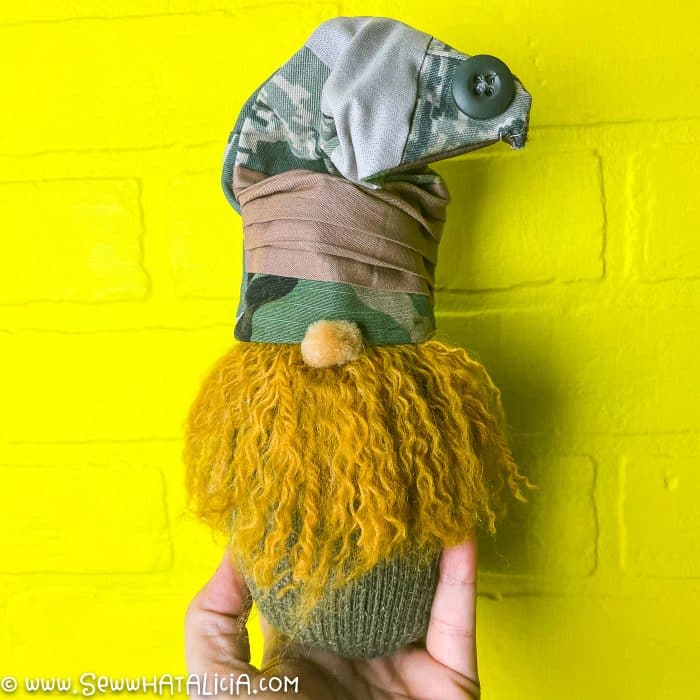
This little gnome comes together really quickly with supplies that you probably have lying around the house. I made mine using old military uniforms but this would be a great project to use old sports uniforms, boy/girl scout uniforms, or just your favorite old t-shirts. Let’s get to the easy gnome sewing tutorial shall we?
Want more easy sewing tutorials? Check them out HERE.
Supplies:
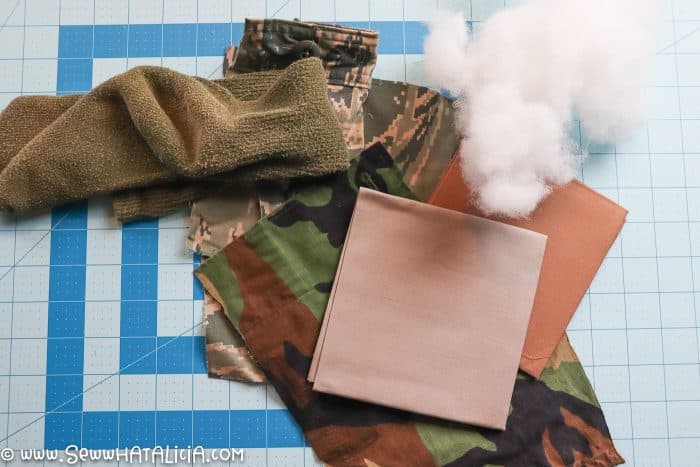
- Old Tube Sock
- Uniforms, old t-shirts, or fabric scraps
- Polyfil (or use stuffing from an old pillow)
- Coordinating Yarn
- Pipe cleaner for hat (optional)
- Pom pom (not pictured above)
- Sewing machine or needle and coordinating thread
See what else I did with old military uniforms <—- 🙂
Create the Body:
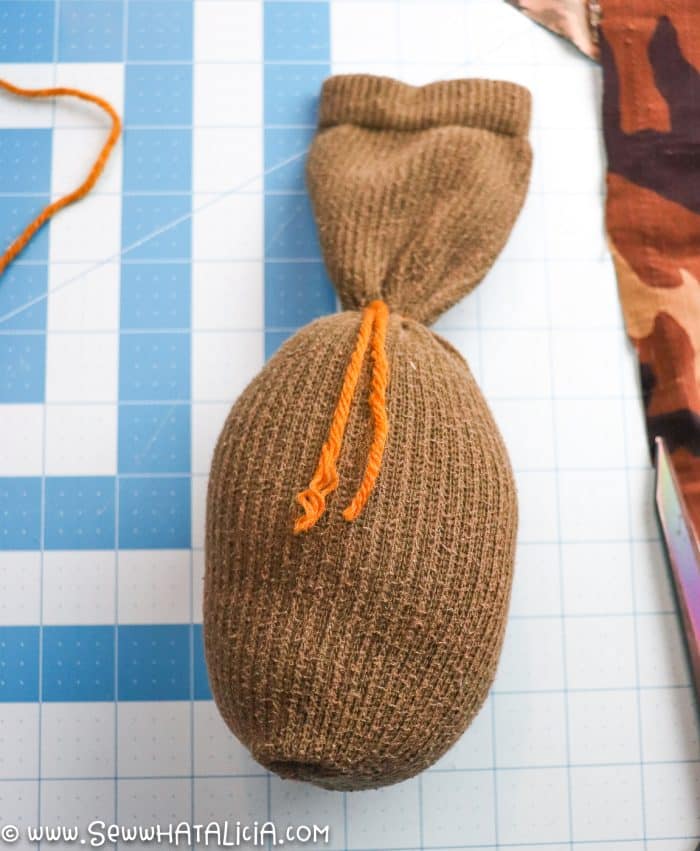
Cut the bottom off of the tube sock. I cut just below where the stretchy knit turned to the softer knit. We will be using the tube portion, the part that goes over your ankle and calf.
Turn the tube inside out. Sew along the bottom to close the tube.
Sew the edges in a slight curve. We want the gnome to be rounded and not have a straight flat bottom.
Turn the piece right side out and stuff with your filling of choice. Use a length of yarn to tie the opening closed when you have stuffed the gnome to your liking.
I left the top of the tube sock in place. It added a little fullness to the hat on my finished gnome. You can cut the excess off but make sure you don’t cut too close or your yarn won’t stay in place.
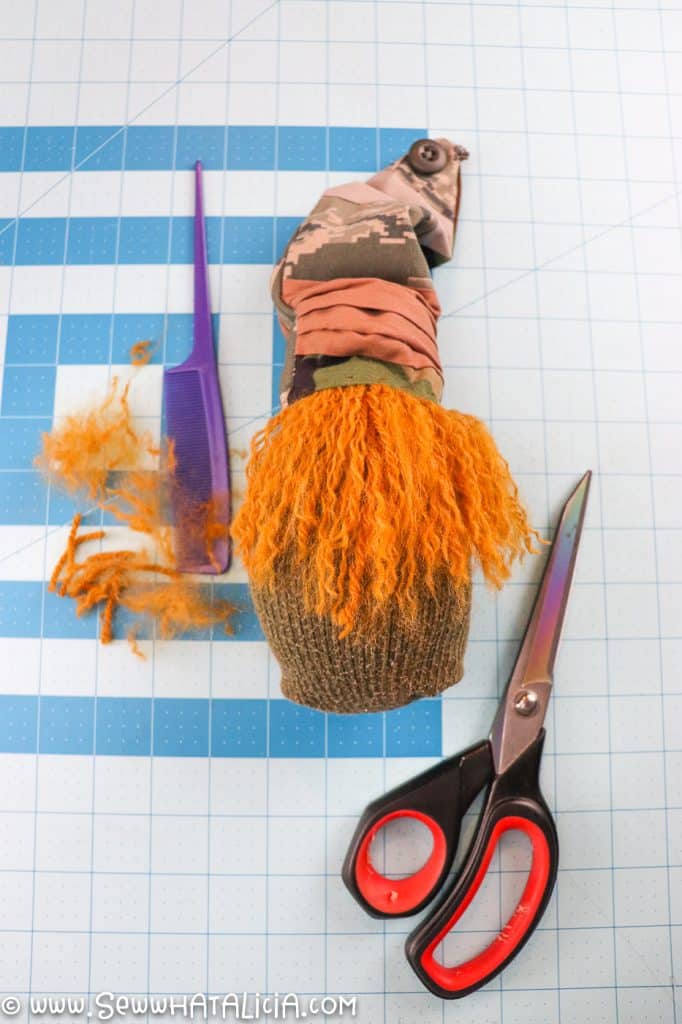
Make the beard:
Continue tying lengths of yarn around the top of the gnome. We want to use enough to create a nice full beard. I cut my strings to 6″. We will trim the beard so don’t worry too much about them being perfectly the same.
Make the hat:
It is time to make a few decisions. How tall do you want the hat to be? What shape do you want the hat to be?
I drew a triangle in a shape that I liked, I knew I wanted the hat to slouch and be moldable so I made it a little taller so I would be able to play around.
Piece your old uniforms together. If you have a large piece and want the hat to be solid use that, it doesn’t have to be pieced like mine. You’ll need two pieces, one for the front of the hat and one for the back.
Place your pieces right side together and use the template for hat size and shape to cut the fabric to size.
With them right sides together sew the two pieces together leaving the bottom open. If you want your hat to stay in the position you place it in, now is the time we will add the pipe cleaner.
Place your pipe cleaner along one side and use a zig zag stitch to sew it in place. Make sure that your zig zag is wider than the pipe cleaner, we don’t want our needle hitting the metal of the pipe cleaner. Trim any excess pipe cleaner. Note, you can put a pipe cleaner on both sides but it is not necessary.
Now turn your hat right side out. Fold the raw bottom edges under and don’t hate me but you’ll probably need to sew this seam in place by hand.
Finishing the gnome:
Using a comb pick out the twist in the yarn. You can make the beard as fluffy as you want in this step. I left a little twist because I thought it was cute!
Use your scissors to trim the beard. Give it a slight curve or leave it straight or make it pointed, this is your chance to give him personality.
Sew the hat on with a needle and thread. It should sit just above the beard. You can use an invisible stitch by grabbing just the fabric on the inside (that we folded under when we finished the bottom edge of the hat) with your needle and then grab a piece of the sock and continue in this manner until your hat is secured in place.
The last step is to add your pom pom nose. Find the spot in the middle of the pom where everything meets and put your needle through, then wrap the thread around the pom once or twice. This will help to make sure that it doesn’t just pull through the pom when we attach it to the gnome. Fluff the pom to hide the thread that we wrapped around.
Pull the needle all the way through the gnome and out the back. Try and bring the needle out just under the bottom edge of the hat. We are going to hide the knotted thread under the edge of the hat. Knot your thread and trim. And he’s finished!
I’ll post a video on TikTok so make sure you’re following me if you are over there for a video of this easy gnome sewing tutorial!
Pin Easy Gnome Sewing Tutorial


Leave a Reply