Create an easy unlined zipper pouch with a box corner bottom with this quick tutorial. You just need a few supplies and you’ll be a zipper master in no time!
Easy Unlined Zipper Pouch Tutorial
Zipper pouches are kind of my thing! Today we are going to create this easy unlined box corner pouch in less than an hour, you can totally do it I promise! If you’re a visual person you can see a video tutorial for this on TikTok here.
Supplies
- Fabric
- Pellon Tru Grid (Fusible or Non Fusible)
- 7″ Zipper
- Glue Stick (for non fusible grid interfacing)
- Zipper Foot
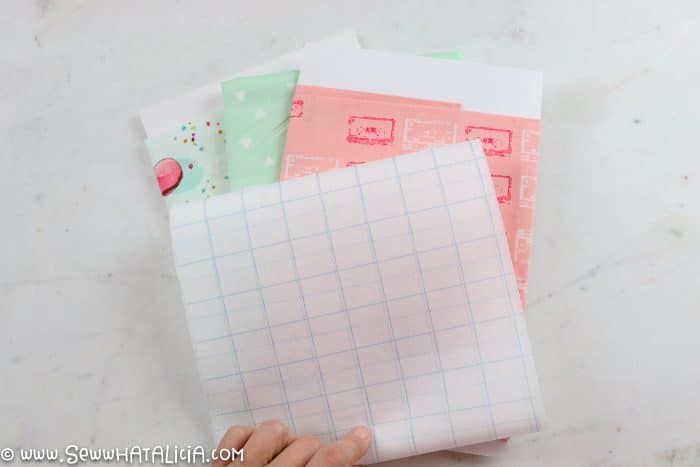
Cut the Fabric and Interfacing
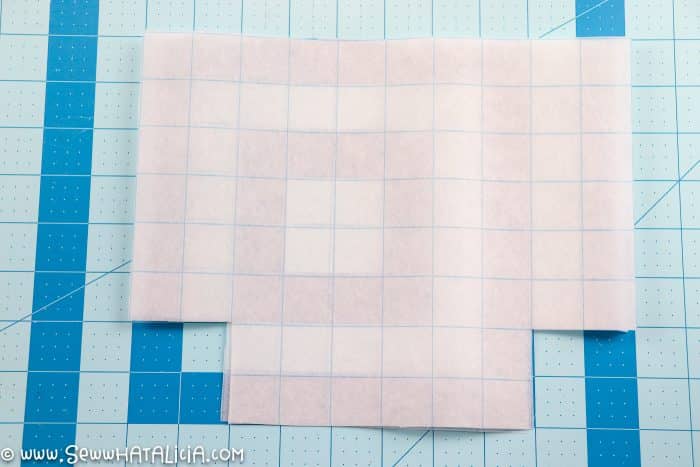
From the interfacing cut two 10″ squares. Then cut a 2″ square from the bottom left corners and the bottom right corners. It should look like the piece pictured below.
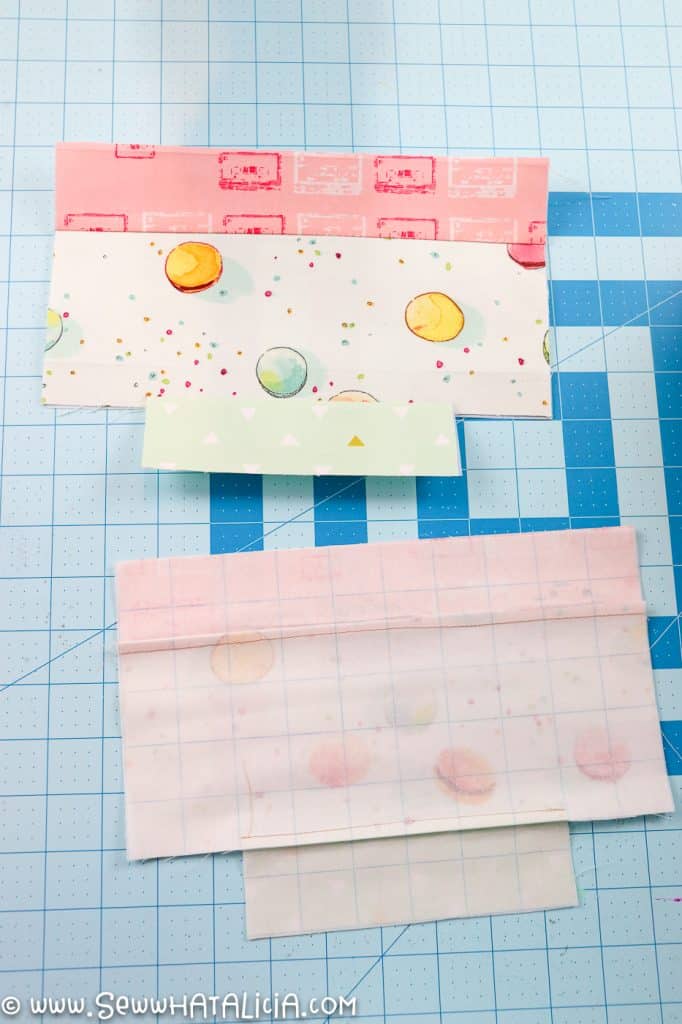
Next cut fabric pieces to cover the grid interfacing. The sizes I cut are listed on the picture below.

Attach the Fabric
Place your fabric over the grid interfacing. Right sides up.
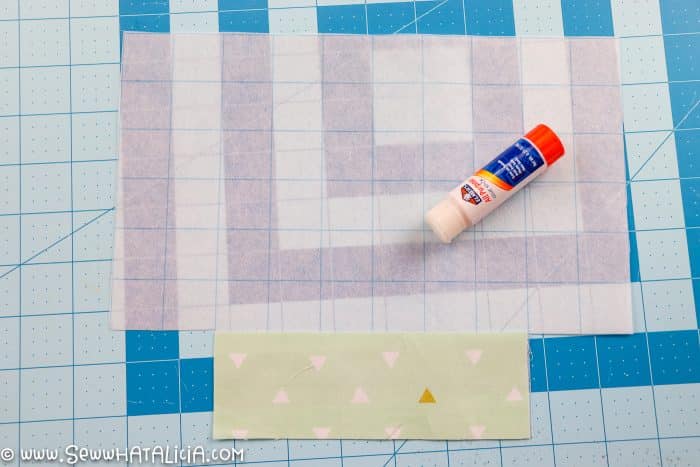
If you have the non fusible interfacing place a small line of glue stick to hold the fabric in place. Cover the entire piece of interfacing. If your interfacing is fusible press the fabric onto the interfacing.

Fold the fabric together where the different pieces meet, right sides facing , fold using the grid lines in the back as a guide.
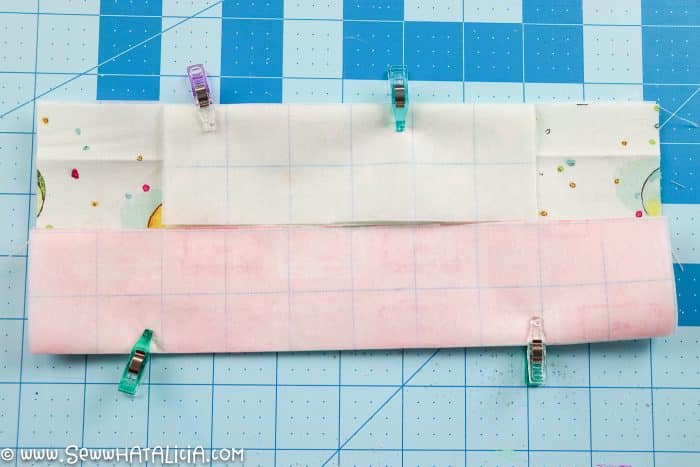
Sew on the folds using a 1/4″ seam allowance. Press open. Repeat with both pieces of interfacing and sets of fabric. The interfacing will keep the inside of your pouch nice and clean since this is an unlined pouch.
Attach the Zipper
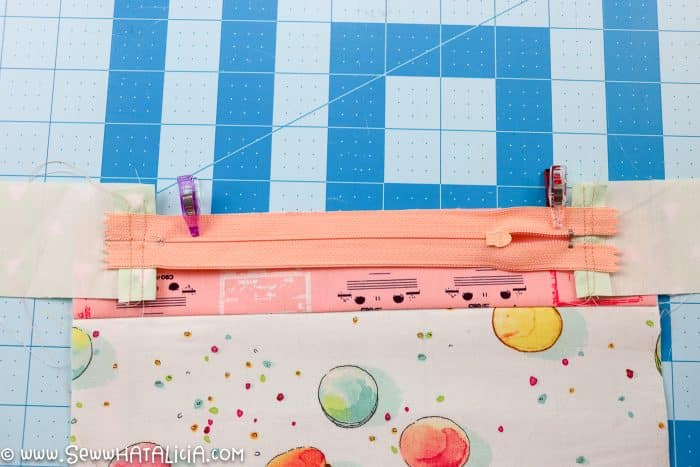
Use a scrap of fabric to create tabs on each end of the zipper. For more detailed instructions on this check out THIS tutorial. Your scrap pieces should be a few inches long so that when they are attached to your zipper your zipper and tabs measure at least 10″.
Place the zipper right side down along the 10″ top edge of your piece. Clip in place. Sew using your zipper foot. If your zipper tabs are wider than the zipper (like mine pictured below) flip the piece and use the grid paper as a guide to sew the zipper in place. Alternately you could use your ruler to trim the fabric so that it is straight and lines up perfectly with the top of the piece you are attaching it to.
Once you have sewn the zipper on unfold the zipper and fabric so that you can top stitch along the fabric where it meets the zipper tape. This will help it to lie flat and to keep the zipper from tangling in the fabric.
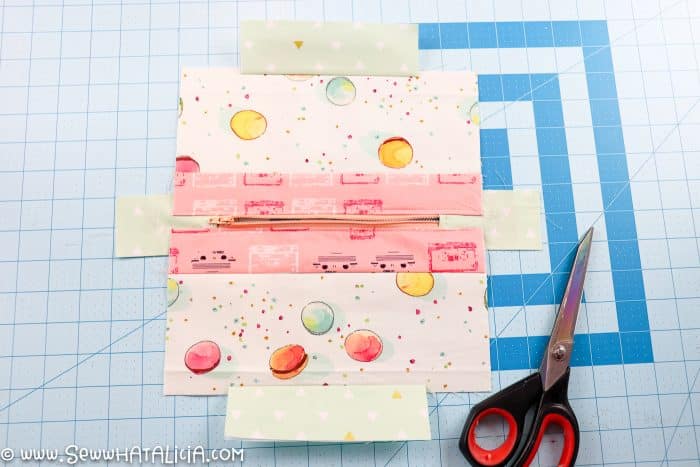
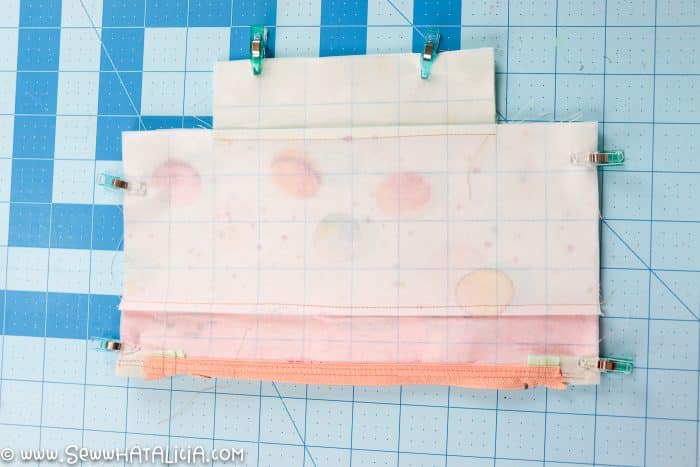
Place the un-sewn edge of the zipper right side down on the second section of fabric. Sew in place and top stitch in the same manner described above. Your piece should look similar to the image below.
Finishing the unlined zipper pouch
Trim an excess zipper tab fabric so your sides are straight. Place the right sides together with the zipper at the top or bottom as pictured below, and clip.
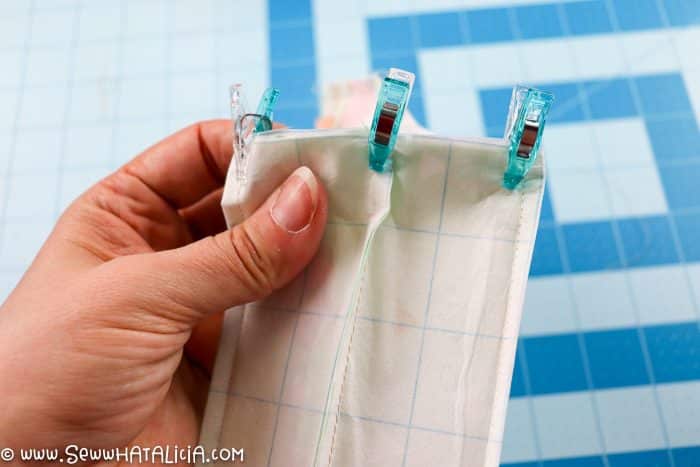
Sew along the two sides and the short bottom edge. Leave the 2″ cutouts un-sewn. Once your side and bottom seams are sewn open the seams up and line up the bottom seam with the side seam. This should bring the two un-sew edges of the cutout together. Clip in place and sew. Repeat on both sides.
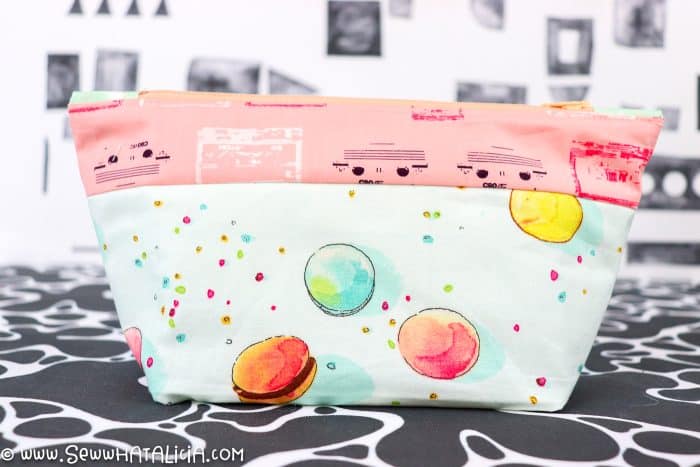
Press your seams for a nice clean finished product. Turn the piece out and you’re done! The boxy bottom and interfacing will help your pouch to stand on it’s own and give it great structure.
Pin Easy Unlined Zipper Pouch
Don’t forget to save this for later!


Leave a Reply