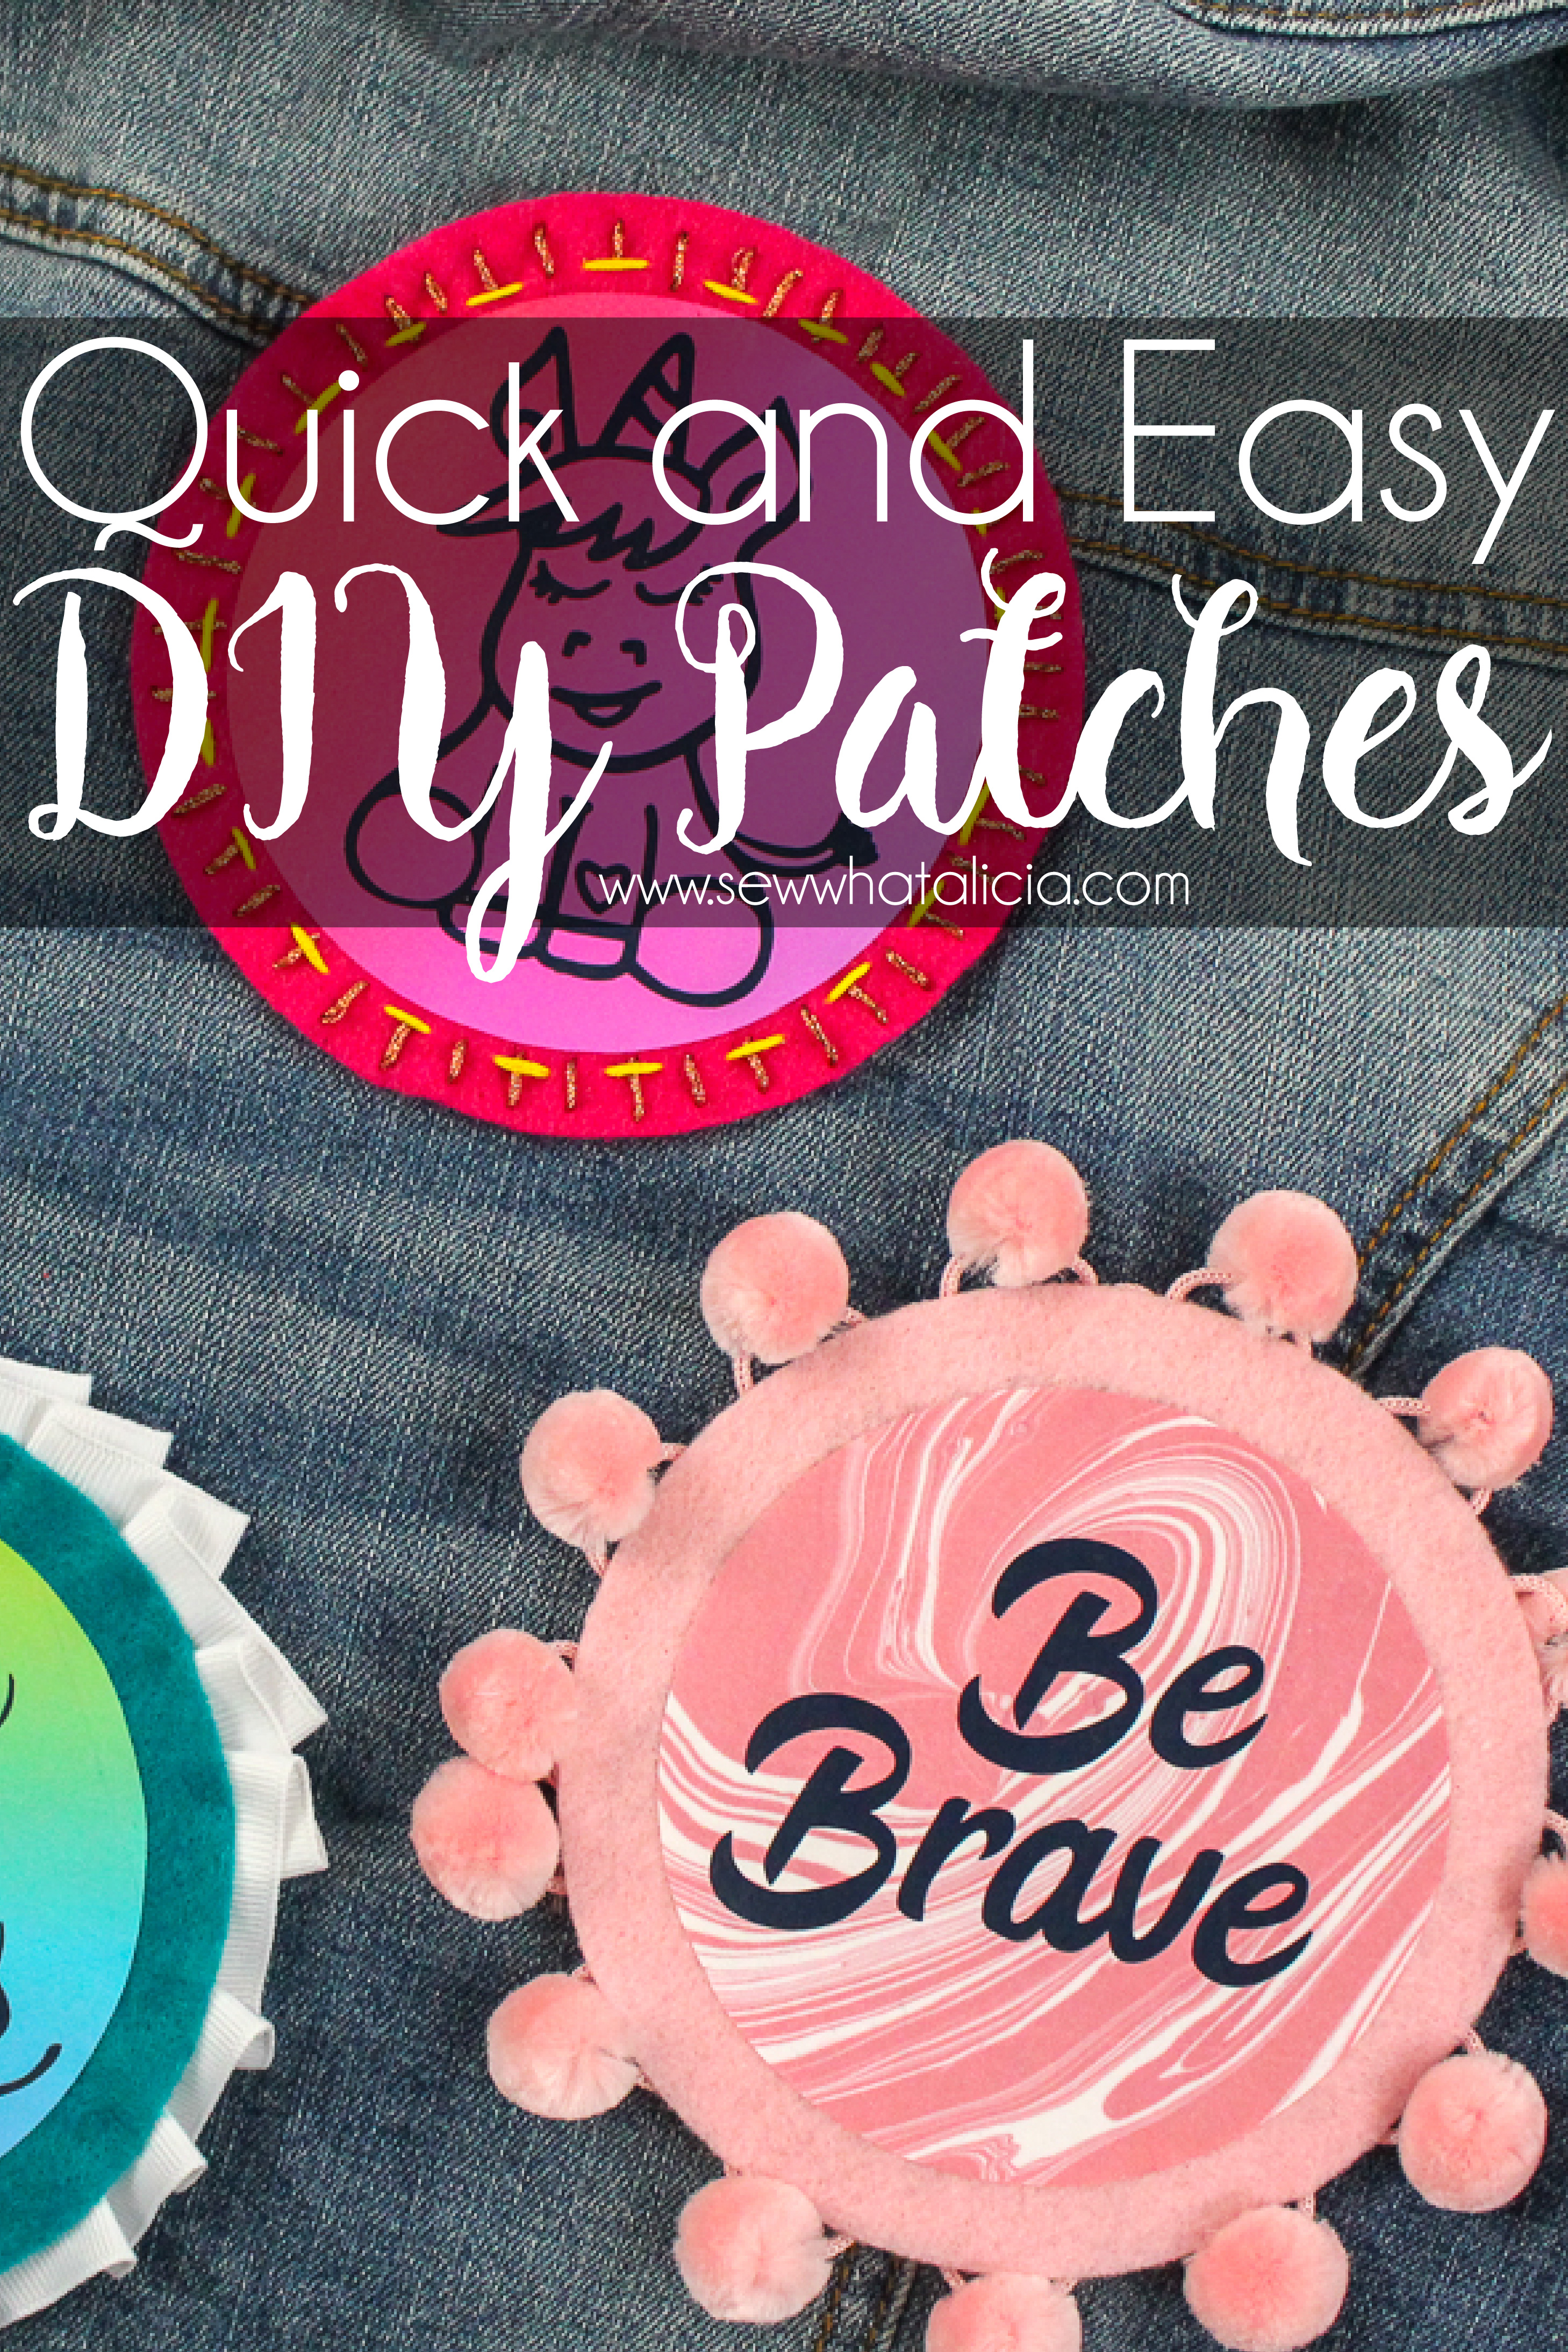
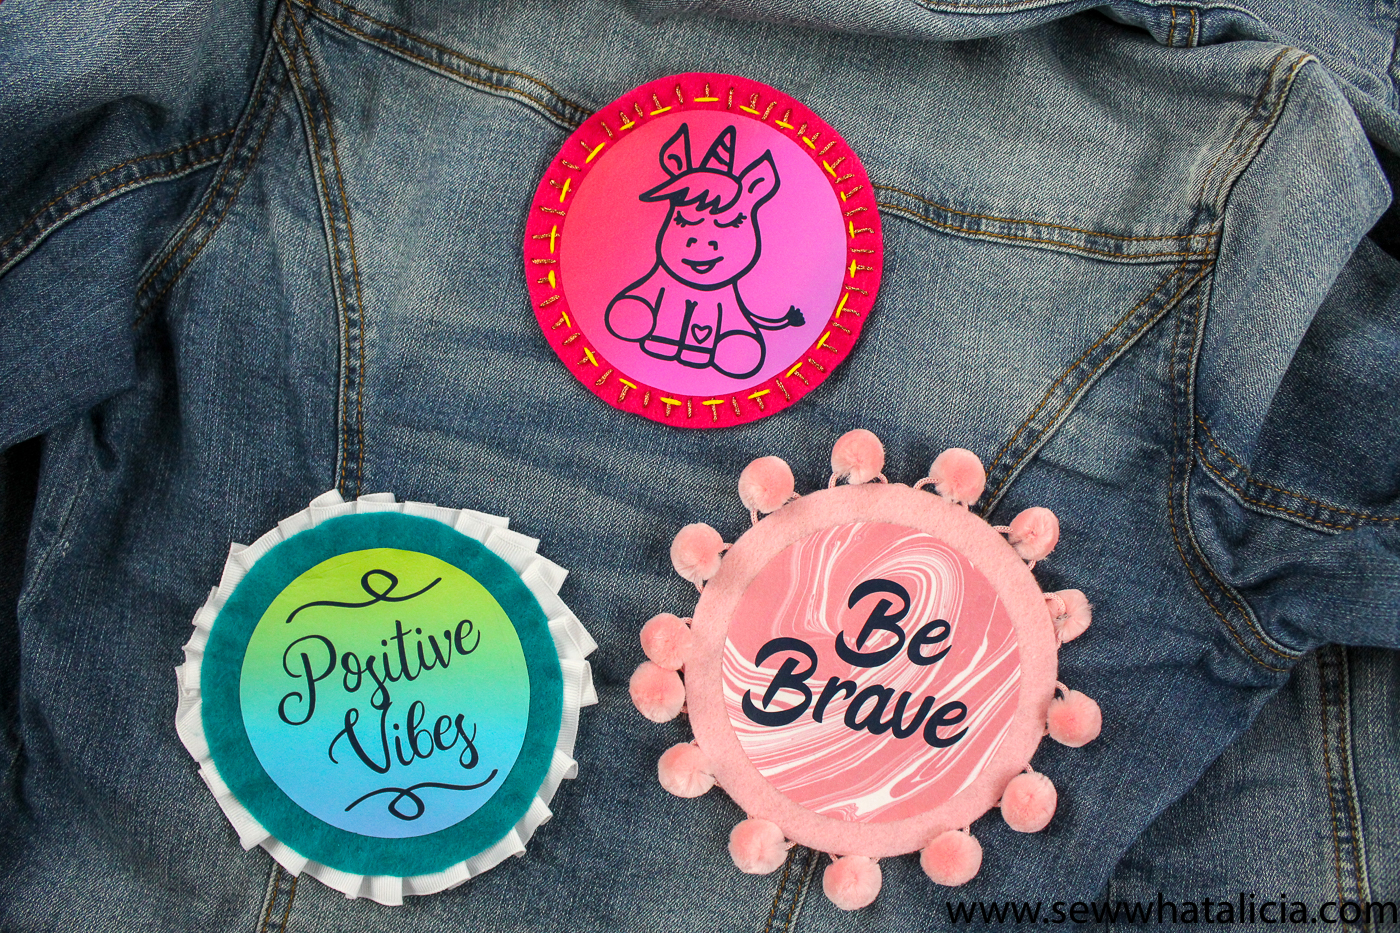
Quick and Easy DIY Patches
Patches were quite popular when I was a kid. Like all things they have burst back into popularity! There are lots and lots of ways to create your own patches. I will highlight the quickest and easiest as well as a few more fun ways to create patches in this post.
Quick and Easy DIY Patches
Scroll down for hand sewn patches and ideas.
DIY Iron On Patches:
What you need:
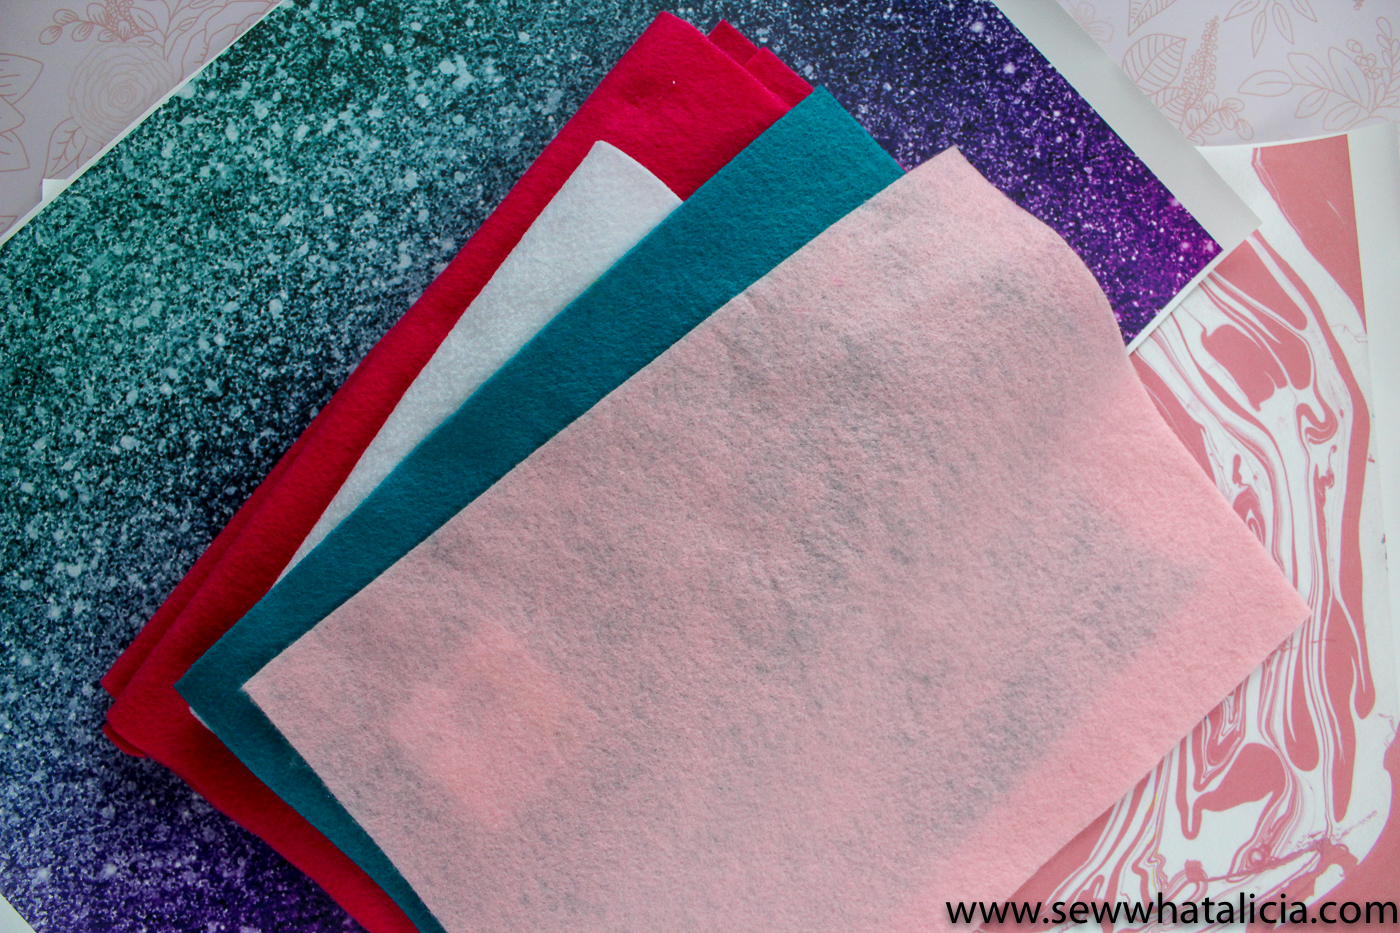
For these patches you will need some HTV (aka Iron On). I used this Magical Rainbow HTV and Coral Marble HTV. But there are SO many awesome patterned HTV options here>>> Patterned HTV.
To attach the patches you will need Heat N Bond Ultra.
You will also need a Cricut Maker or you can use your Silhouette or Explore Air but you will probably want to check out these felt cutting tips if you aren’t using the Maker.
Use your EasyPress 6×6, heat press, or iron. If you are using your EasyPress you will also want the pressing mat.
Last you will need felt and various decorations. Pom pom trim, ric rac, ribbon, and even glitter.
You might also want to get your hot glue gun ready.
How do you put patches on without sewing?
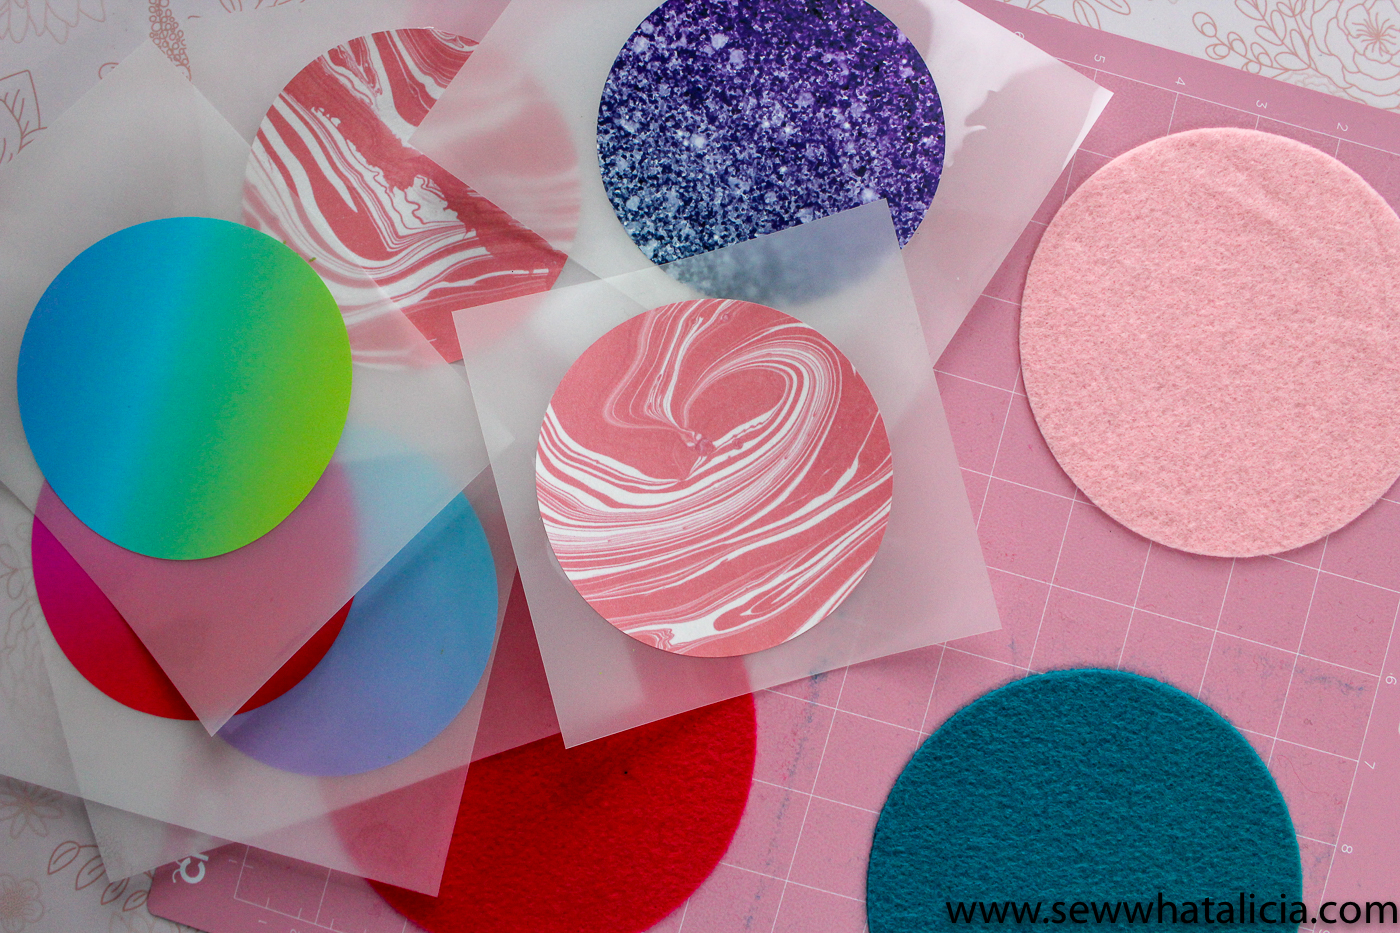
To create the patches you will cut shapes from the felt. You can use THIS SVG (Or THIS PNG) cut file to create some of the patches pictured. For the unicorn cut file (plus a bunch more cute stuff) check out Fresh Cuts SVG Files.
The cut file will create large patches so you can size them down if necessary. Press your Heat N Bond Ultra to the back of your felt. Cut the background circle from the felt.
Next cut your patterned heat transfer vinyl (in the cut files I shared above this is the smaller of the two circles.)
Then cut the words or images you want to add to your patches from heat transfer vinyl.
Place the felt circle (make sure the paper from the Heat N Bond is removed) onto the area where you want the patch to be placed. Then center the patterned vinyl circle onto the felt. Using your EasyPress or Iron to do a kiss press on the vinyl. This is a quick 5-10 second press to help the vinyl stick but not totally adhere so you can remove the plastic transfer paper. Check out all my heat transfer vinyl tips and tricks if you are new to the process.
Line up the wording or image on the circle. Be sure that you cover all of the patterned HTV with the plastic protective transfer tape. Do the full pressing time for the vinyl. This will adhere all of the vinyl and the Heat N Bond.
Last use your hot glue gun to add any trims you want.
DIY Embroidered Patches
You can also make patches from embroidery. This can be either hand or machine embroidery.
Embroider your design onto a piece of fabric, felt, or canvas. Once you have finished your design trim the fabric so that it is 1/4-1/2″ around the design. Turn the raw edge of the fabric under and press. Spray the back of the embroidered piece with a heat activated adhesive (like THIS ONE.) Press the embroidered piece to a circle of thick felt or canvas.
Add trims if desired.
How do you sew a patch by hand?
There are several ways you can attach a patch by hand. There are a few fun hand embroidery stitches that will give the edge of the patch a fun look. Blanket stitch, running stitch, feather stitch, and back stitch are a few stitches you can use that will add a decorative touch to the edge of the patch.
If you don’t want to see the stitching you can use a blind stitch, like you would when hand binding a quilt. For this version you will need to cut the circle for your patch larger than needed and then press the edge under 1/4″. This will give you an edge to place your blind stitch. (This post has some tips for this process.)
There are TONS of fun ways to customize patches using these techniques. What will you do to make DIY patches? Share with me in the comments below.


Leave a Reply