I am a total Christmas music fanatic. I am ready to blast the songs long before Thanksgiving, and sometimes I do! The 12 days of Christmas is such a fun and iconic song. Last year my dear friend from Persia Lou created a beautiful set of cut files inspired by the 12 days of Christmas and I knew I had to make a quilt with them. This is that quilt, I am beyond in love with how it turned out! The quilt is the perfect size to hang on the wall or toss on the couch. Please note that this quilt can be made without the cut files and you can substitute non Christmas patterns for a regular quilt!
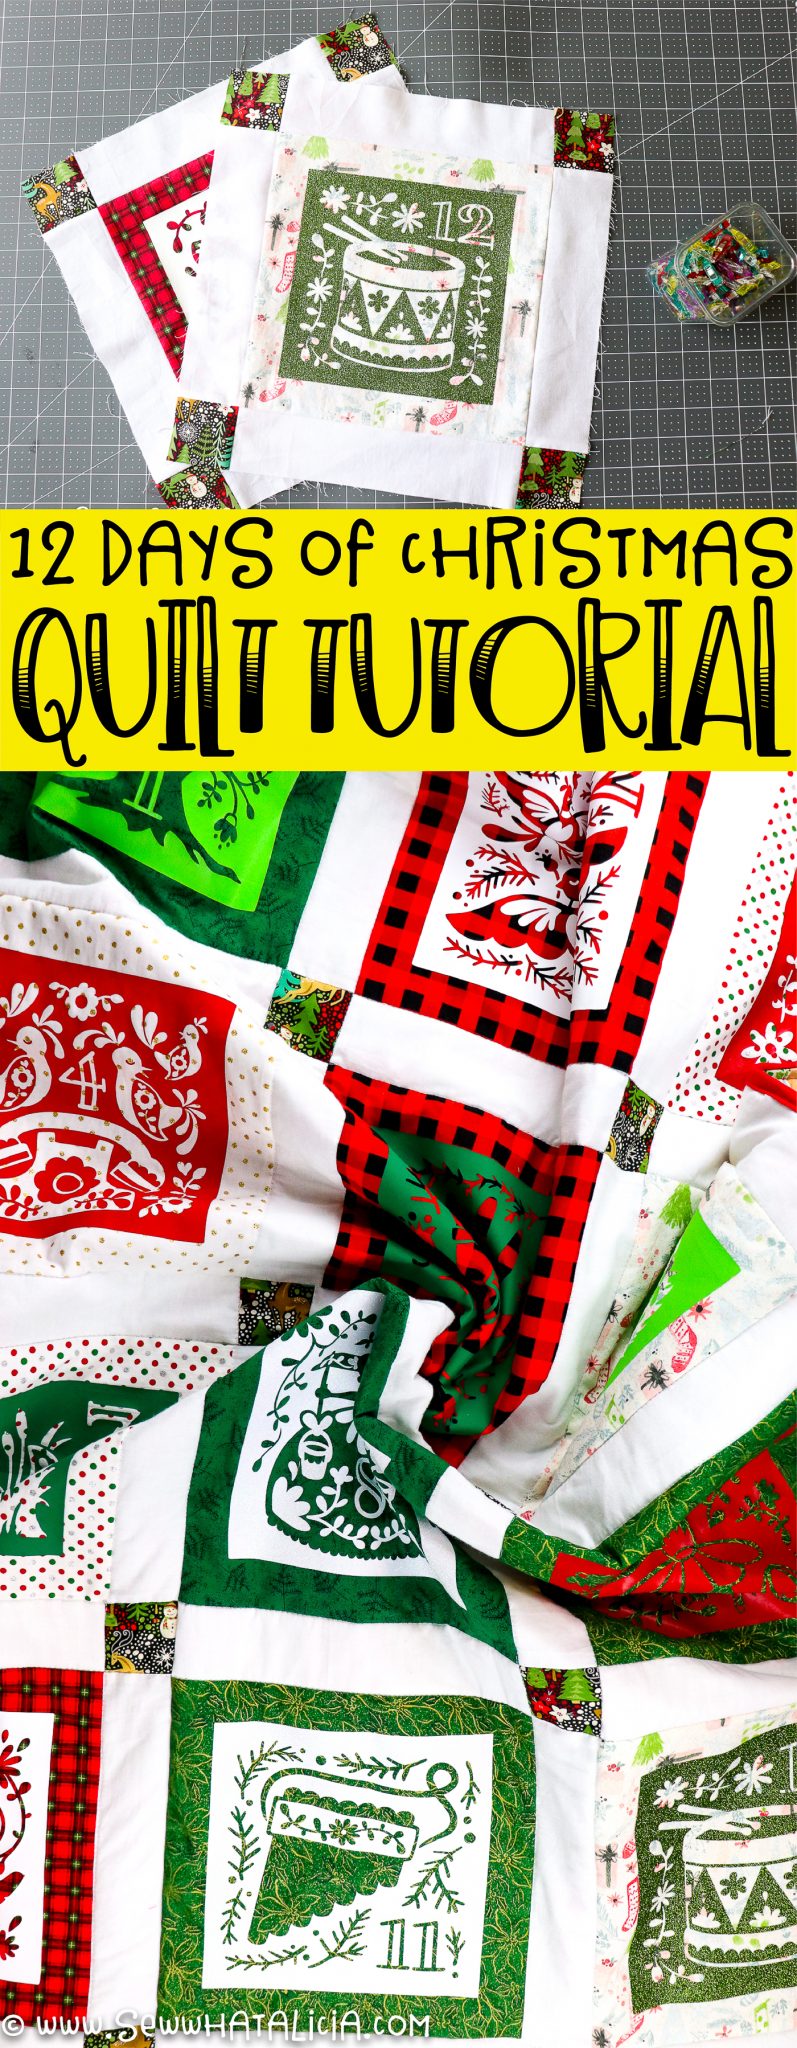
12 Days of Christmas Quilt
What You Need:
For the quilt:
- 12 – 10.5″ squares – I used scrap Christmas fabric that I have been saving for something just like this!
- 20 – 2.5″ squares
- 31 – 2.5″ x 10.5″ white strips
- Batting – This is a wall hanging/lap quilt so a crib size batting is plenty.
- Backing fabric, ~1.5 yards.
- Binding fabric
For the 12 Days of Christmas Images:
- 12 Days of Christmas Cut Files – these are hand drawn and AMAZING!
- Cricut Maker or Cricut Explore Air 2 or another cutting machine- you’ll also need some of THESE tools if you don’t have them already.
- Heat Transfer Vinyl – You’ll need 12 sheets total, one for each of the 12 days of Christmas.
- EasyPress or Iron
How to make the quilt:
New to quilting? I recommend my quilting crash course email series! You’ll get an introduction into everything you need to know about how to make a quilt.
First cut the pieces
Need tips for cutting fabric straight, start HERE before you do your cutting. That post will walk you through everything you need to know about how to cut fabric straight, which is crucial when you are making a quilt.
You’ll need 12 squares that are 10.5″.
Then you need 20 squares that are 2.5″.
Last you need 31 strips that are 2.5″ x 10.5″.
Next cut the vinyl
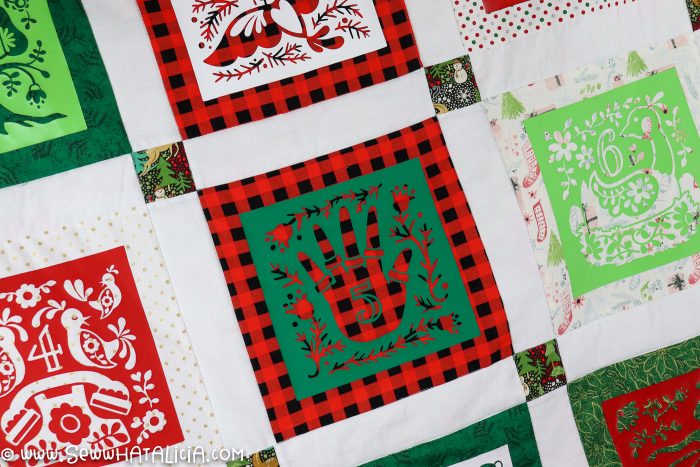
Resize your cut files so that they measure 7.5″. This is the perfect size to fit onto your 10.5″ fabric block.
Cut the images using your cutting machine and heat transfer vinyl. Remember with HTV you need to mirror the image so that it faces the correct way.
Add the vinyl
This step can be done before you piece the quilt together or after. I chose to do it before, in large part so that the blocks were numbered which made construction of the quilt easier!
Use a firm surface beneath your blocks. You want to press the vinyl firmly, and according to the directions, so that it stays nicely on your quilt. You know you have pressed it correctly when you can start to see the texture of the fabric beneath the vinyl. The better you press the vinyl on the better chance you have it will not peel away.
When you add the vinyl before you need to remember that you cannot press the vinyl again without protecting it. So when you are piecing your quilt pieces be careful not to touch the vinyl with your heat source or it will be ruined!
A good way to make sure you don’t accidentally touch the vinyl is to press on the back side of the fabric.
Piece the quilt together
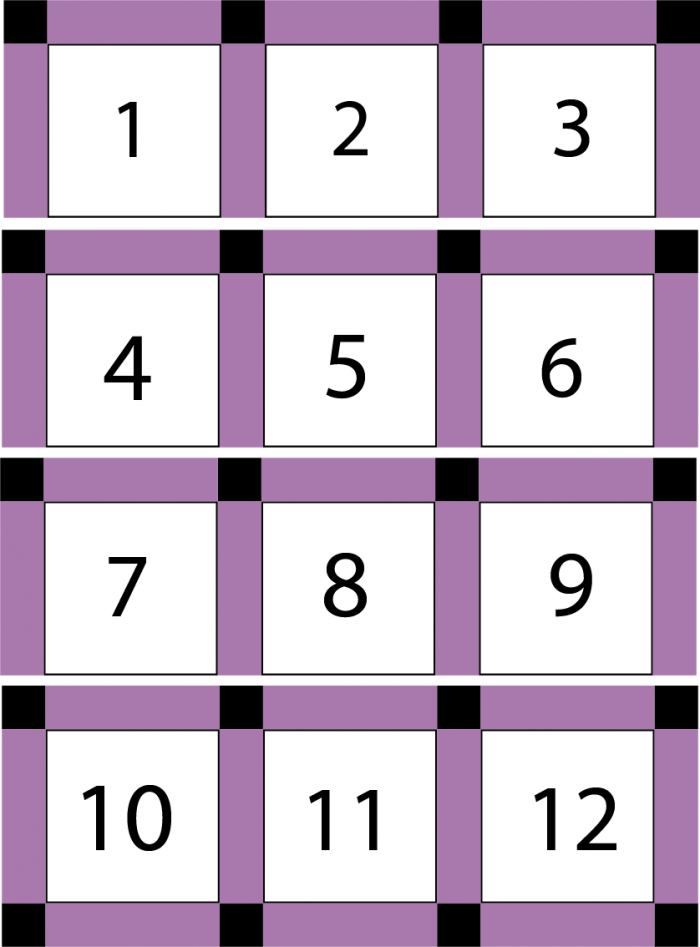
In these instructions I am going to reference the block number, please refer to the diagrams below to follow along!
As always remember to square and press your pieces after each step. This will help you get the nicest finished product.
- First add a 10.5″ x 2.5″ white strip to the sides of blocks 1, 3, 4, 6, 7, 9, 10, and 12.
- Add a 10.5″ x 2.5″ white strip to the top of blocks 2, 5, and 8.
- Add one to the top AND bottom of block 11.
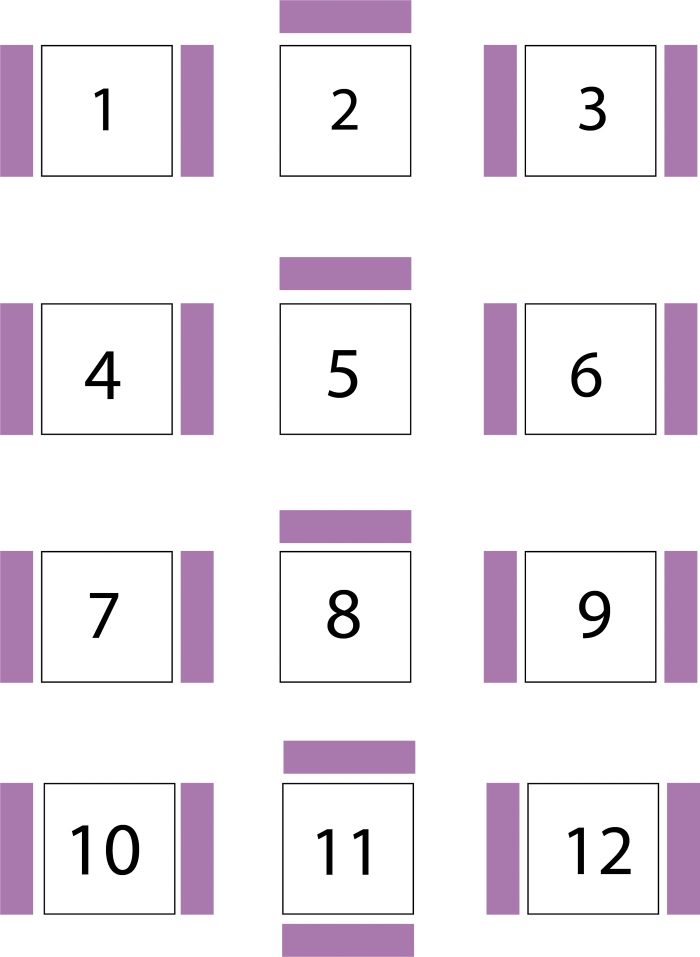
- Next add a 2.5″ square to each short edge of the remaining 10 white strips.
- Then add these pieced strips to the top of blocks 1, 3, 4, 6, 7, and 9. Add one to the top and bottom of blocks 10 and 12.
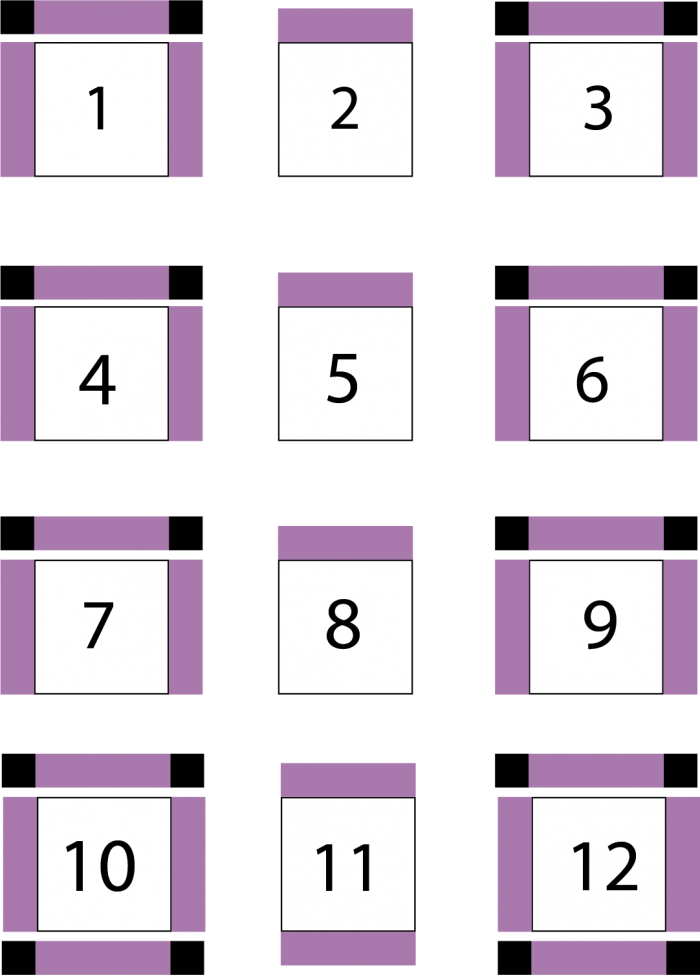
- Next piece your rows together, 1-3, 4-6, 7-9, and 10-12.
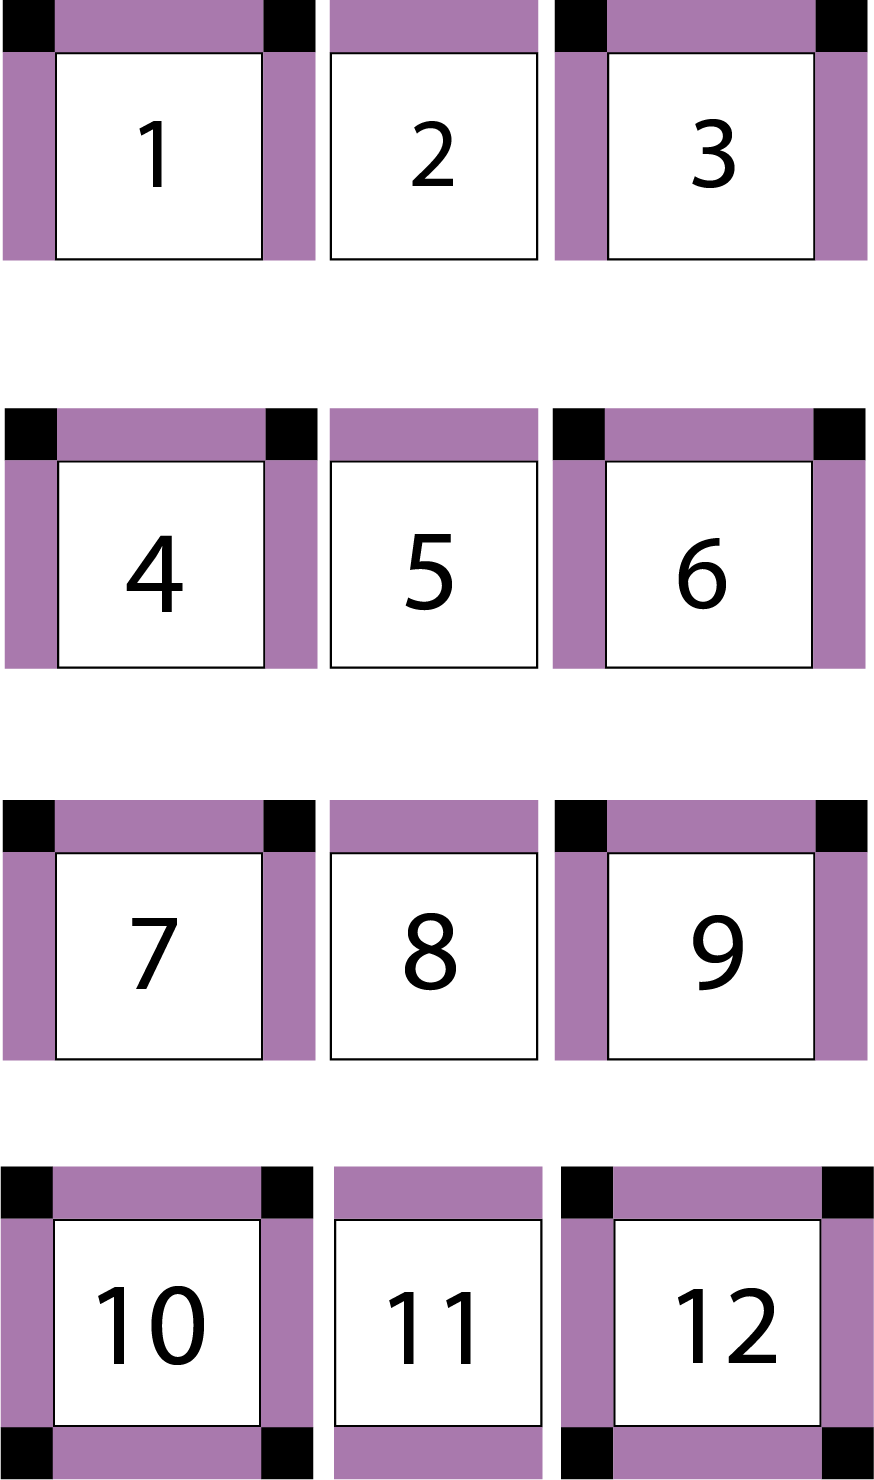
- Last piece your rows together to complete the quilt top.
Finishing the quilt
Make the quilt sandwich
The quilt sandwich is simply the term for placing the three layers of the quilt together. You will need about a yard and a half of fabric to back the quilt.
Lie your quilt top flat, wrong side up, swipe your arms across to remove all the wrinkles and ensure that the quilt top is truly flat.
Add the batting to the back side of the quilt top. Carefully roll the top and batting into a large tube shape and set aside.
Lie your quilt back out on a large flat surface (I use the hardwood floor), wrong side up. Again remove all wrinkles. Carefully place your top and batting onto the back by unrolling the tube shape you created earlier.
Use clips or pins, I like THESE curved safety pins, to secure the three layers together. You want to pin every 4-5 inches to keep the entire piece secure.
Quilt the quilt
For this quilt I highly recommend the stitch in the ditch quilting method, get all the details on stitch in the ditch HERE.
You don’t want to sew over the vinyl so choose a quilting method that avoids those areas. There are free spaces inside each image so you could do the tie quilt method if you prefer that method and like the look.
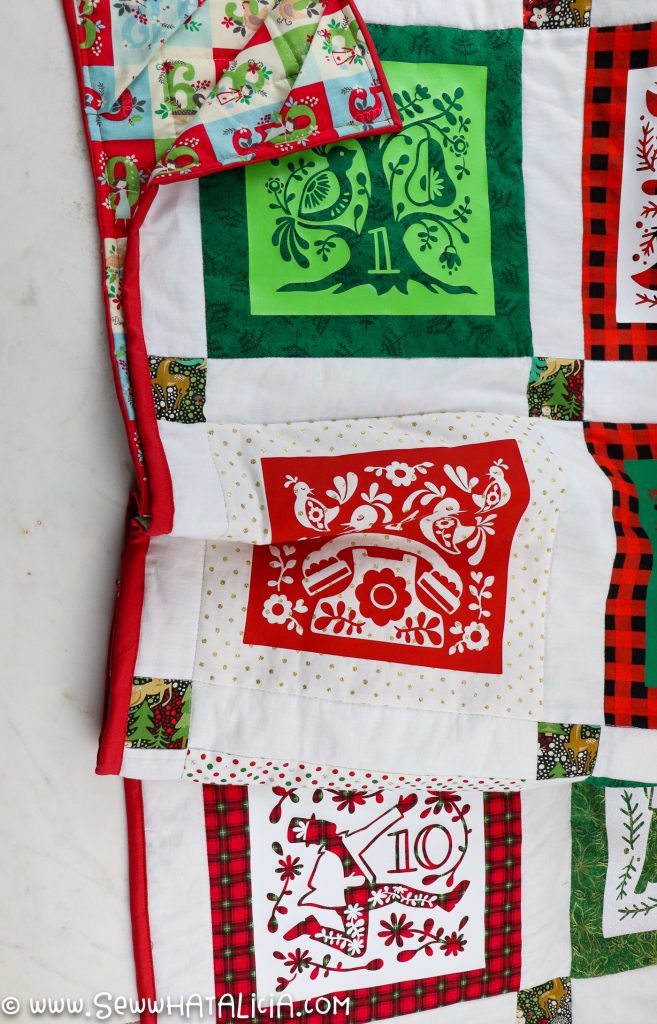
Add hanging pockets
If you want to hang your quilt on the wall, which is what I recommend you do with this quilt, you can add pockets to the back to make hanging easier.
Cut two 5″ squares, fold them diagonally and pin then to the top corners of your quilt (before binding.) Line up the raw edges of the triangle with the raw edges of the quilt.

Bind the quilt
Start HERE if you are new to binding. The quilt binding is simply the fabric that is folded over the outside edge to give it a beautiful and polished finished look. I used a red fabric to add a pop of color to the edge of the quilt.
Caring for the quilt
This quilt is different than a typical quilt because of the vinyl. You CAN use this quilt but you want to be careful when washing. The more frequently you wash the quilt the higher the chance the vinyl will start to peel away.
I recommend you do not dry your quilt in the dryer. Hang it to dry, the tumbling combined with the heat can hasten the damage to the vinyl and cause it to peel away.
Video Interview with Alexis from Persia Lou
I had the chance to chat with Alexis, over zoom of course, to hear more from her about her process for designing. She is one of my very favorite people and I can’t wait for you to meet her!
Pin 12 Days of Christmas Quilt
Don’t forget that the best way to help a blogger is to help people see their content! You can easily help by pinning their post or sharing them to your social media! This blog helps me to support my kiddos and allows me to stay home with them and take care of them! You can learn more about me and my kids HERE.


Alexis says
YAY! I love it so, so much, friend!