How to Make a Stencil with a Cricut
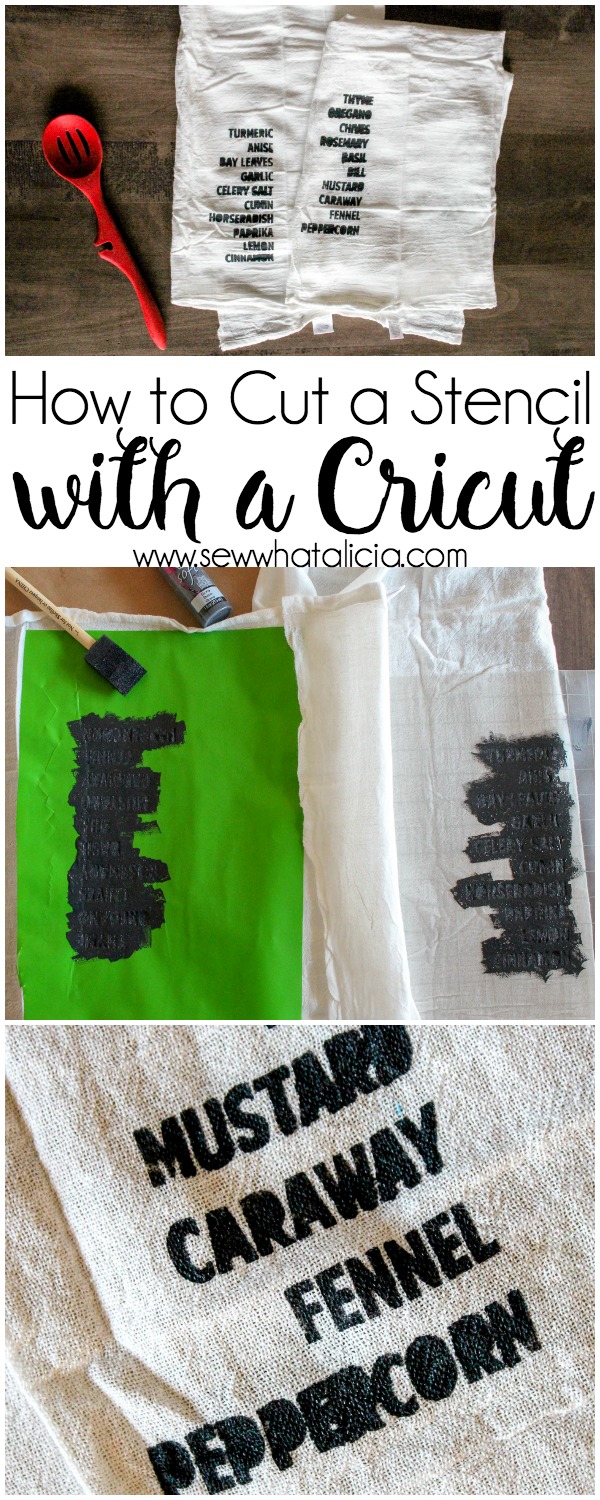
There are so many things that you can do with your Cricut. Using stencils with fabric paint is one of my absolute favorite things to do with my Maker. I have put together a video showing you several ways to use Design Space to create a stencil (scroll down to the bottom) but I am also answering some of your other burning questions about cutting stencils and using Cricut Design Space. Here is how to make a stencil with a Cricut.
How to Make a Stencil with a Cricut
Supplies:
Cricut Maker (or Cricut Explore)
Transfer Paper or Adhesive Vinyl or Stencil Material
For the project pictured:
Cut File (Spices File)

How do you cut out a stencil?
Cutting out a stencil is very similar to cutting out any file using vinyl. The main difference between a stencil and a regular file is that you use the opposite piece once it is cut. You want the negative space to be kept in tact so you weed out the letters or the image instead of weeding out the background as you normally would.
Check out the video below to see how to create a stencil in design space.
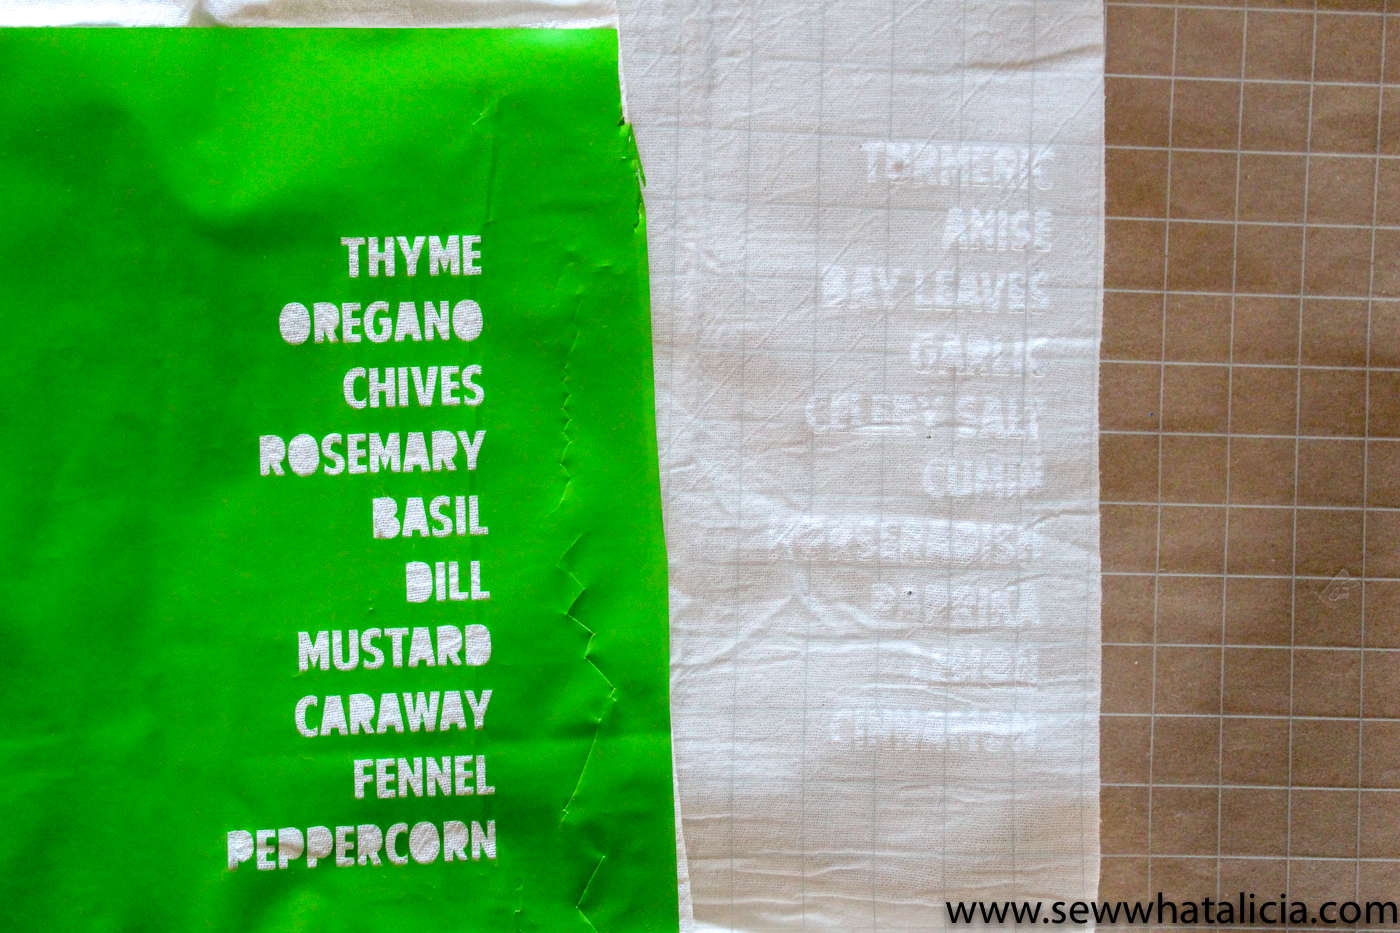
Once you have designed or cut the file cut it out onto the material you have selected. My favorite material to use as a stencil is the clear transfer tape listed in the supplies above. It has a grid and is clear which helps you line it up on your material. This is great if you are adding the stencil to a fabric with a print or that is lined.
You can also use adhesive vinyl or stencil material. The stencil material is very sticky so you will most likely need to use transfer tape to remove the stencil from your cutting mat and get it onto your final surface.
Adhesive vinyl is also a good option but it doesn’t stick quite as well to the fabric so you might have a bit more paint bleeding. (Pictured below is the grid transfer tape and a green adhesive vinyl.)
Cut the file onto the transfer tape and then weed the inside of the image or words, check out these tools for weeding. As I said above this is opposite of how you usually use a file. But since we want to paint the image and not the outline of the image this is how we use the stencil.
**You could also use file and paint around the inside of the image by weeding the background for a fun effect. But this is not how stencils are typically used.
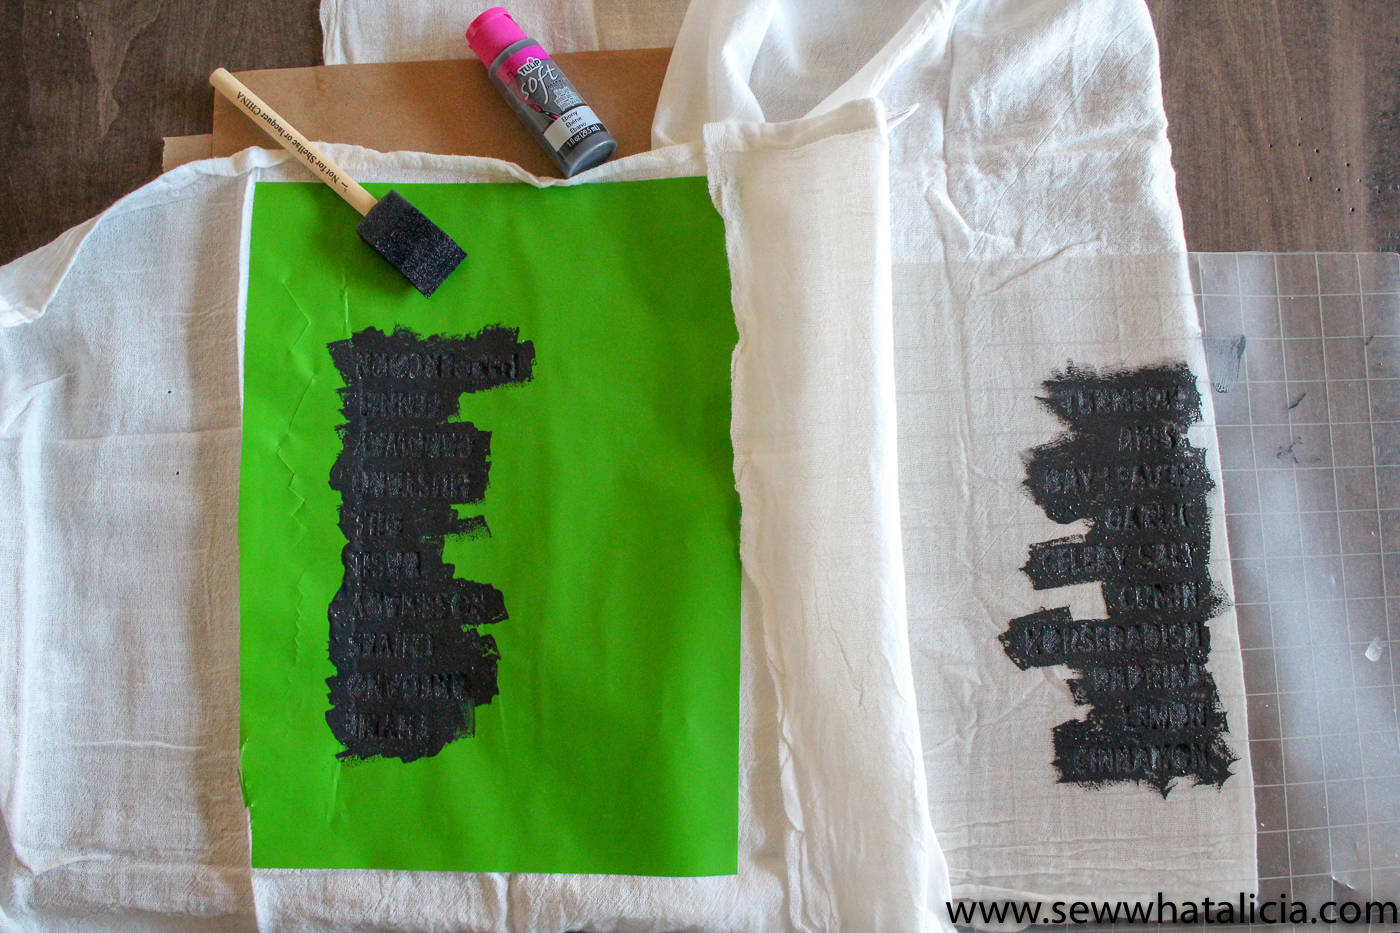
The last step is to attach the stencil to the final material. Use your hands or a tool to be sure that the stencil is firmly attached. Be extra careful around the words so that you can avoid as much paint bleeding as possible.
How do you slice on Cricut Design Space?
To see exactly how to slice check out the video below. Slicing is the process of placing two images together and slicing the front image from the back image. Slicing is a great way to create a stencil.
Try using some of the great design space images to create your own stencils! You can add them to so many surfaces. Make custom quilt blocks, t-shirts, dish towels, placemats, and more. You can also add a stencil to wood projects or use them with etching medium on glass. The possibilities are endless!
Will you be making your own stencils? Share with me in the comments below.
Do you love this project? I would love to send you emails about all things Cricut. I won’t send you a ton of emails, 4 a month max! Leave me your email below and I will keep you posted about everything Cricut, no funny business I promise! Sign up below.


Leave a Reply