This interactive gingerbread house pillow is so fun for kids and adults to play with during the holiday season. My kids love making a new design with the candies! It is like a new holiday decoration each day. I’m honored to be joining Fairfield World in celebrating their 80th birthday by using Polyfil! Keep reading for the gingerbread house pattern and a full walkthrough.

Interactive Gingerbread House Pillow Tutorial

This stuffing for this pillow was provided by Fairfield World. All ideas and opinions are my own.
This pillow comes together quickly. My favorite part is creating all the fun extra candies to decorate the pillow!
Here is what you need for this pillow
- Polyfil Stuffing
- Fabric (or felt) for pillow
- Felt in various colors – the craft felt is my felt of choice since it sticks to itself really well. I used a thinner felt on the windows and the items don’t stick as well.
- Gingerbread House Pattern
- Heat N Bond Spray or Interfacing (optional)
How to Use the Paper Pattern
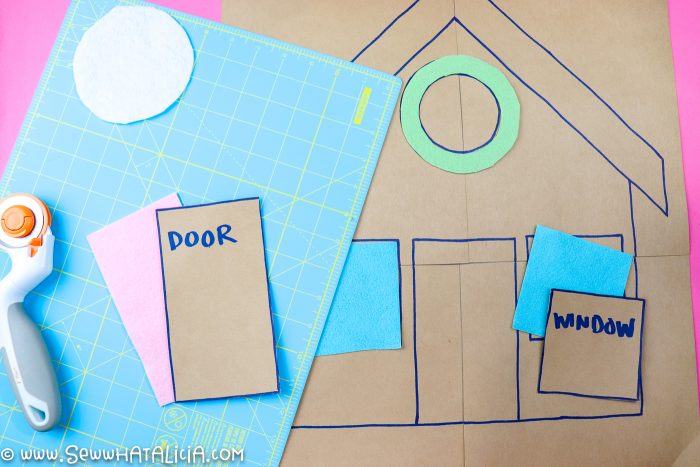
Print the pattern. I recommend not changing the scale, check the 1″ square to make sure you have the pattern at the right scale.
You can scale the pattern down but the smaller you go the smaller your felt details will be and the smaller you go the harder the felt will be to work with. So go smaller at your own risk.
Cut the pattern out around the lines.
Tape the pattern together taping the solid sides over the shaded dashed lines. The dashed lines around the edge are the seam allowance for the pillow, be sure to leave those attached.
Place the paper pattern over two pieces of fabric, the fabrics should face right sides together. This will ensure that your pieces line up for sewing. My picture shows my pattern prototype where I forgot to add seam allowance, thus why I cut it outside the pattern.
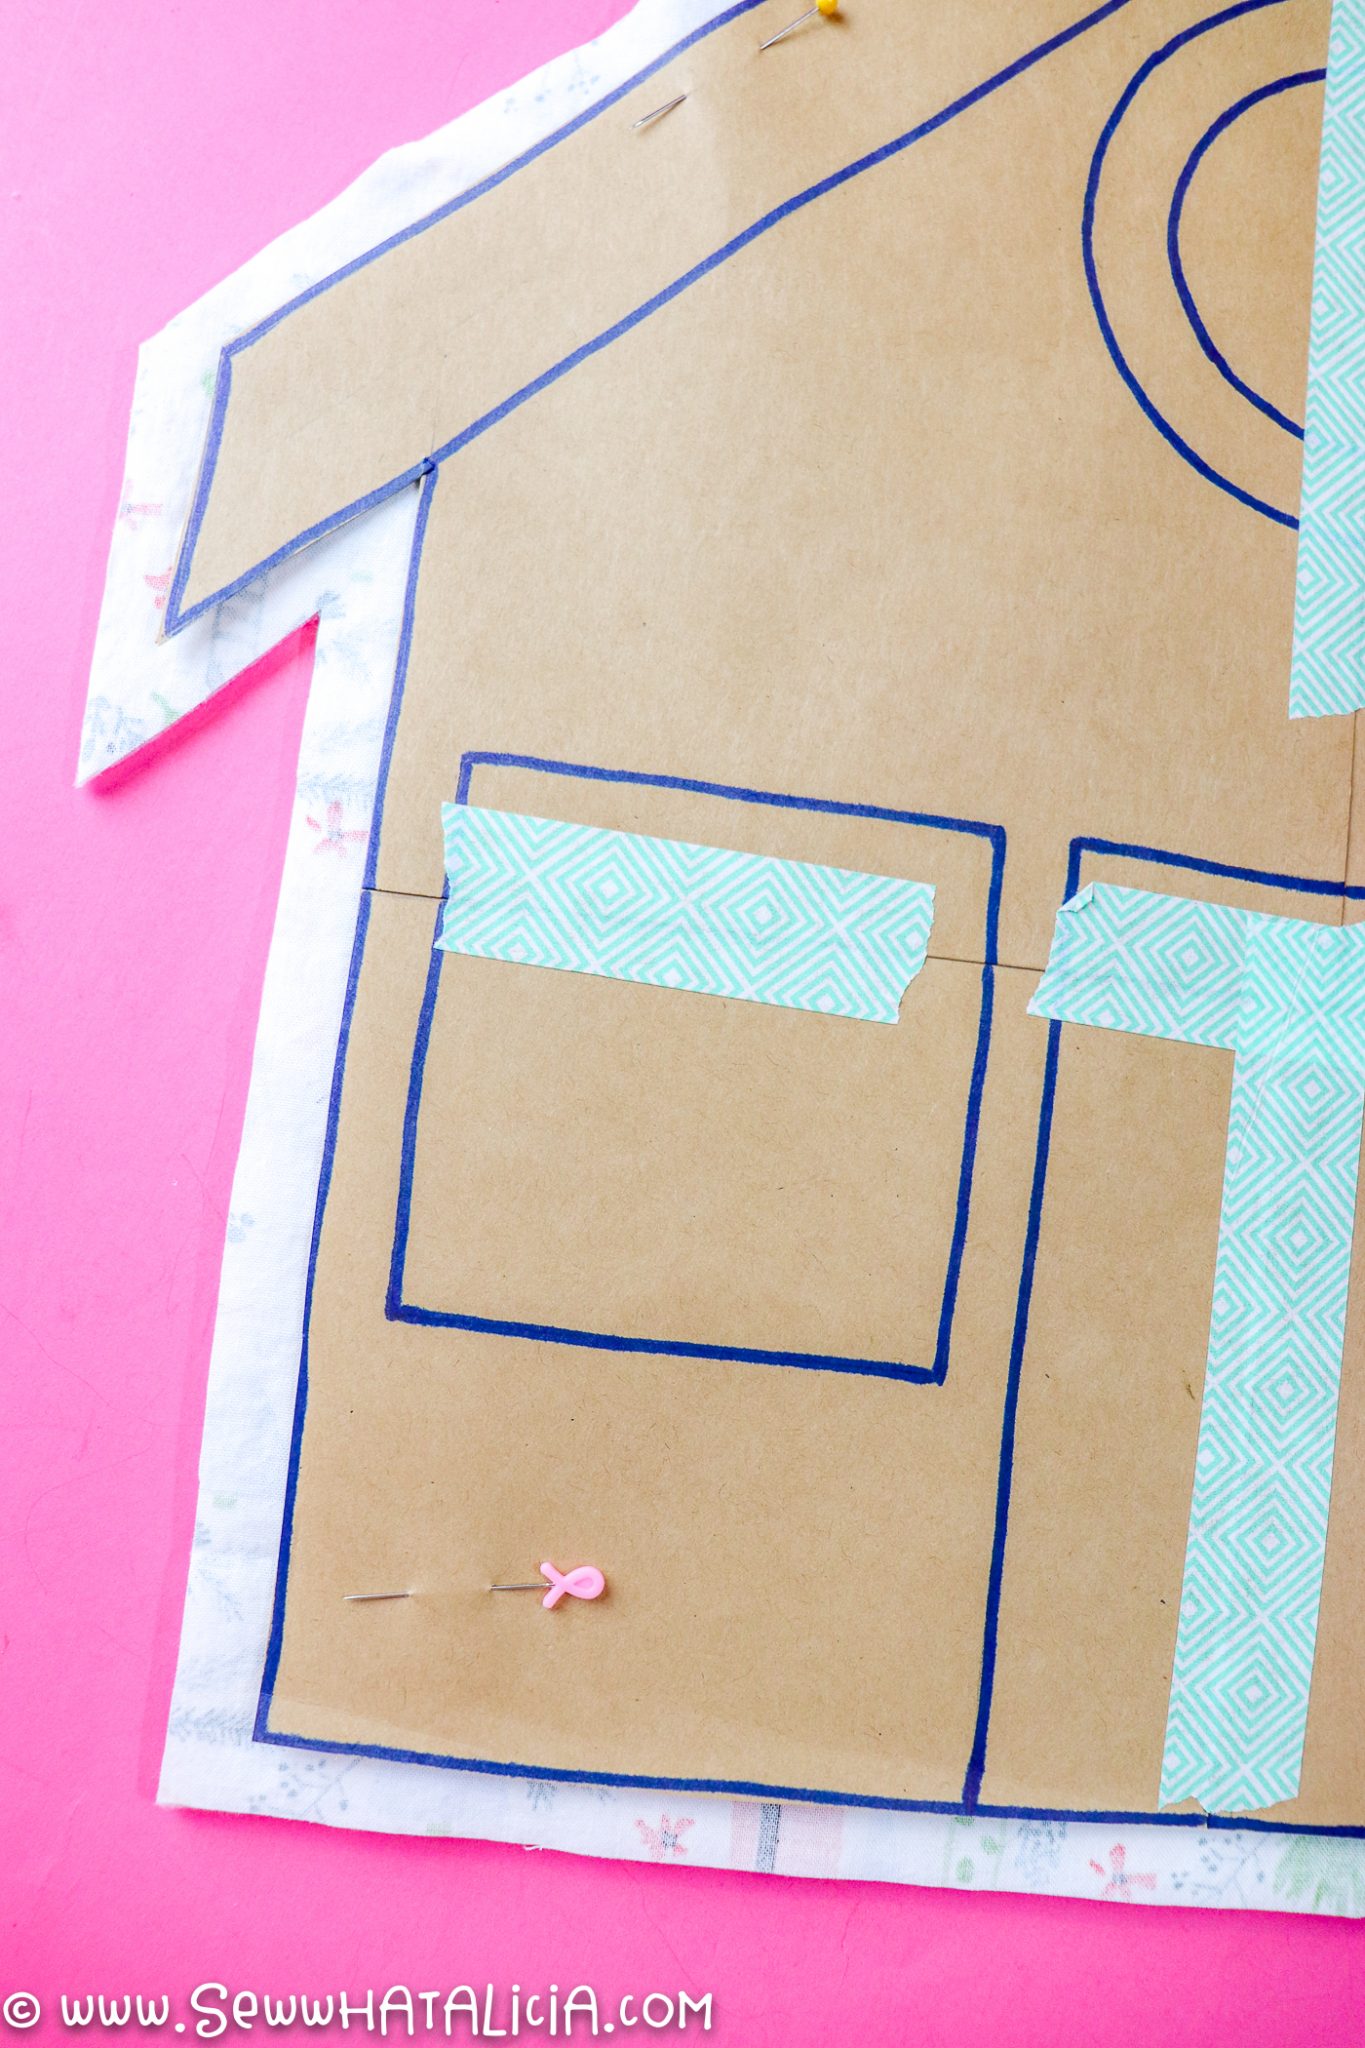
NOTE: You can also cut your pillow out of felt. If you cut it from fabric the candies will only stick to your felt details like the windows and door. Cut it from felt if you want the candies to stick to the entire pillow.
Cut the detail pieces out of felt. You need two windows, one attic window, two roof pieces, and one door.
Create Decorations
The gingerbread house pattern does not include candies. There are so many fun options for creating these candies for decorating your pillow.
Here are a few ideas of what to cut for your gingerbread house.
- Gingerbread man cookies
- Gum drops
- Peppermint candies
- Candy canes
- Icing drips for snow
- Tootsie rolls
- Oreos
- Marshmallows
- Whip cream dollops
The sky is the limit and you can get as detailed and creative as you want!
Decoration Tips
You can use a Cricut to cut these candies. Check out THIS post for tips on cutting felt with Cricut.
Use fusible adhesive spray, like THIS, to attach small felt pieces together. I used this spray for the candy canes and peppermint candies.
Making the pillow
Sew the windows, door, attic window, and roof onto the front of your pillow. Be sure to remember the 1/4″ seam allowance when placing the door and roof.
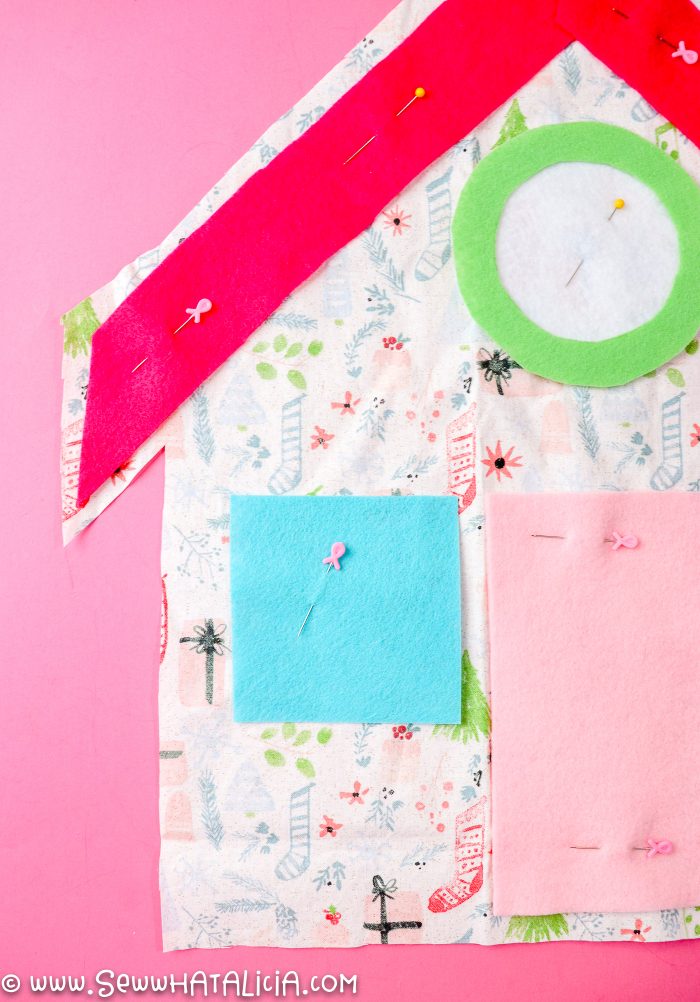
You can use your fusible spray to attach these instead of sewing them on. I used a temporary bond spray to hold the pieces in place and then sewed them on, because my kids are hard on things and I needed the extra strength of sewing.
Place the pillow pieces together right sides facing. Sew around most of the edges, leave 4-5″ open on the bottom to turn the pillow out.
Trim the corners and pointed areas, this will help them to turn out better and give you a crisper point.
Use a turning tool, like THIS purple thang, to press the corners and pointed edges out.
Finishing the gingerbread house pillow
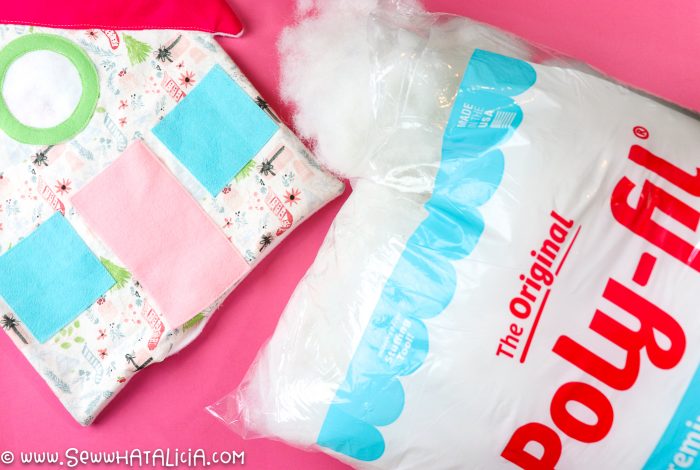
Stuff the pillow using Original Polyfil. I like my pillow to be firm so I use a good amount of stuffing to fill all the nooks and crannies.
Pin the opening on the bottom closed, the raw edges should fold in 1/4″ and create a straight line along the bottom.
Sew the opening closed. You can use a ladder stitch to hide the stitching. Or use your sewing machine to sew a stitch along the entire bottom edge of the pillow. Since the seam is on the bottom it will be virtually invisible whichever method you choose to close.
Pin Gingerbread House Pillow
Don’t forget that the best way to help a blogger is to help people see their content! You can easily help by pinning their post or sharing them to your social media! This blog helps me to support my kiddos and allows me to stay home with them and take care of them! You can learn more about me and my kids HERE.


Leave a Reply