Using a seam ripper is something we all do pretty much every time we sew. So is there a right way to use a seam ripper? What are the best practices for using a ripper? Keep reading and I will tell you how to use a seam ripper.

New to sewing? Check out these easy projects for beginners.
How to Use a Seam Ripper
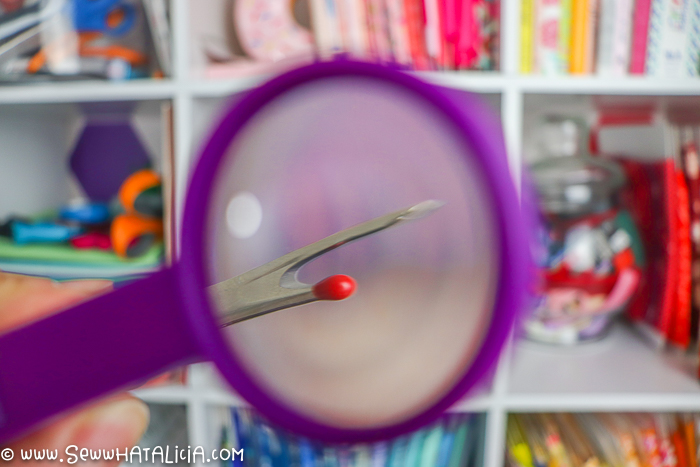
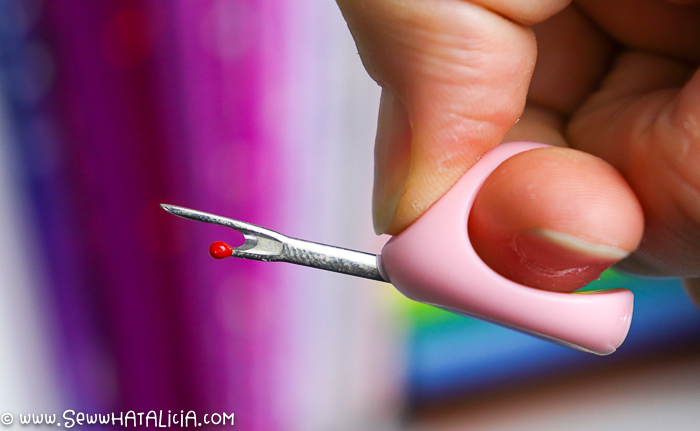
The seam ripper is a very simple tool. It has a handle and a sharp end with a u-shaped blade. Most have a short side of the U with a red ball and longer pointy end.
To use the seam ripper you place the stitches you want to rip out into the sharp U and cut the thread.
There are several methods for this and which you choose will depend on your comfort level, the fragility of your project, and your desired outcome.
Unpicking a seam
Unpicking a seam is basically just what it sounds like. You use the sharp point end to pull up the seam and then cut it with the u-blade.
This is an effective method when you have just a few stitches to rip or if your fabric is fragile, like lace or tulle.
Ripping a seam
Ripping a seam is slightly different than unpicking a seam.
You will use this method when you have a long seam to unrip and the fabric isn’t too finicky, like cotton.
The red ball will face down, into your project, and the sharp end will be up and outside the project.
You may have to pick the first few stitches to give yourself an opening to rip. Then you will run the ripper along the seam to cut all the threads.
What is the ball for on a seam ripper?
What the heck is that little red ball for on the top of the seam ripper? Welp, let me tell ya! The red ball does have a purpose that actually makes using the ripper much more effective.
The red ball is meant to go down towards the inside of your project. The ball protects the fabric and allows you to smoothly slide the seam ripper through the stitches.
If you place the pointed edge down towards the fabric it can get caught and rip the fabric. The sharp edge should go up and away from the fabric.
What is the best seam ripper?
My favorite seam ripper is THIS one. (This is the ergonomic seam ripper shown in the video.)
It has a nice ergonomic handle that is easy to hold. Plus it is a pretty purple, which makes me smile!
The other plus to this seam ripper is that the end is rubber, which enables you to use it for a fun little hack!
There are tons of options for seam rippers, so the best one for you might not be the same. If you have dexterity issues keep reading for my ideas regarding an adaptive seam ripper.
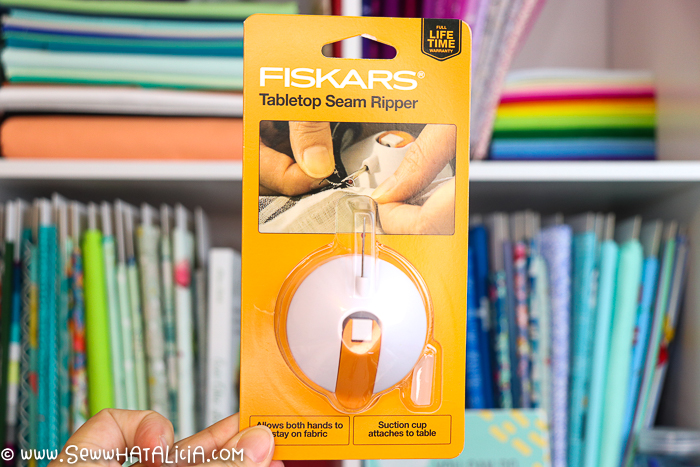
What is the best adaptive seam ripper?
THIS tabletop seam ripper is a great option for those with less hand dexterity. It sticks to the table making it easier to use your hands on the fabric and eliminating the juggling act of fabric and ripper.
If you have issues with vision you can try a ripper with a magnifying glass and/or a light, like THIS one.
How do you sharpen a seam ripper?
The curved U on the seam ripper is sharp, which enables it to cut the threads on your project. This can get dull, especially when you rip as many seams as I do!
You can try sharpening the ripper by using a small piece of steel wool. Rub the steel wool back and forth across the edge to sharpen the seam ripper.
Cindy’s Seam Ripper Review
THIS seam ripper is new on the market. I had to try one. You can see how it works in the video below. But here are a few of my takeaways.
- This seam ripper is easy to hold. It frees up your hand so you can hold the fabric with both hands while seam ripping.
- It works well to rip seams.
- I’m worried about keeping track of it. I have a hard enough time keeping track of my full size seam ripper.
There are pros and cons to this seam ripper, the best thing to do is to give it a try for yourself. Everyone is so different in how they hold and manage their tools so this is definitely a personal preference tool!
Video Tutorial with Tips and Tricks
THIS is the ergonomic seam ripper shown in the video.
THIS is the pink Cindy’s seam ripper shown in the video.
Pin How to Use a Seam Ripper
Don’t forget that the best way to help a blogger is to help people see their content! You can easily help by pinning their post or sharing them to your social media! This blog helps me to support my kiddos and allows me to stay home with them and take care of them! You can learn more about me and my kids HERE.


Leave a Reply