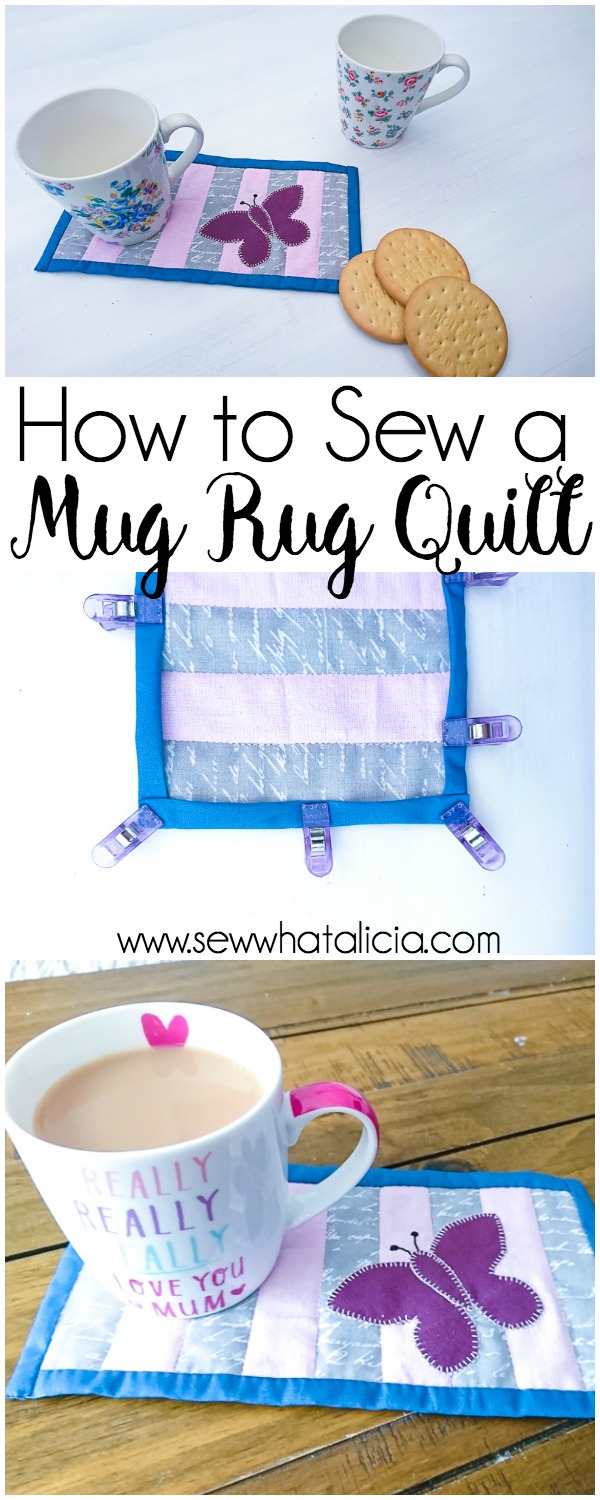
How to Make a Mini Quilt – Tutorial
Michelle here again from Creative Blonde. Today I am going to share a quick and easy mini quilt/mug rug tutorial. The term mini quilt is kind of a catch all for quilts that aren’t big enough to use as a blanket. A mini quilt can be any size from 20″ to 9″. The process is the exact same regardless of the size, so if you follow this tutorial you will be set up to make a mini quilt that is bigger or smaller than this one. Here is how to make a mini quilt!
How to Make a Mini Quilt – Tutorial
Live Video Supplies:
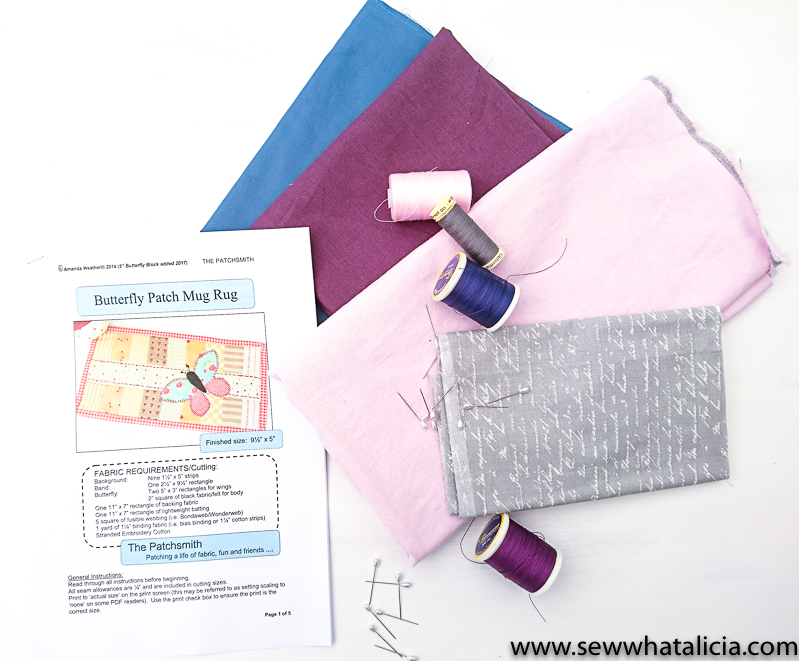
Supplies:
Wonderclips (optional)
9 strips of fabric of your choice measuring 1.5”x 5” each
One 5”x 3”rectangle for the butterfly
One 5”x 3”rectangle of lightweight fusible interfacing
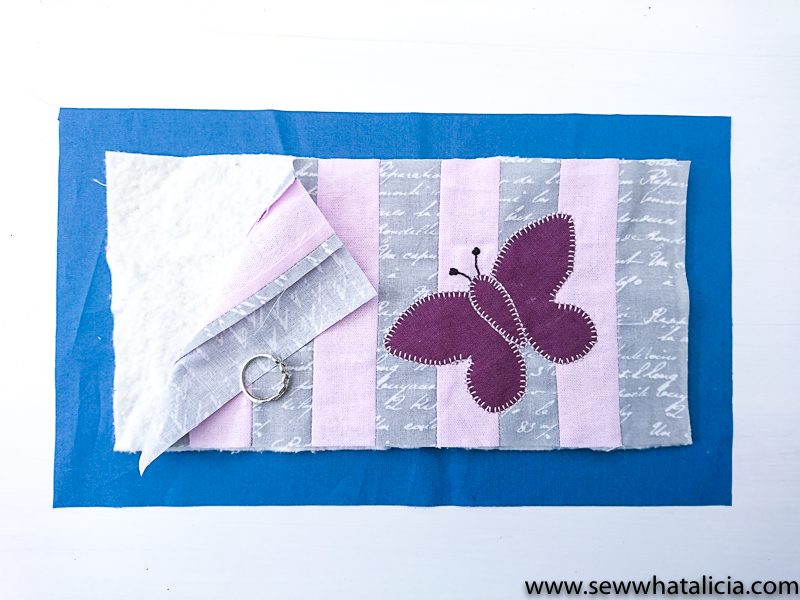
13”x 9”piece of fabric for the backing
11”x 7”piece of lightweight batting
Black cotton thread, needle and a cuppa
 Instructions:
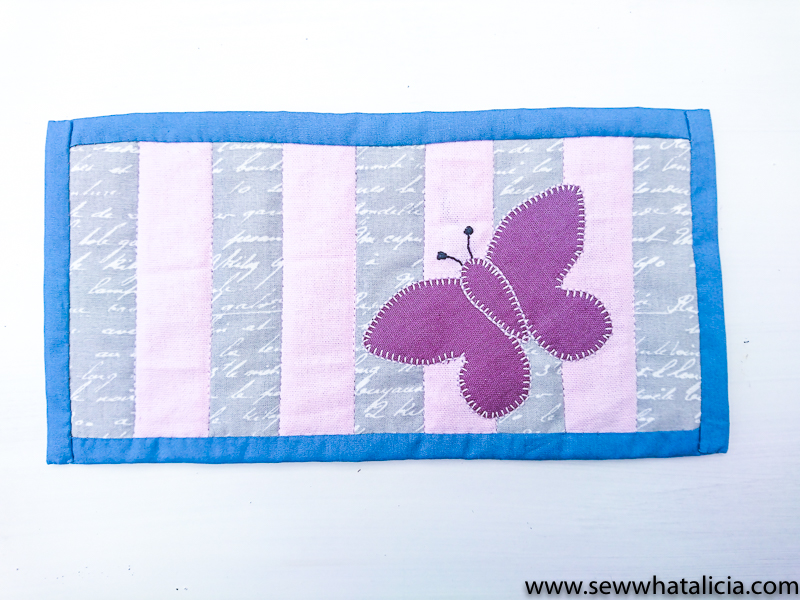
Start by taking the 9 strips of fabric and with right sides together and using a ¼”seam allowance, sew the strips together, press seams open on reverse.

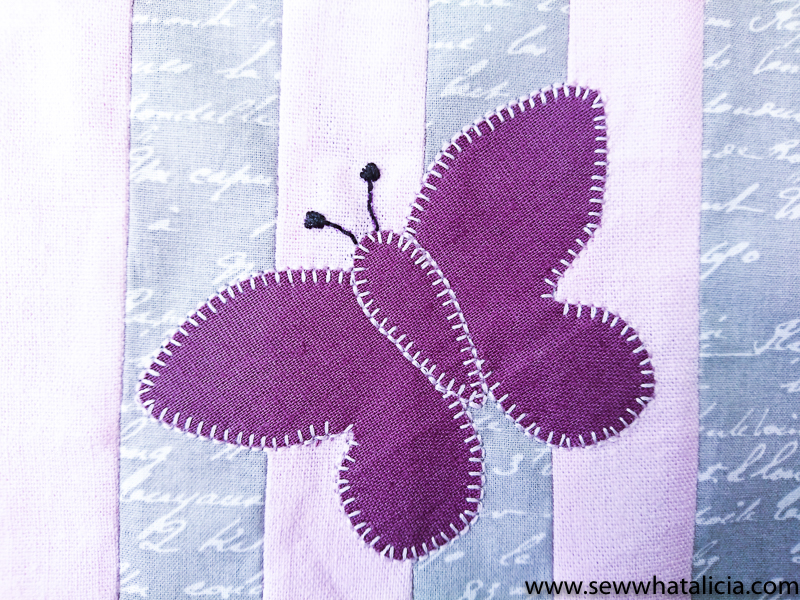
I chose a striking purple fabric, and kept it all one color. Start by tracing the butterfly template onto your fusible interfacing, then fuse this to the wrong side of your butterfly fabric.
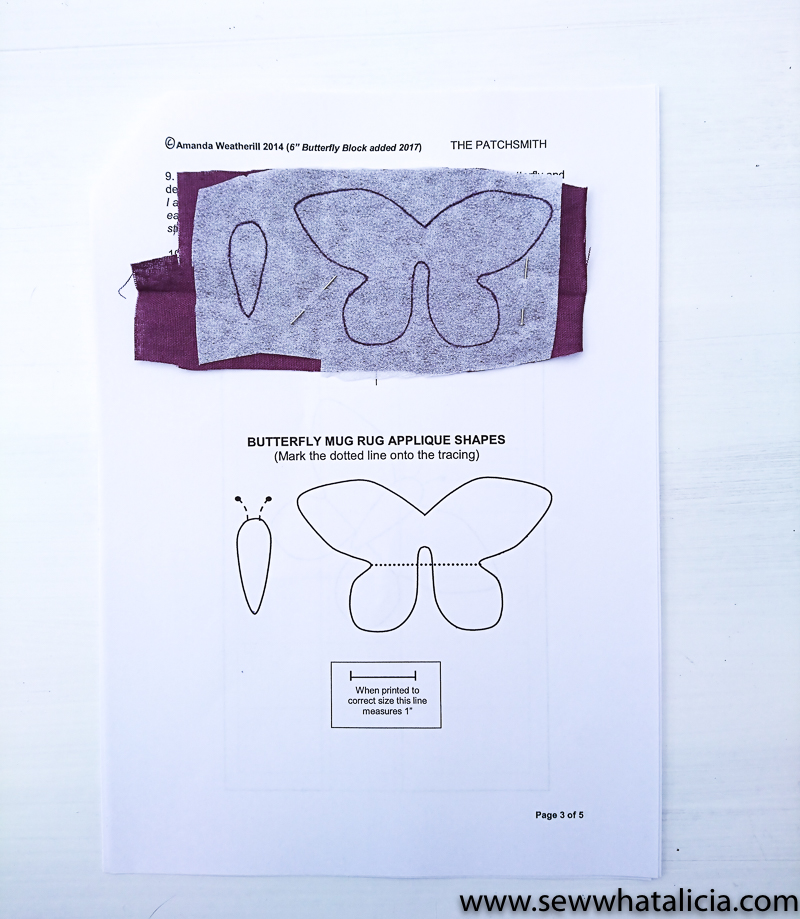 Cut around your template, and position in place with a pin onto the top of the mug rug.
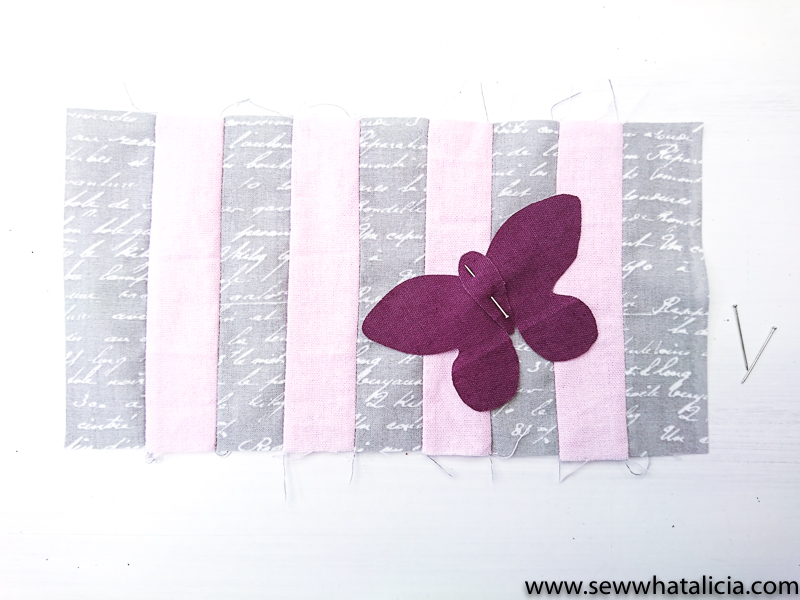 Using a short blanket stitch, either by hand or machine, stitch around the appliqué, I used a contrasting pink thread. Using a back stitch in black thread I added the butterfly antennae.
 Place the larger backing fabric at the bottom, wrong side facing up, place your batting on top of this, then place the top of the mug rug on top.
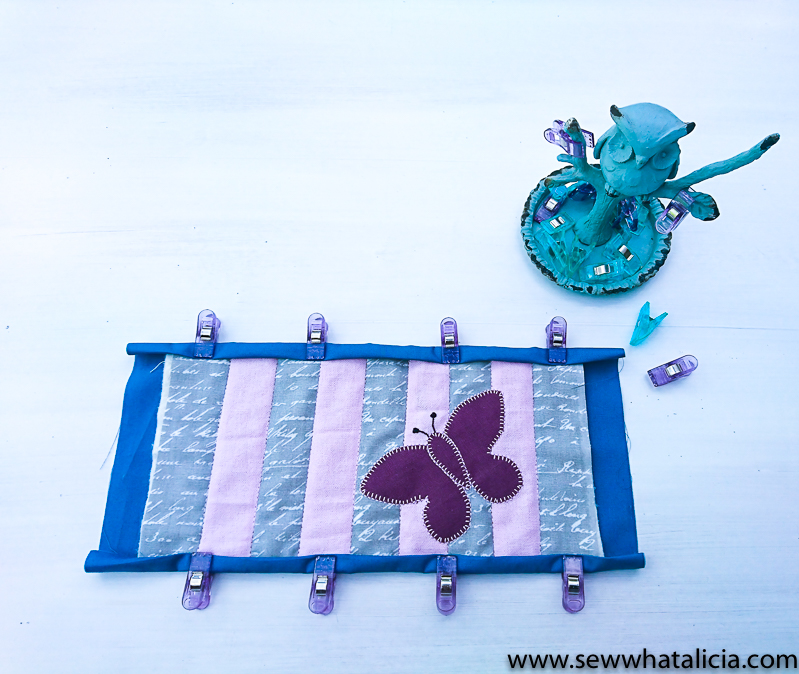
 To keep things simple (not having to change the foot on your machine) I kept the quilting in lines, so that this can be completed using your usual machine foot. I stitched in the ditch (along the coins where the strips were sewn together.)
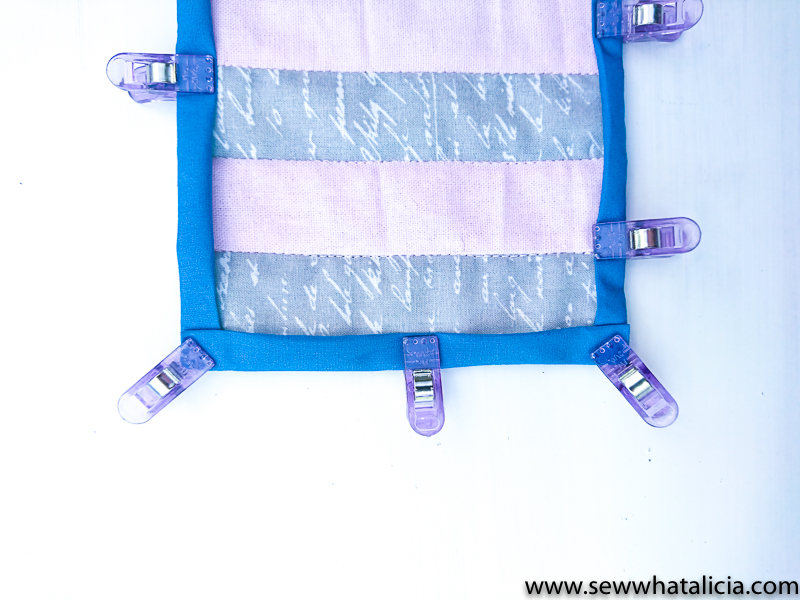
If you haven’t used bias binding before, this is a great alternative way of doing it, because we cut the backing fabric larger than the top, we can now just fold the edges twice each and pin in place.
**We love Wonderclips to hold the binding in place while you sew.
 The corners are simple too. See the photo below.
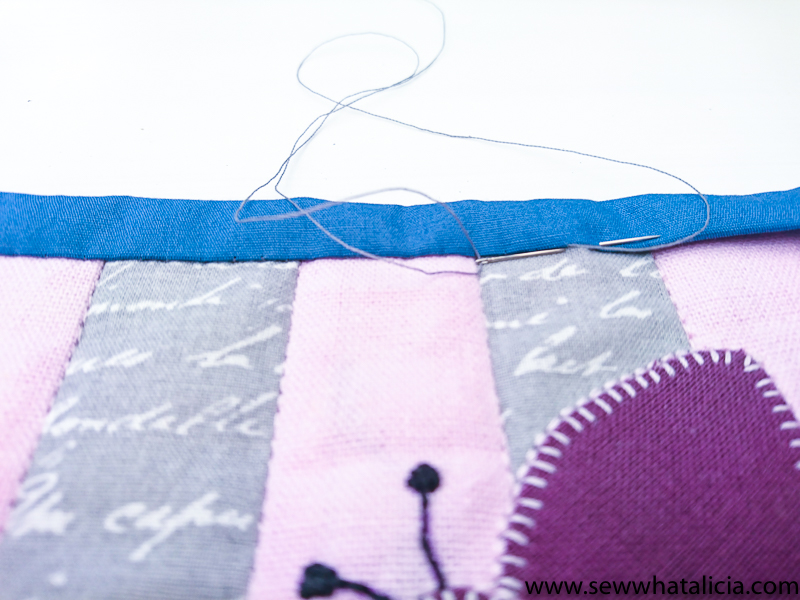
 Using a neutral thread and a fine needle, sew your binding in place.
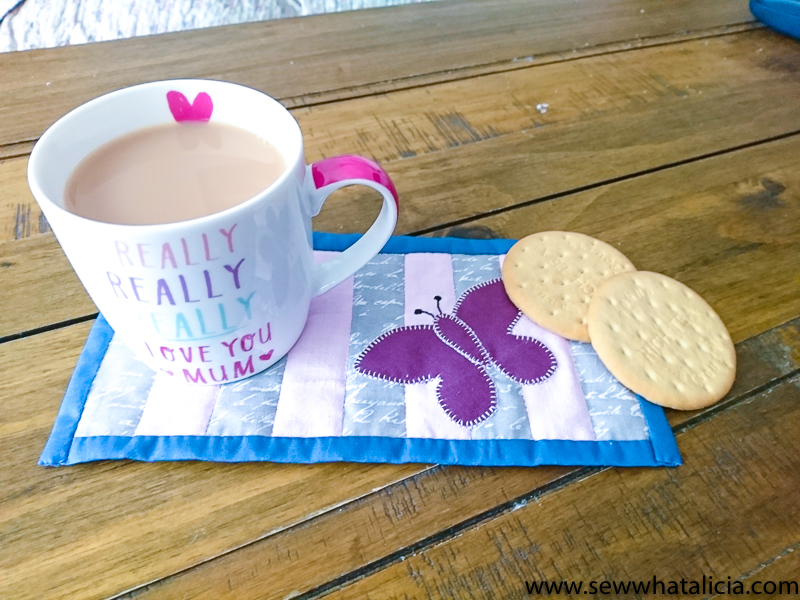
 And now you’re ready for the cup of tea, and the best thing is there is room on there for a biscuit or two!
 Make sure and visit Michelle on Instagram and check out her blog for more of her great tutorials!


Leave a Reply