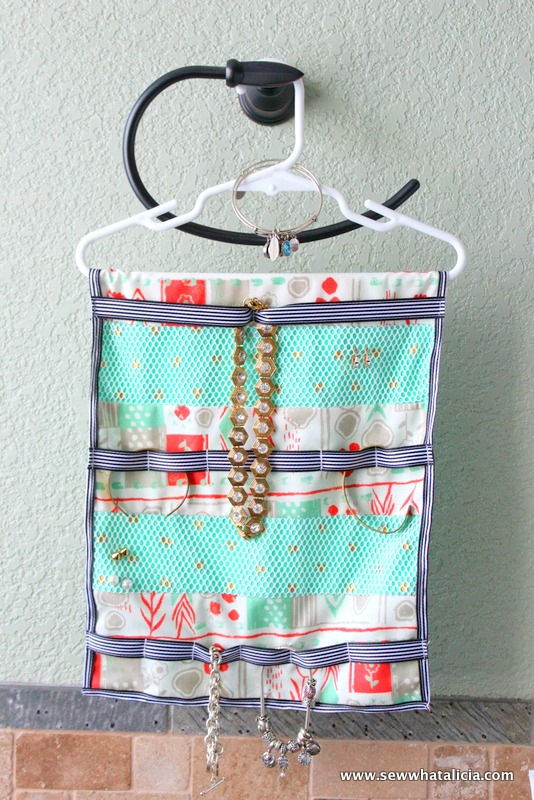
Hanging Jewelry Organizer Tutorial
I am smack dab in the middle of a Stella and Dot party and as I am checking out all the amazing jewelry I realized I have nowhere to put all my jewelry! (You can check out my Stella party HERE!) So I marinated on the thought for a few days and I came up with the perfect storage solution and I made this hanging jewelry organizer!
Hanging Jewelry Organizer Tutorial
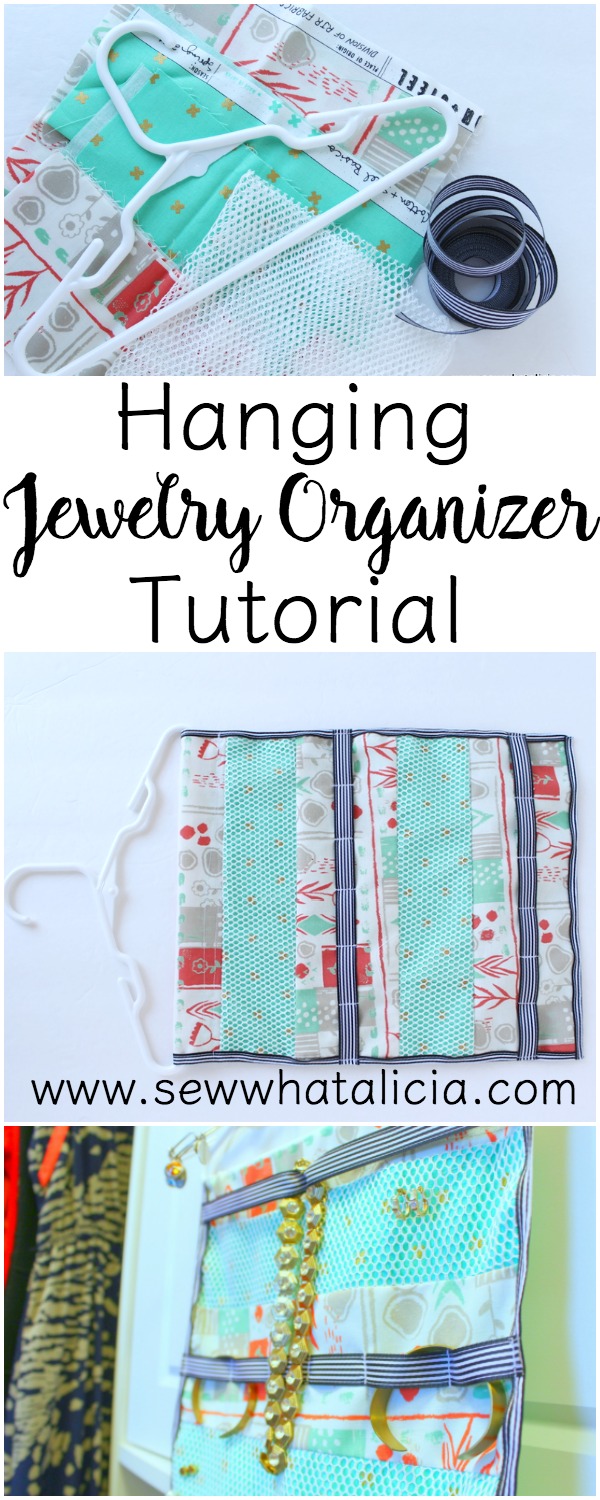
Supplies: (Click the title to be taken to the product)
1 Fat Quarter
Baby Hanger (This is a do as I say not as I do moment. As I was taking photos I realized I totally should have used a pretty hanger. Something wood or velvet or basically anything other than what I used! So do that instead of what I did mmkay?)
Fabric Preparation:
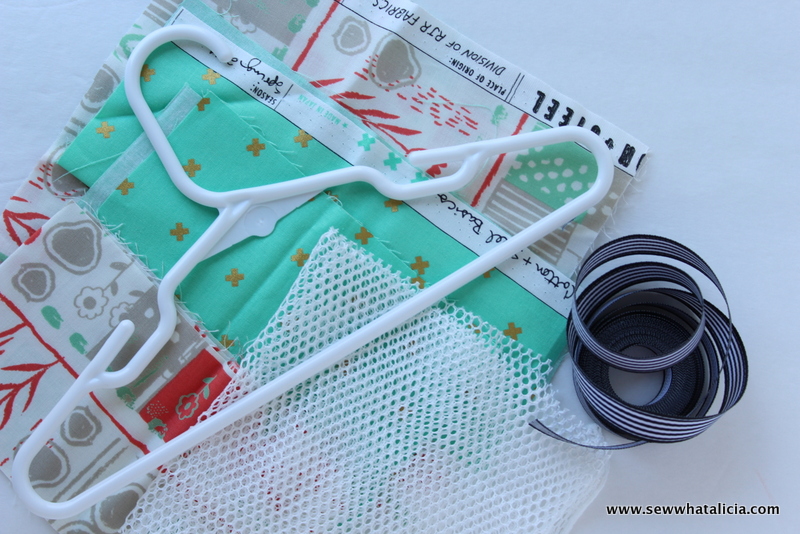
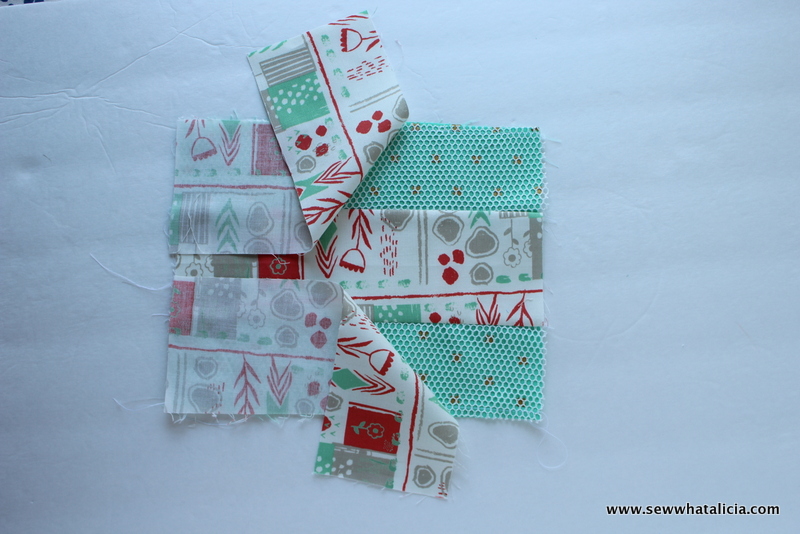
- Cut two mesh into strips measuring 11”x3″
- Cut two green strips measuring 11”x3″
- Cut three patterned strips measuring 11”x4″
Organizer Instructions:
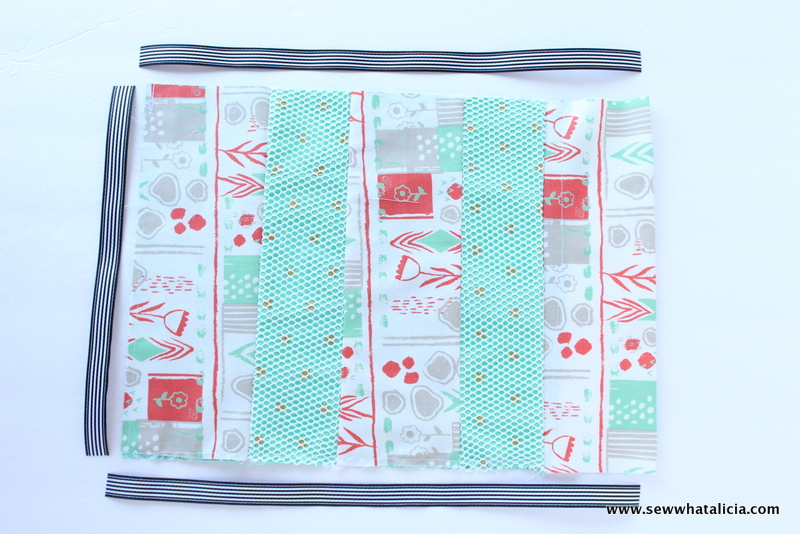
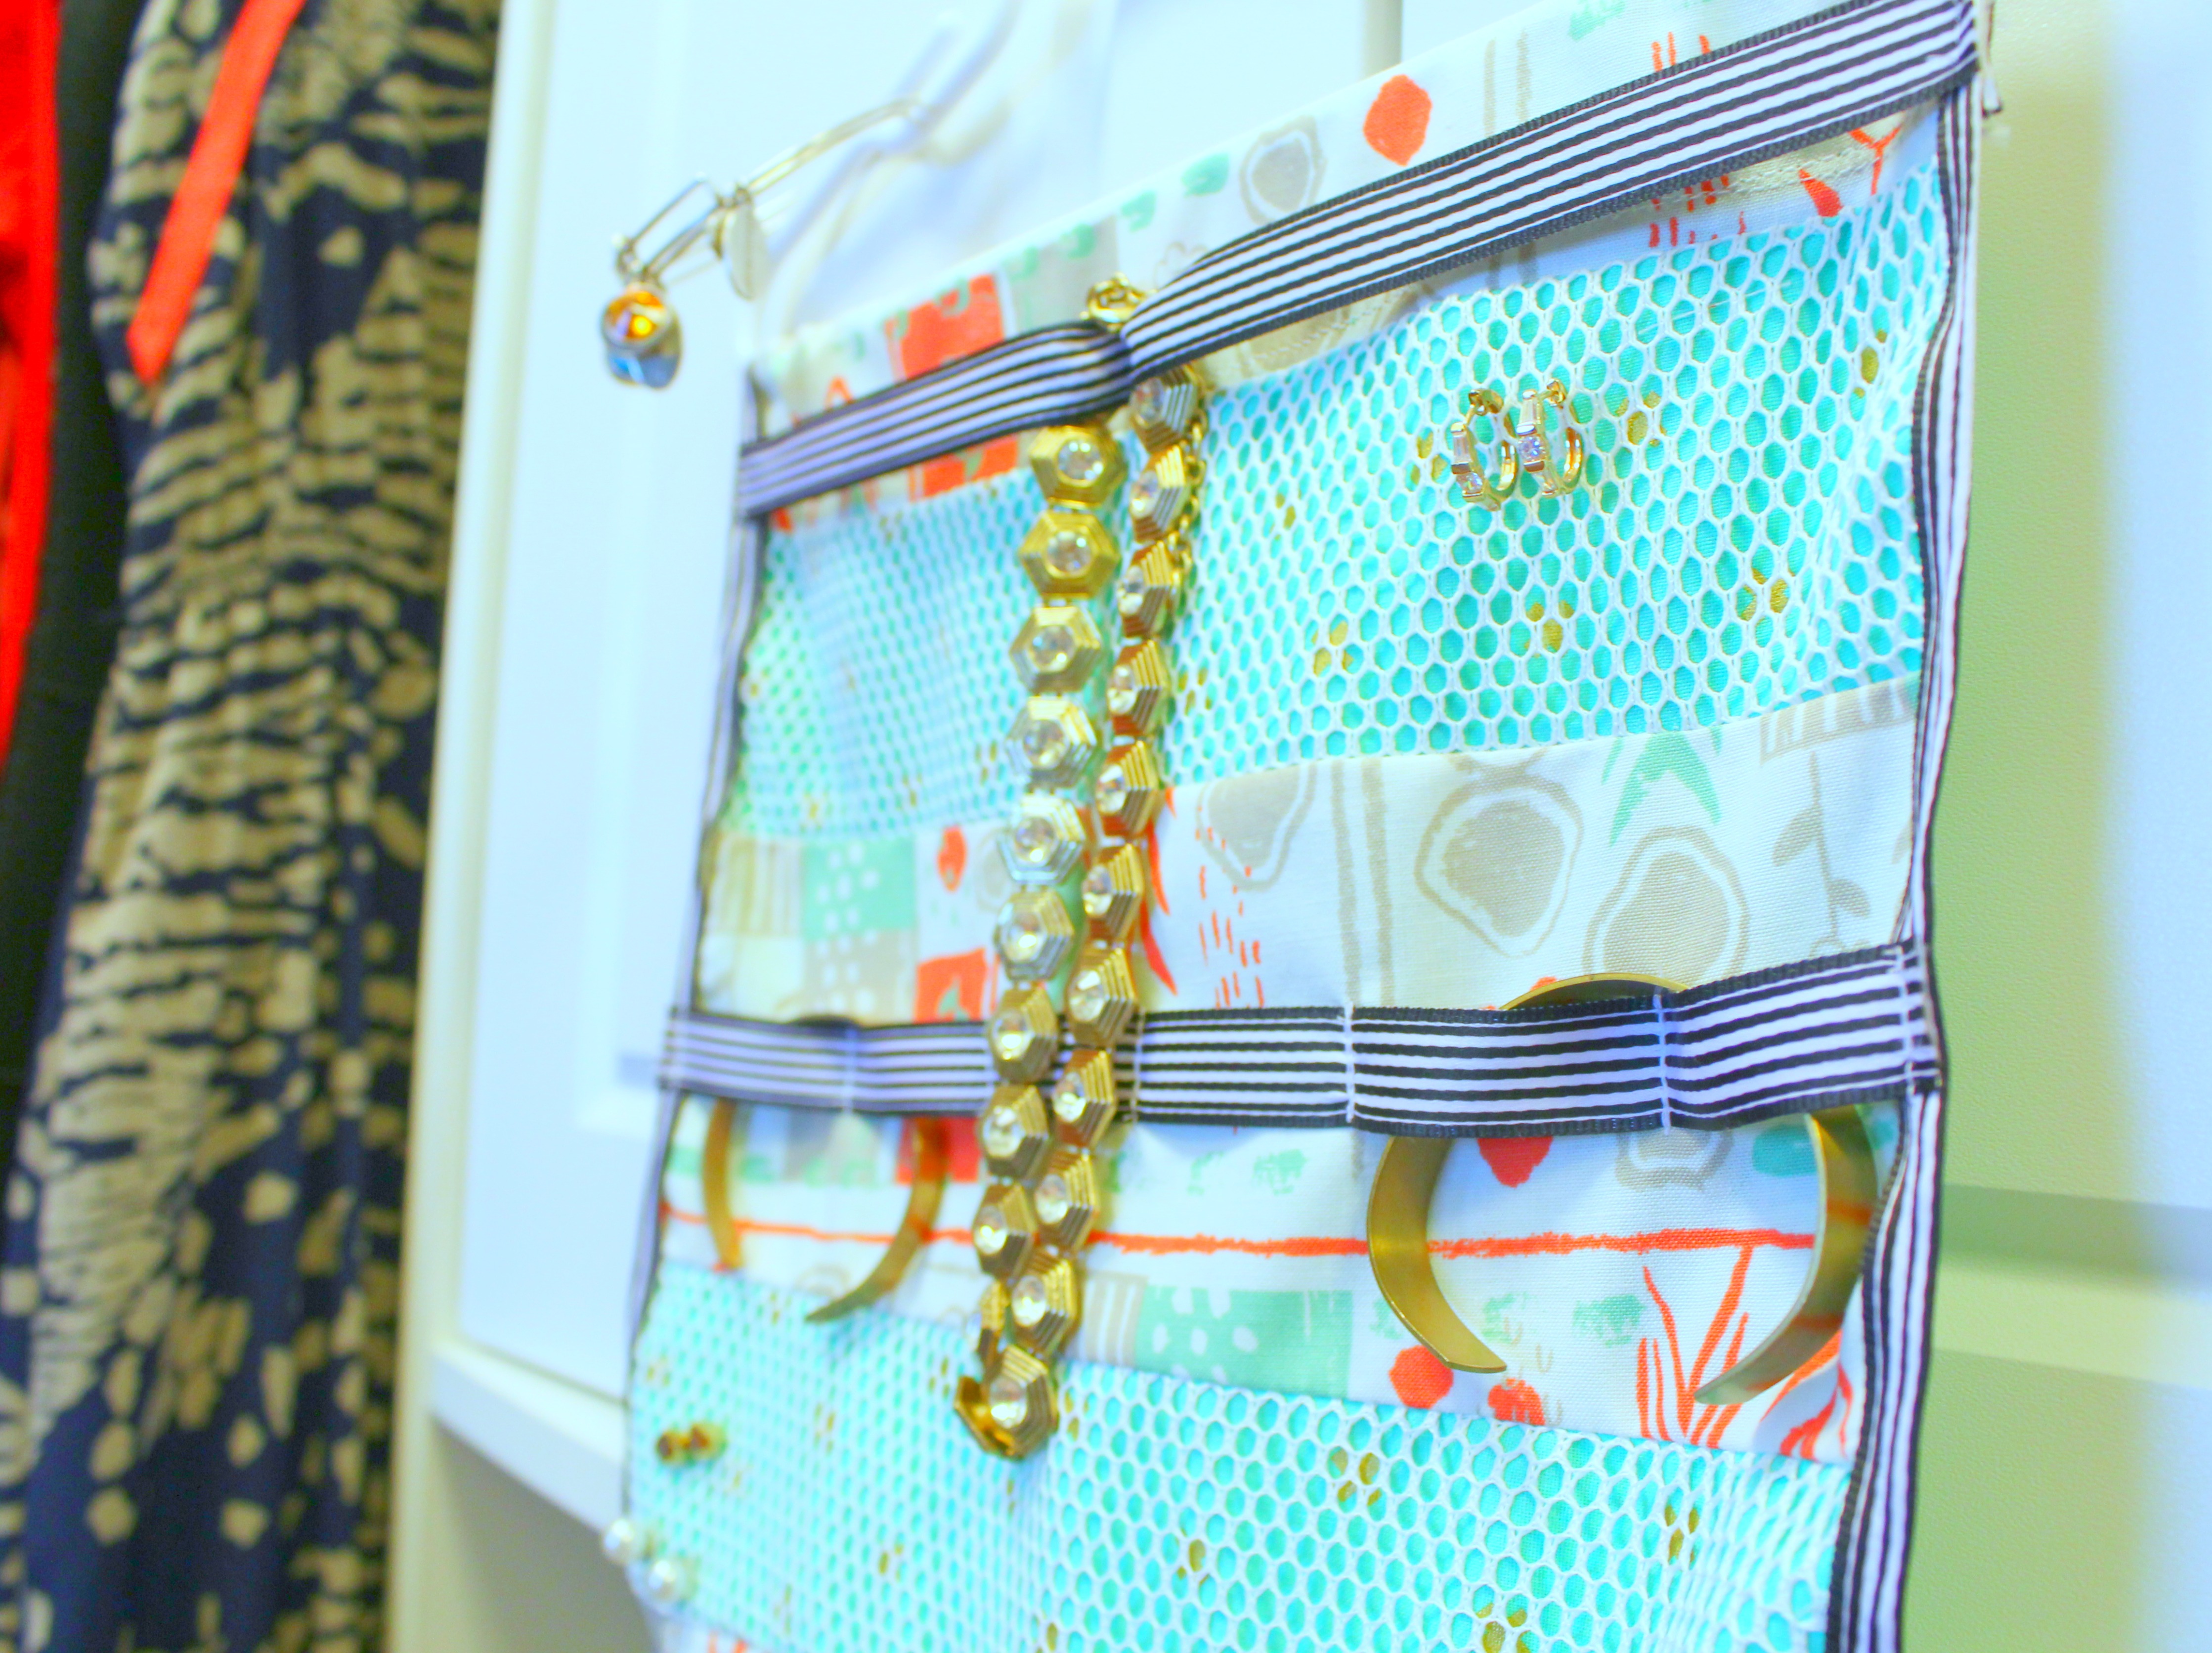
Top-stitch each mesh strip onto the front of the green strip.
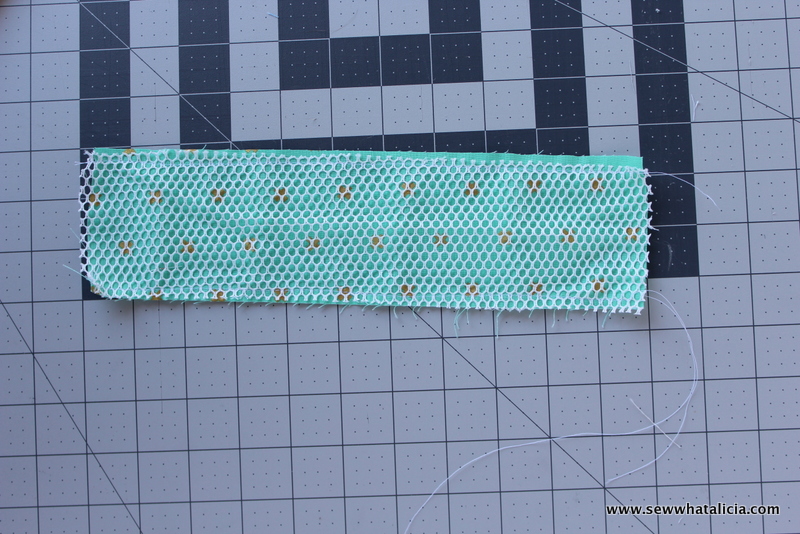
Sew the two green and mesh strips onto one of the patterned strips.
Add the remaining patterned strips on either side of the mesh strips.
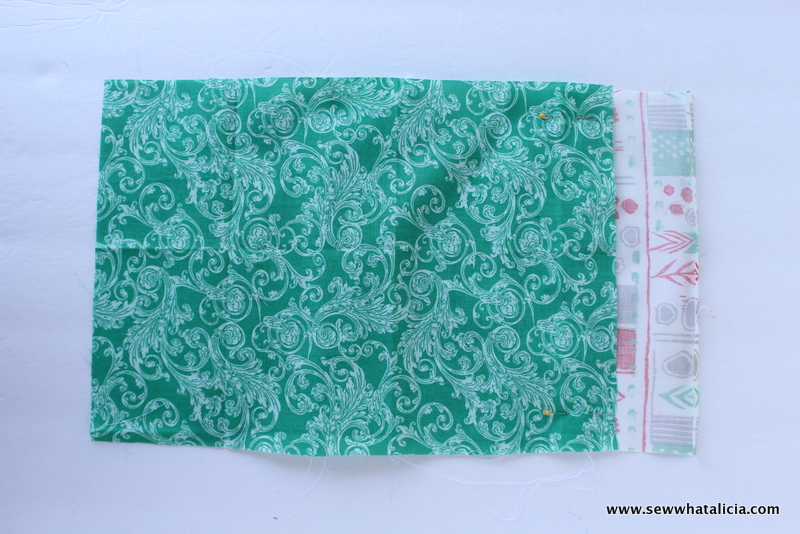
Line your fat quarter up on the backside of the piece. Cut it to fit exactly except at the top. Leave about 2″ to fold this piece over the hanger. Press the top edge of the front piece under by 1/4″ (you can see this pictured below.)
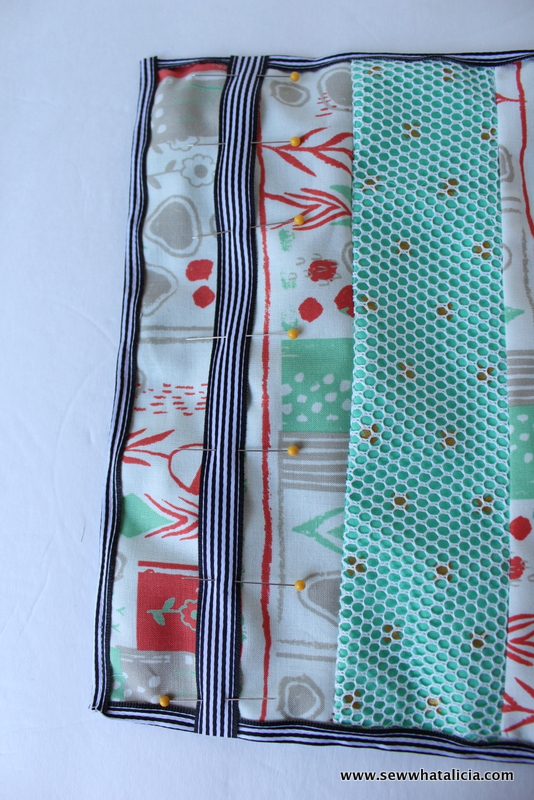
Now grab your ribbon and cut three strips (as pictured below.)
Now attach the ribbon to the back of the piece leaving half hanging off the edge.
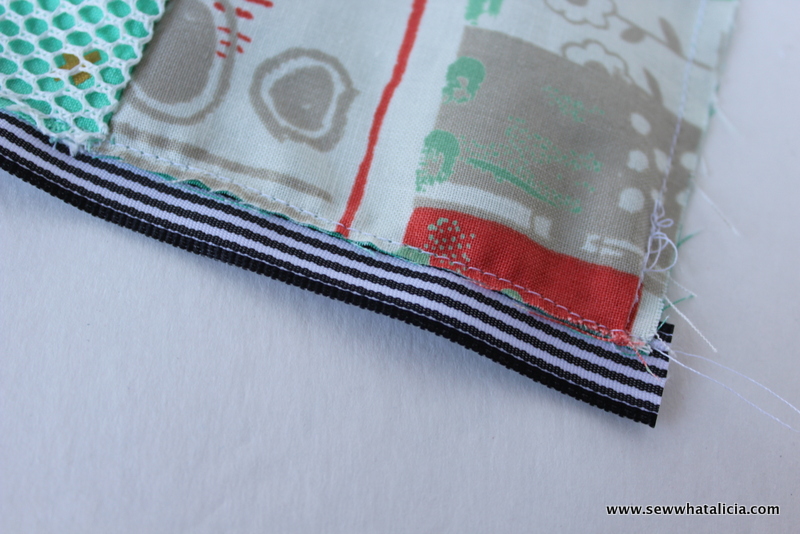
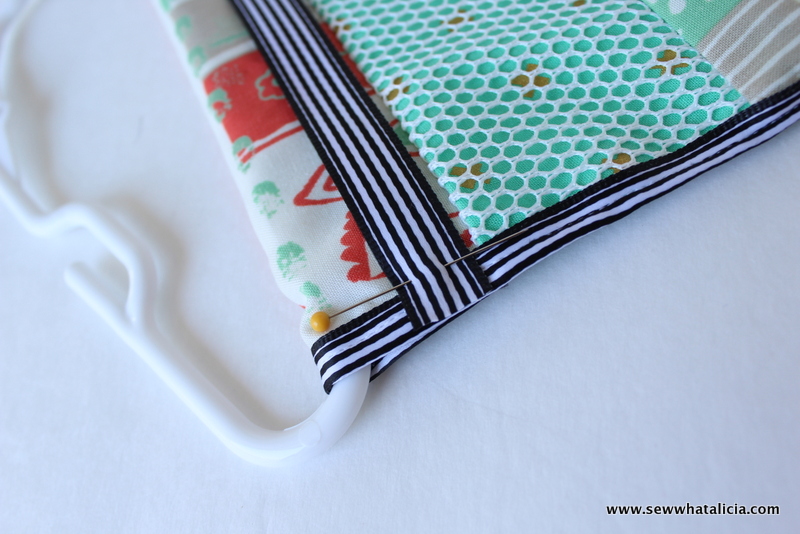
Now fold the ribbon over and attach it (like binding.) Do the sides first and then attach the bottom.
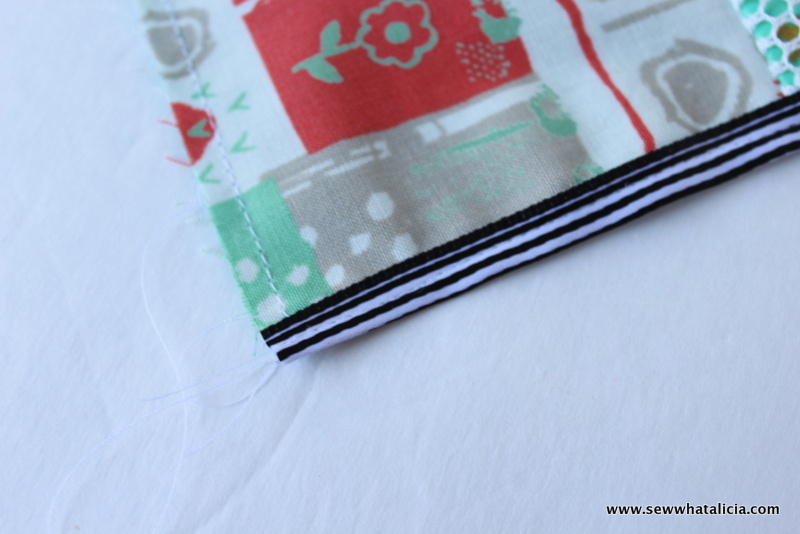
Once you have bound three sides we are ready to add the ribbons to hang the jewelry. Cut three more strips of ribbon that are the width of the piece. Pin the first ribbon in place every couple inches and then sew in place. Repeat with the second ribbon in the second empty spot. Don’t do the top ribbon yet, set it aside.
Before we add the last ribbon we will attach the organizer to the hanger. Fold the top piece over making sure that the portion that you pressed under is turned under the keep a clean edge on the back.
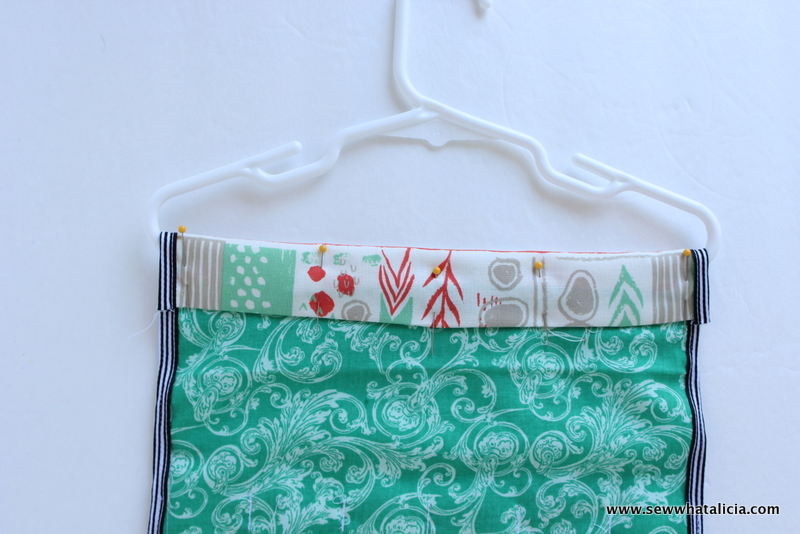
Now that the hanger is in place you can sew the last ribbon onto the front, use the ribbon to cover the seam you just created.
That is it! A finished hanging jewelry organizer!!
Where do you keep your jewelry? Share with me in the comments below.


Jess says
Nothing wrong with your white hanger… That’s what all of mine look like in my closet, so this would work great… Thanks for the awesome idea!!!
sewwhatalicia says
Thanks Jess! I would love to see a pic if you decide to make one!! Thanks for stopping by!
Rhonda Wheeler says
Hi guys! I have had the pleasure of being Alicia’s Stella and Dot stylist! If you would like to order some amazing jewelry to put in this fabulous organizer, here is the link to her show! https://www.stelladot.com/ts/8ysl6
PM me if you have any questions or need any help ordering!! ???