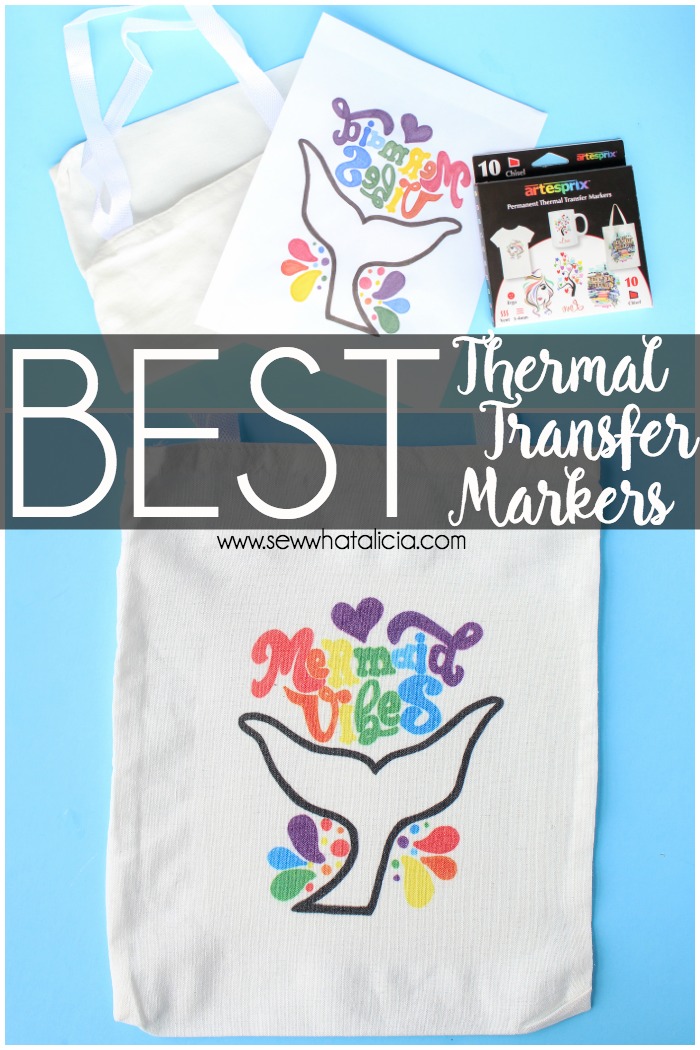
Best Fabric Markers: Artesprix Marker Review
I am excited to share these fun thermal transfer markers with you! They are great for adding a fun custom design to one of your fabric projects. You can also use them for ceramics (but I have not reviewed them on ceramics.) These are so easy to use and I can’t wait to show you how this fun project turned out. Here are the best fabric markers, an Artesprix marker review.
Best Fabric Markers: Artesprix Marker Review
Looking for the space shirts?!?! Read this tutorial and then head over to the Thermoweb blog for the templates for the space shirts in the video!!
Supplies:
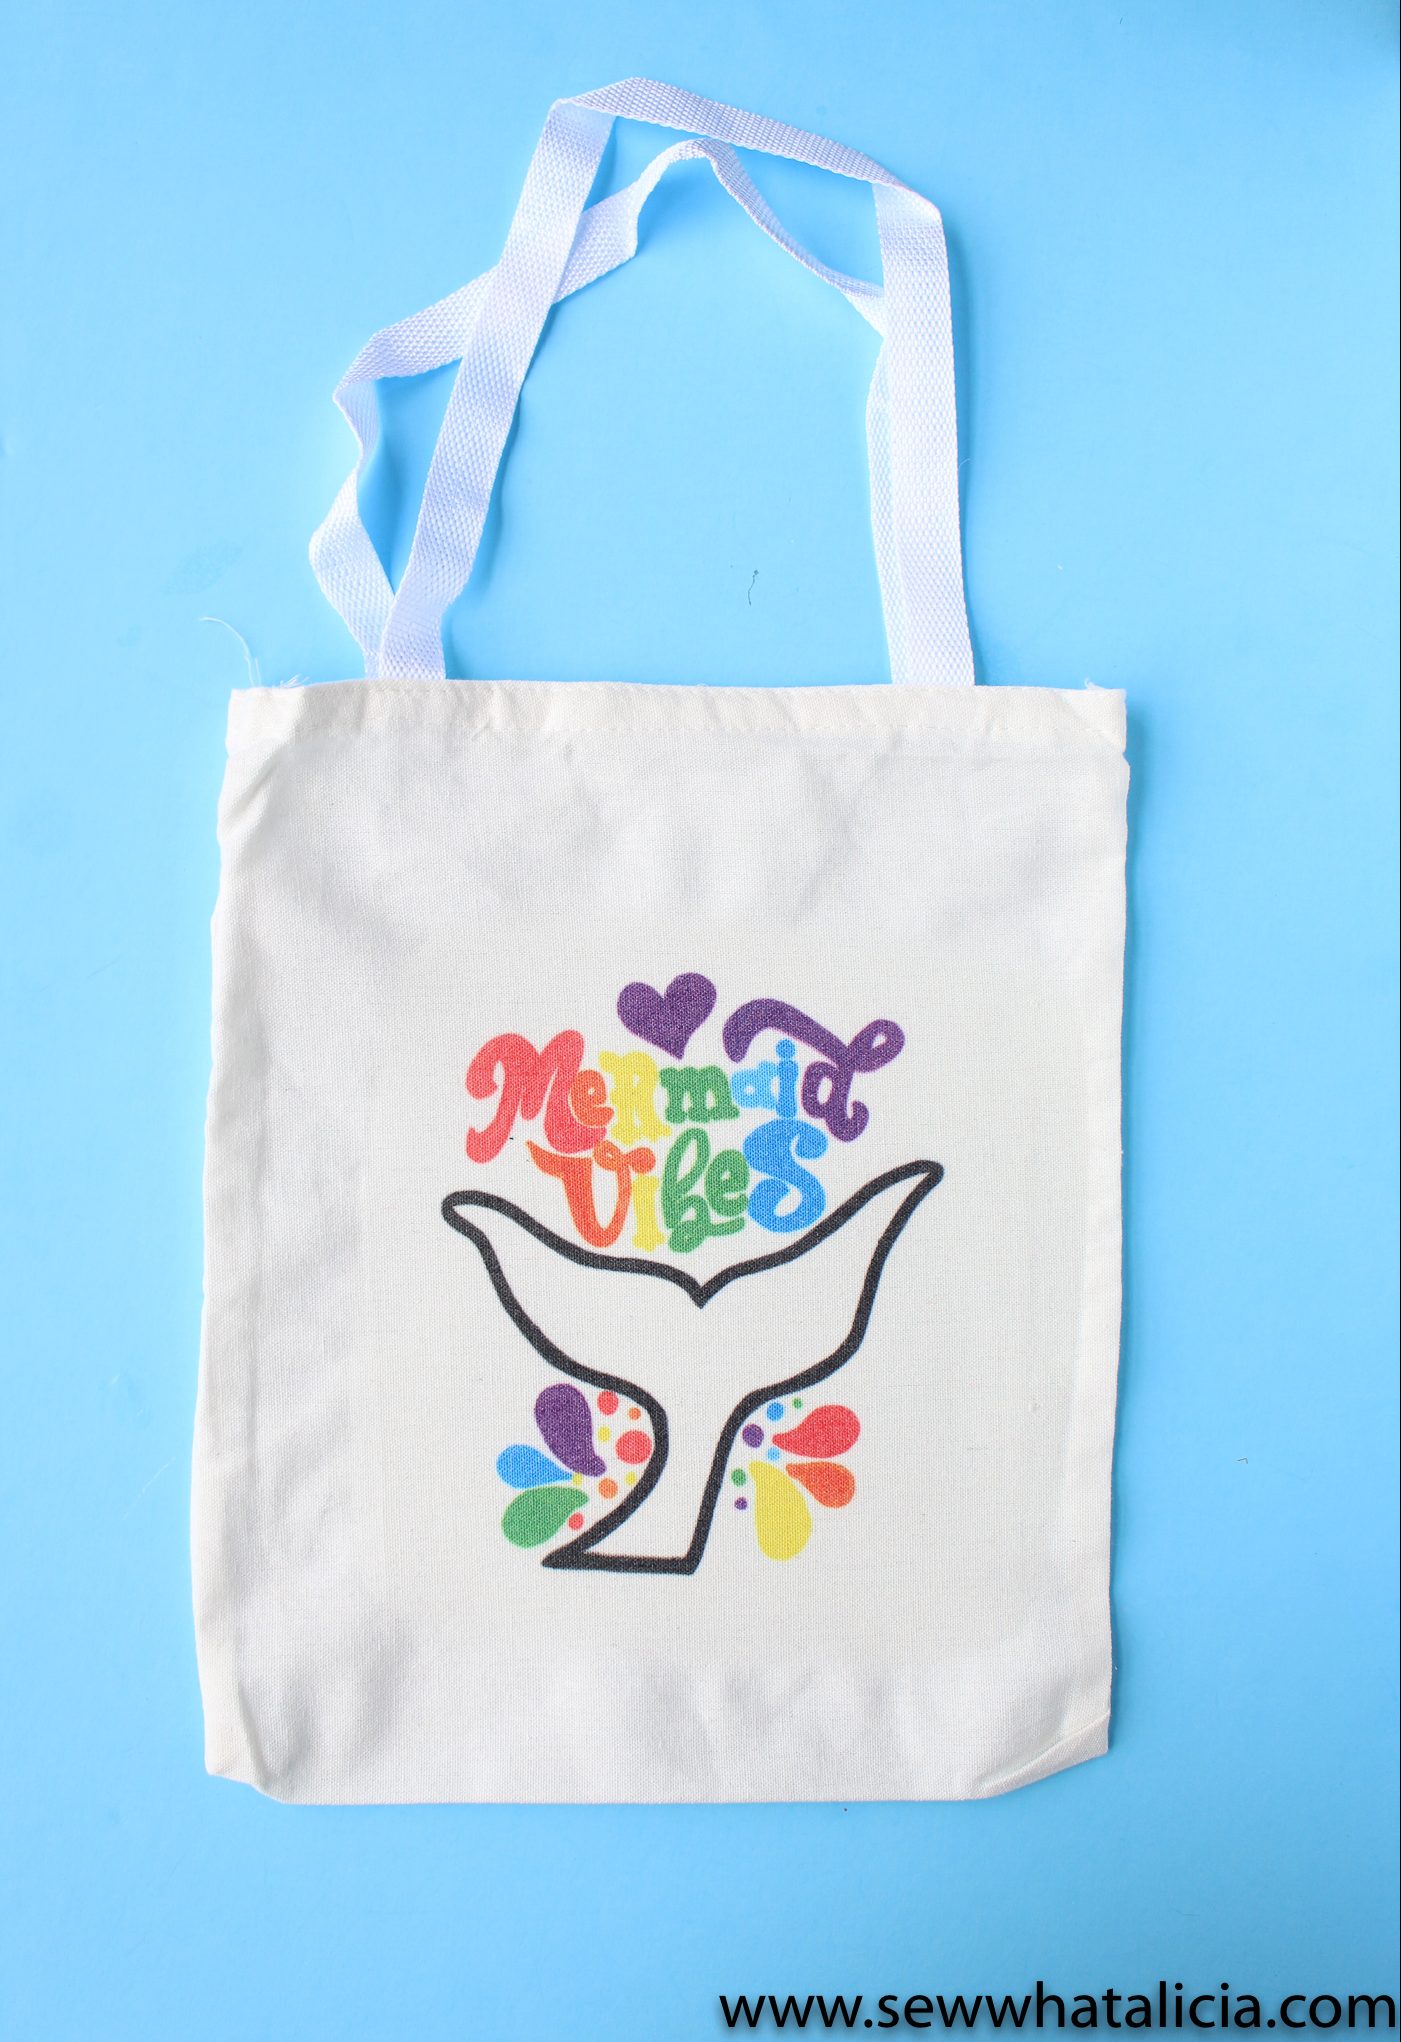
Fabric item – I used these totes. (Note: These are not meant for use on cotton. Use them on polyester for best results.) Or make your own tote with THIS tutorial.

Instructions:
Print your favorite coloring sheet (like the mermaid one listed above) or just draw your own design on a piece of white copy paper. You can use any design but it is important to note that the image will be mirrored so if you have words you will want to draw them backwards.
If you are using the coloring sheet above go over the image with a pen pressing hard. This will give you a good outline to follow on the back. Or you can print the image mirrored if your printer has that option. Use the thermal transfer markers on the wrong side of the coloring sheet, the words and image will be backwards.
TIP: If the markers look streaky on the paper they will look streaky on the finished piece. To avoid streaking use several layers of marker.
While you are getting your design ready, warm up your heat source. I like the EasyPress because I can carefully control the temperature. The packaging has all the heat instructions so be sure to hang on to the box.
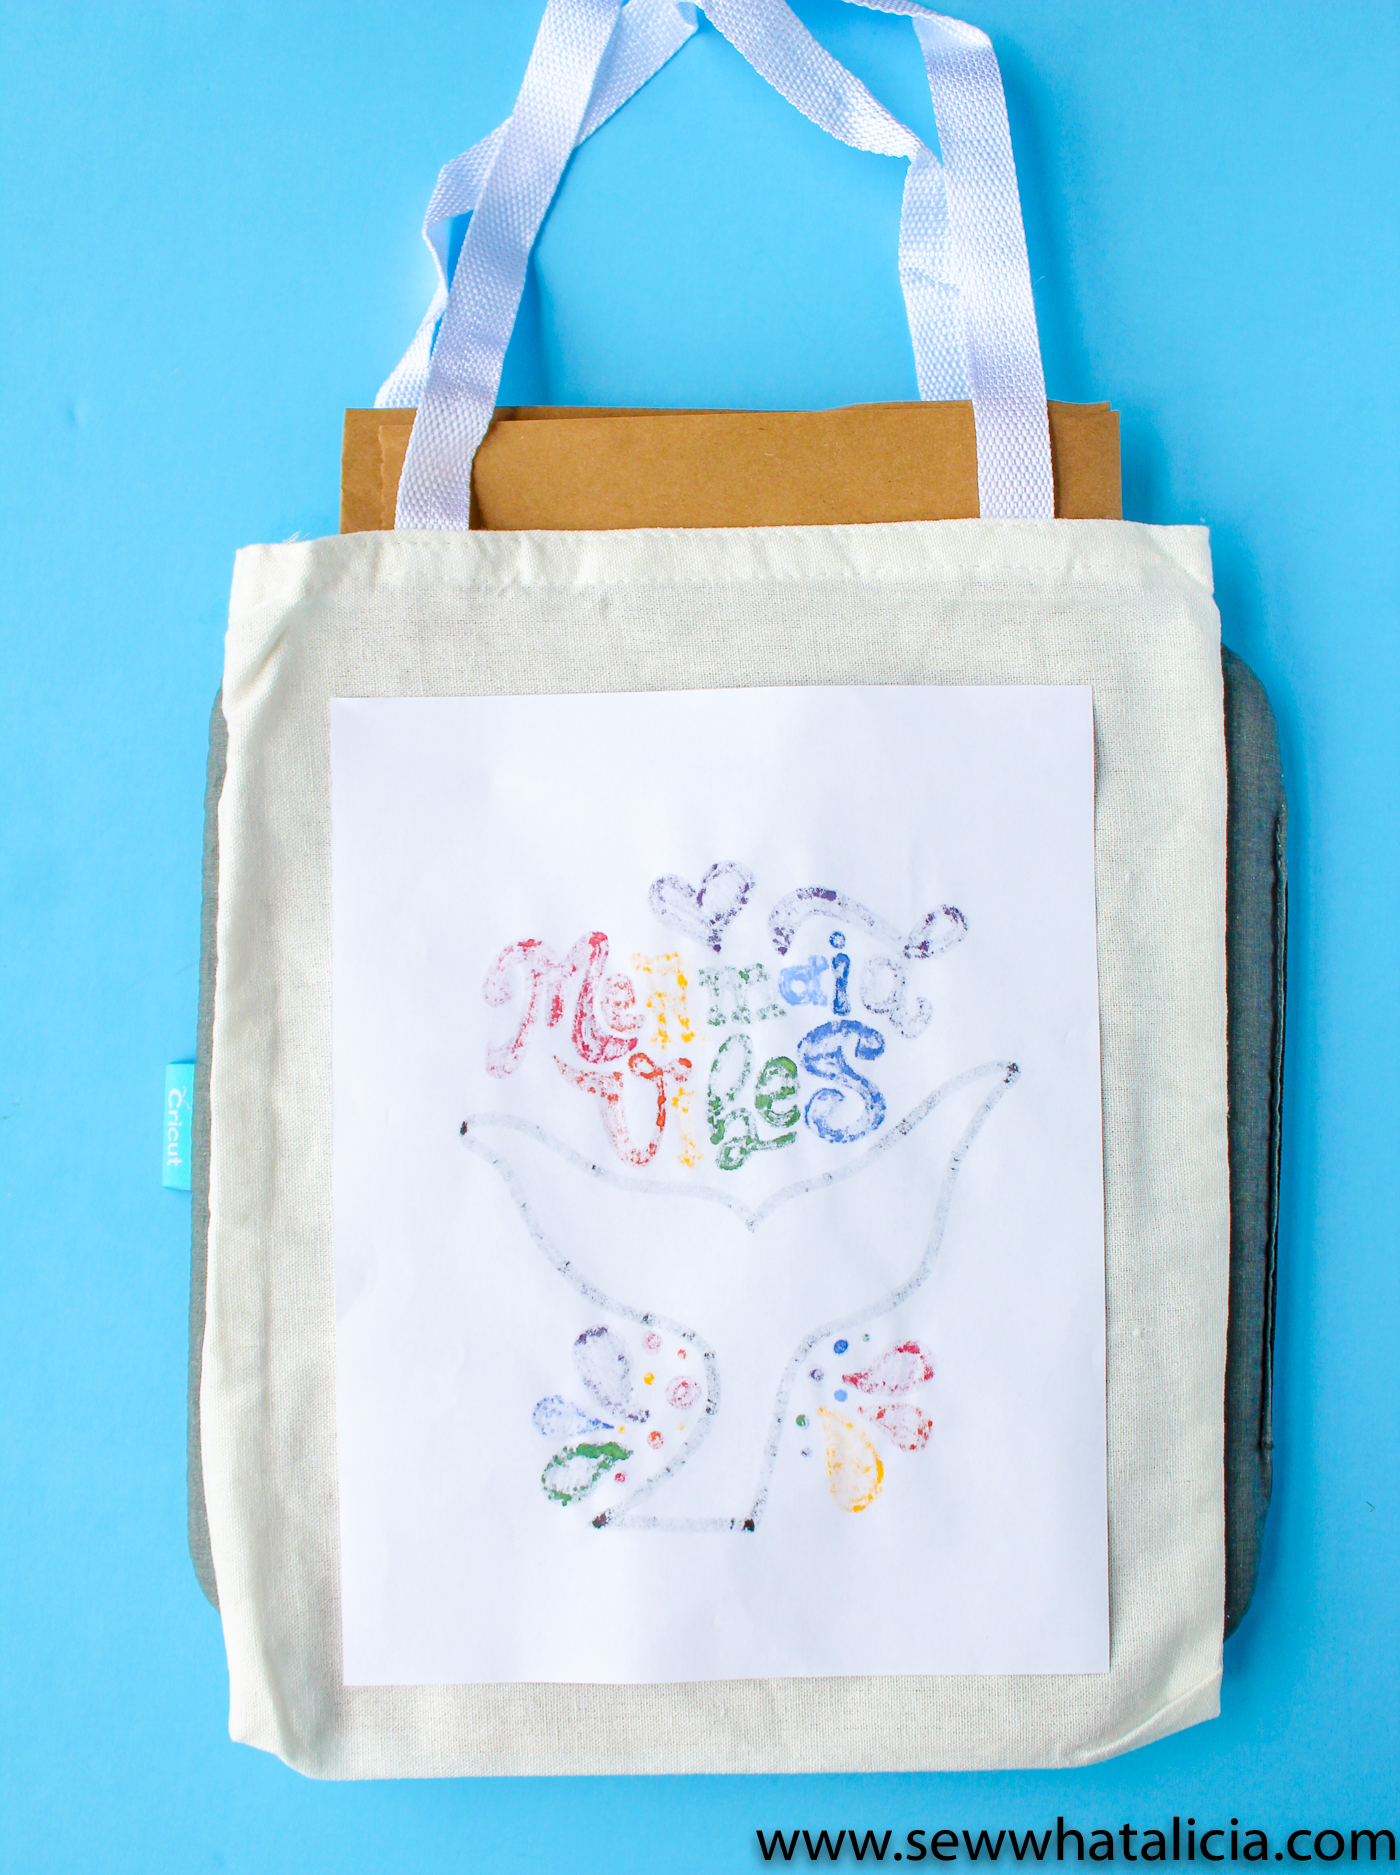
Line up your image onto your tote (or whatever you are transferring the image to.)
NOTE: These markers are not designed for cotton. Be sure to test a small section of the fabric with the marker before trying to finish a larger piece.
Use a piece of cardboard or butcher paper to keep the markers from bleeding through to the back of your tote. Press using the instructions on the box.
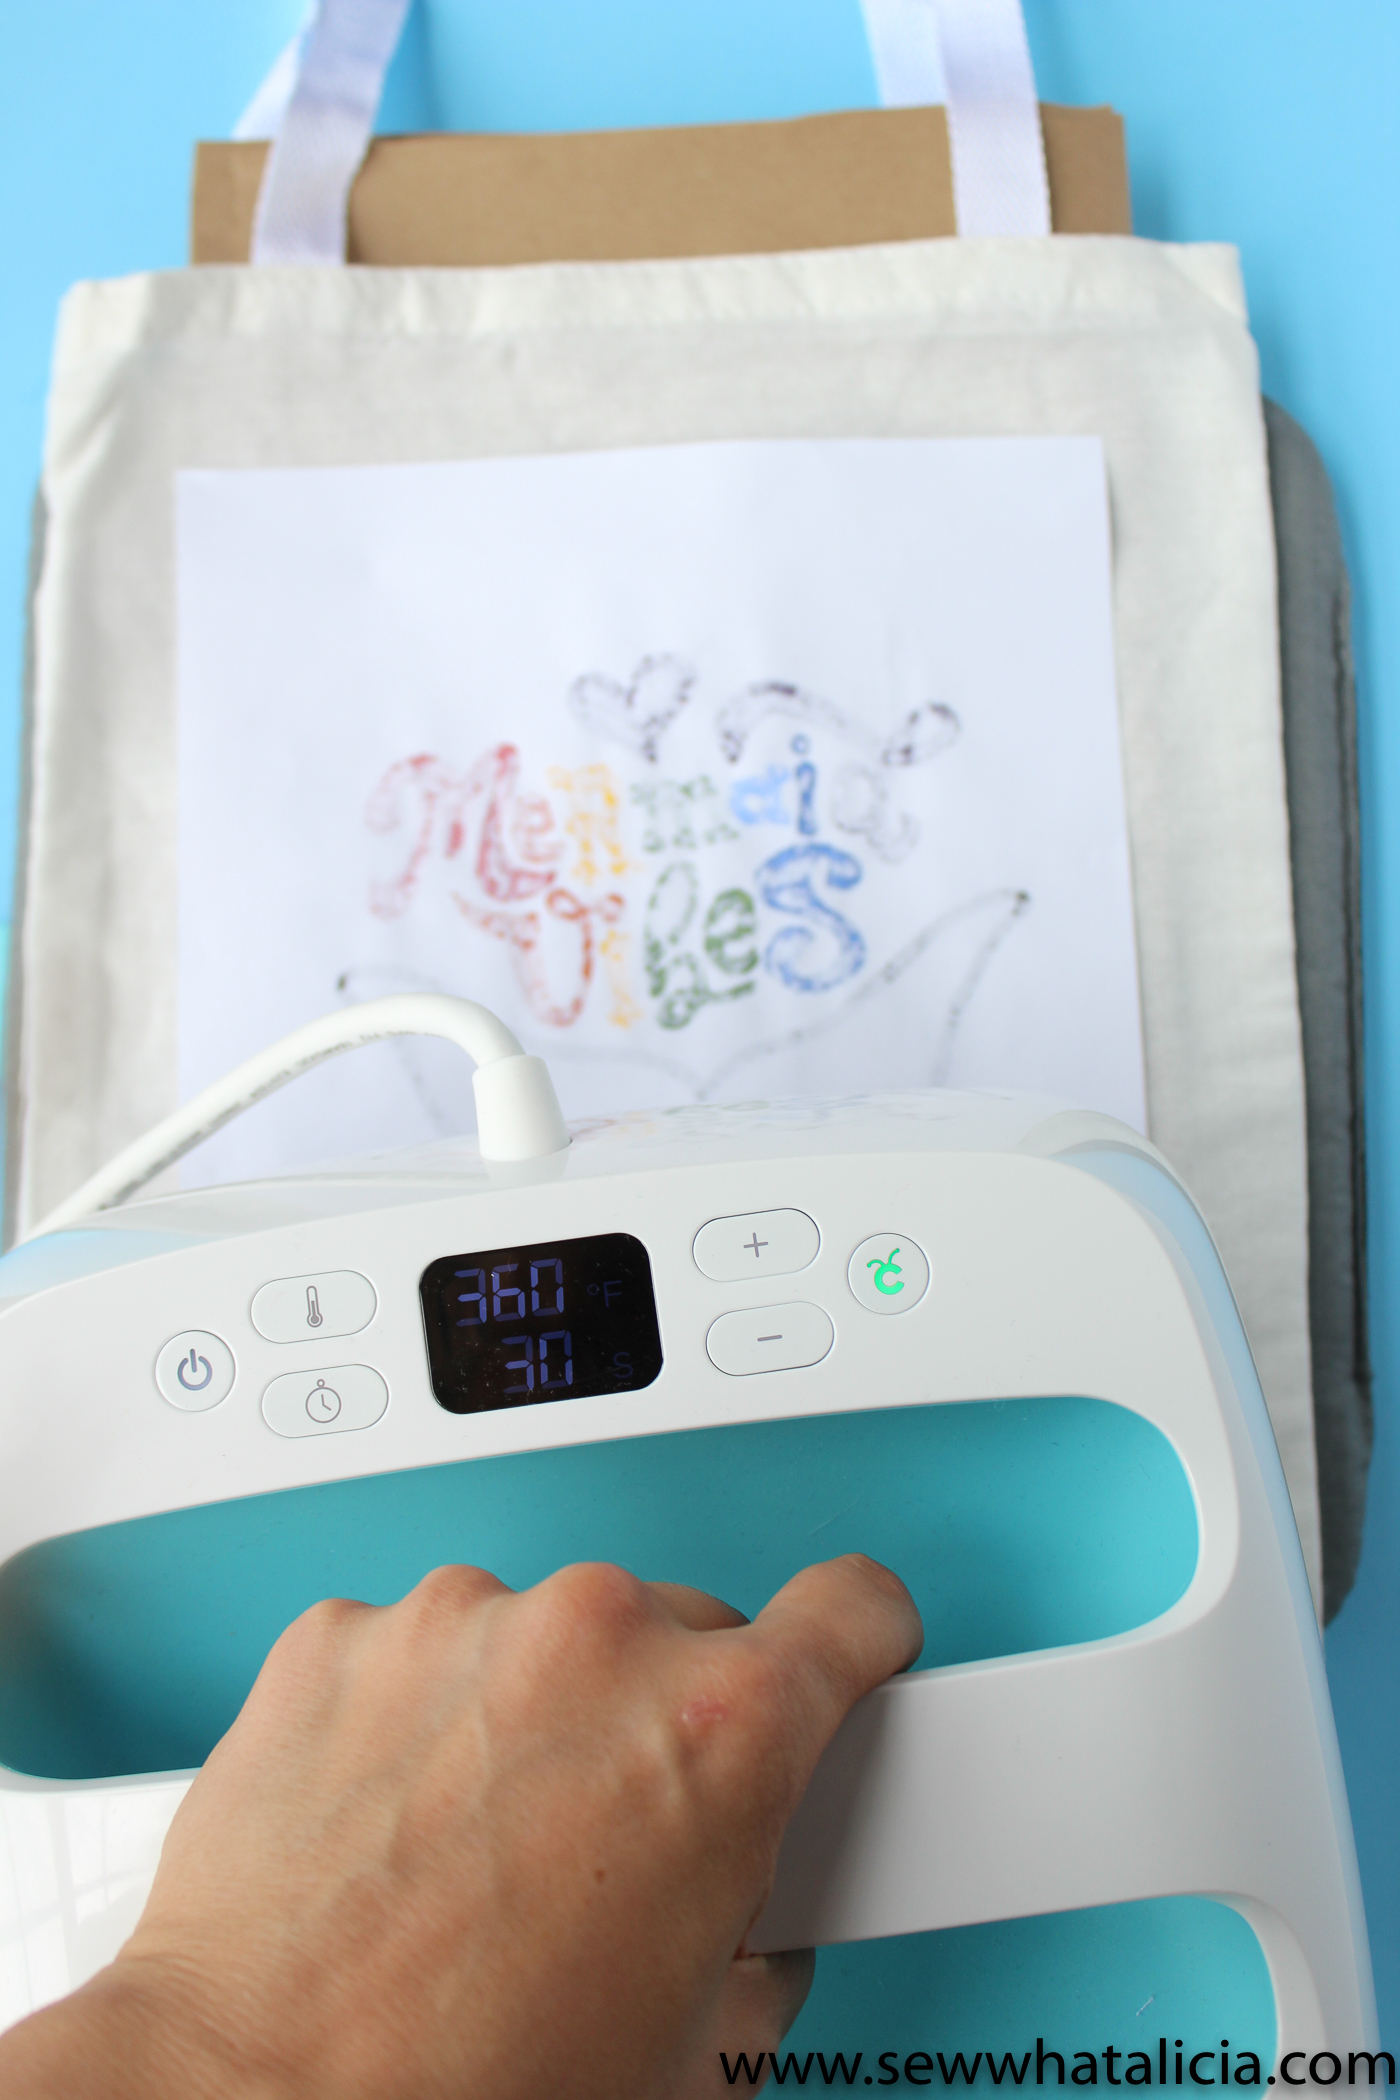
Remove the paper and check out your finished piece.
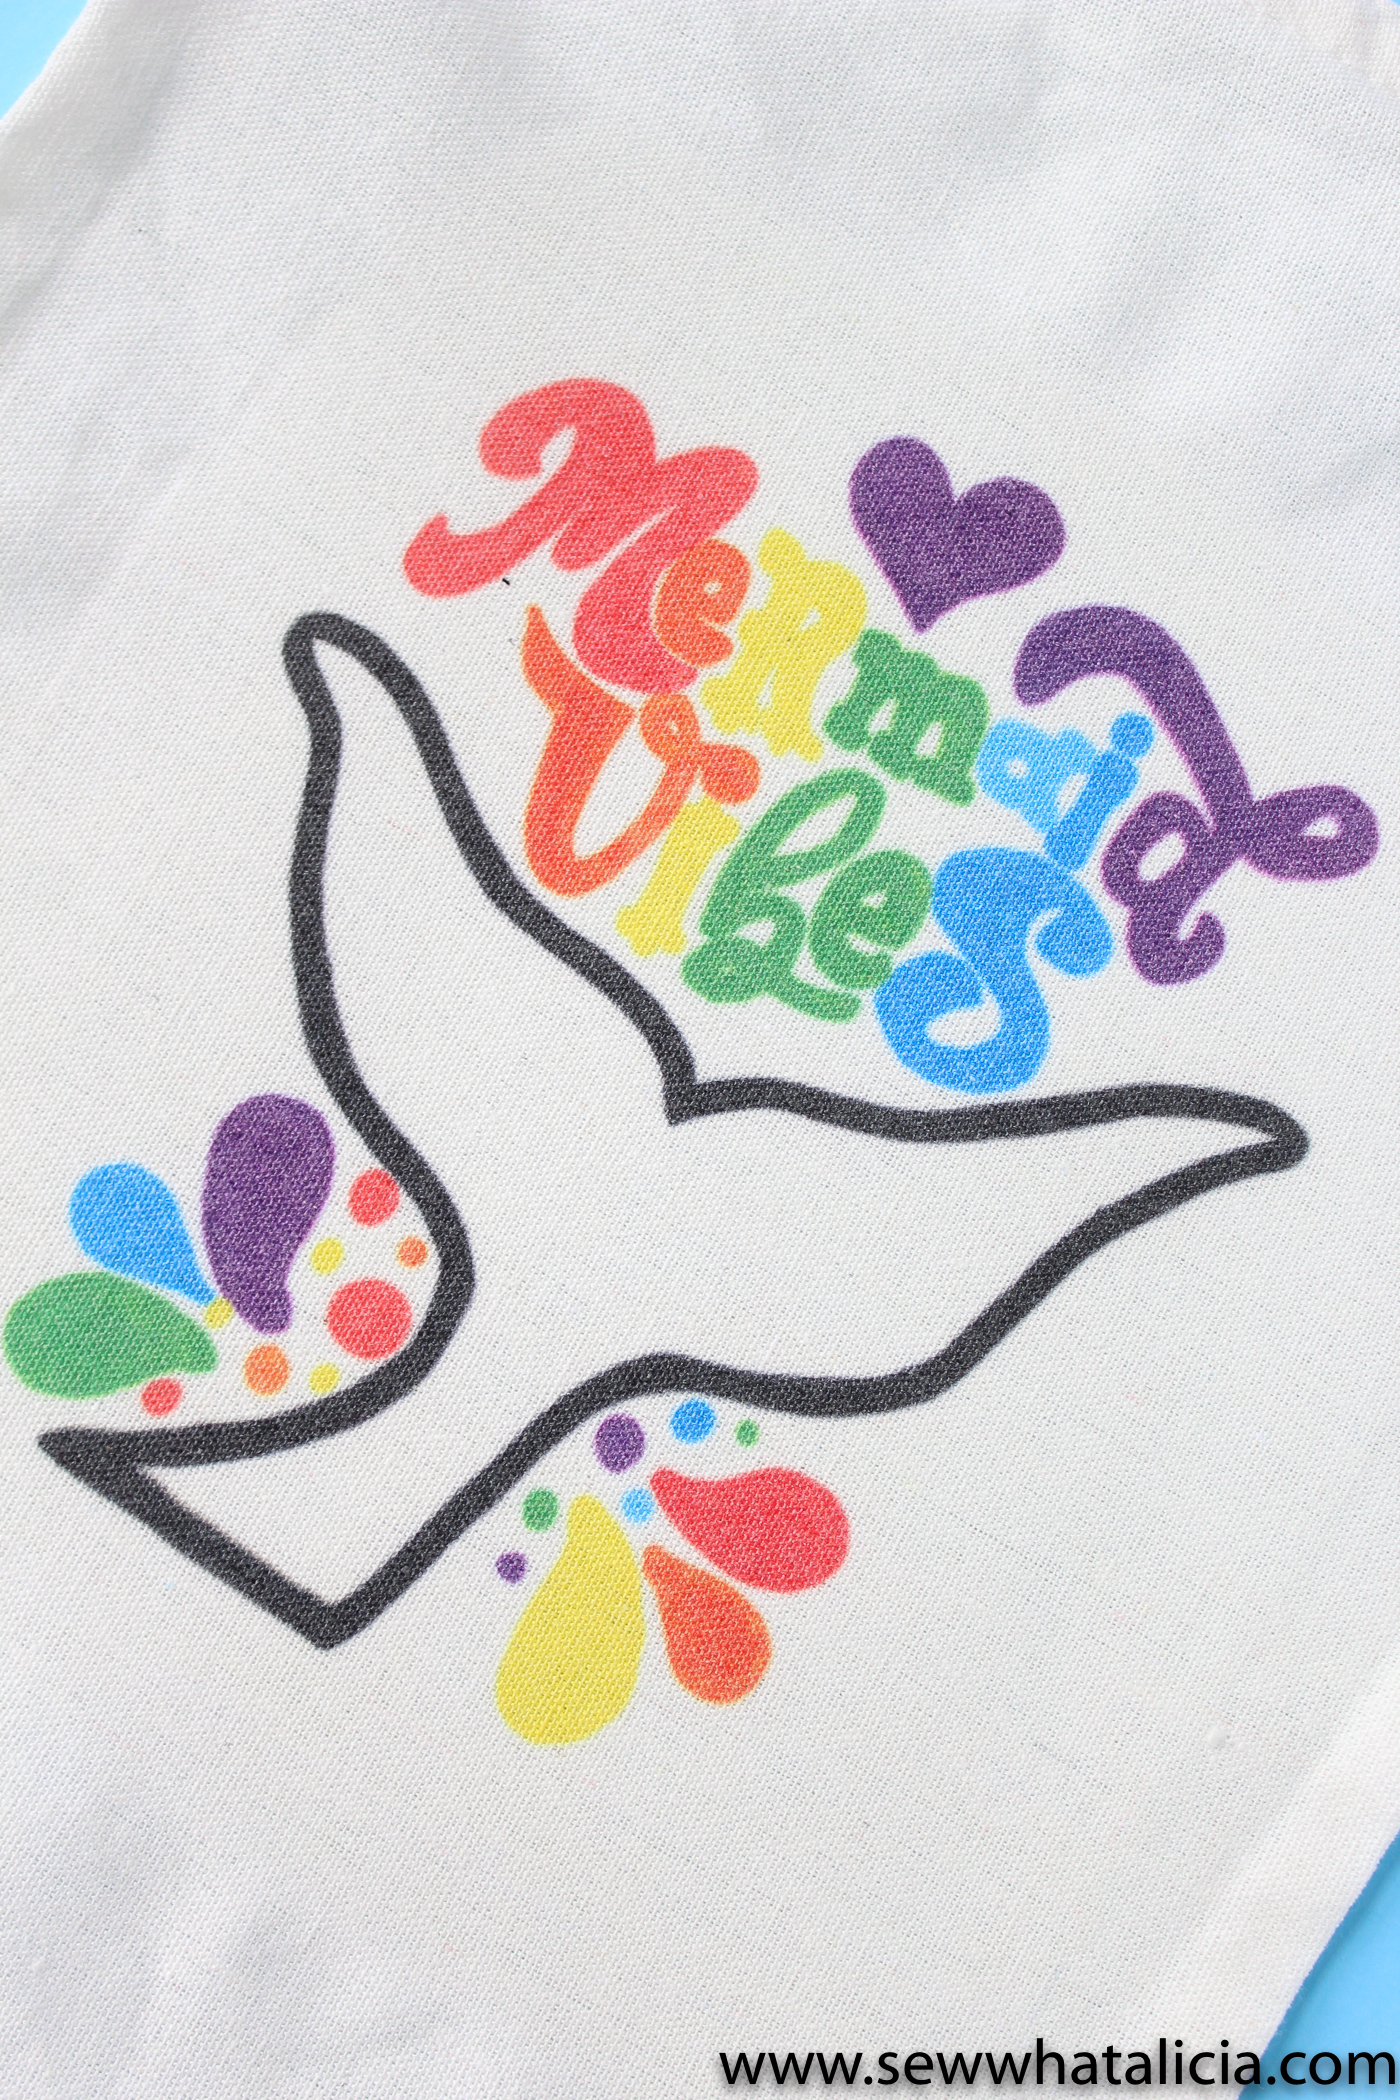
So what did I think of these? I think they are flipping fantastic. I love the way this project turned out. There was a great selection of colors, you know I love a good rainbow and I had everything I needed to create a fun rainbow.
I reviewed the Sharpie Fabric Markers over on By Dawn Nicole and I will let you decide which project turned out better.
Do you use fabric markers? What do you think are the best fabric markers? Share with me in the comments below.


Pat says
I need to look into these. When designing a large tote bag for my friend as a surprise, the only thing I asked her was to name her favorite underwater creature. I should have been more specific because she chose Ursula. And I was stumped for at least a week. I tried everything, including markers (forget their names) but nothing was “speaking to me.” (You know that feeling.) I finally just did an outline and used various fabrics. These markers would have been fabulous. Thanks!!
sewwhatalicia says
Hi Pat,
I like these so much more than standard fabric markers! They are perfect for what you are talking about. You could print a coloring page of Ursula and then color it and iron it on, SO easy!!! I hope you do check them out! <3 Alicia
Artesprix says
Wow! The Artesprix team just read your blog post. We are thrilled that you love our markers! We can’t wait to bring you more colors. Please follow us on social media and share pictures of any new creations you make.
dweddle says
it is a bummer that they are not for cotton. I’m a T shirt artist.
sewwhatalicia says
I know, I really wish it could do 100% cotton too. But any shirt that has at least a small amount of polyester would work. so you can definitely find shirts that you can use!!