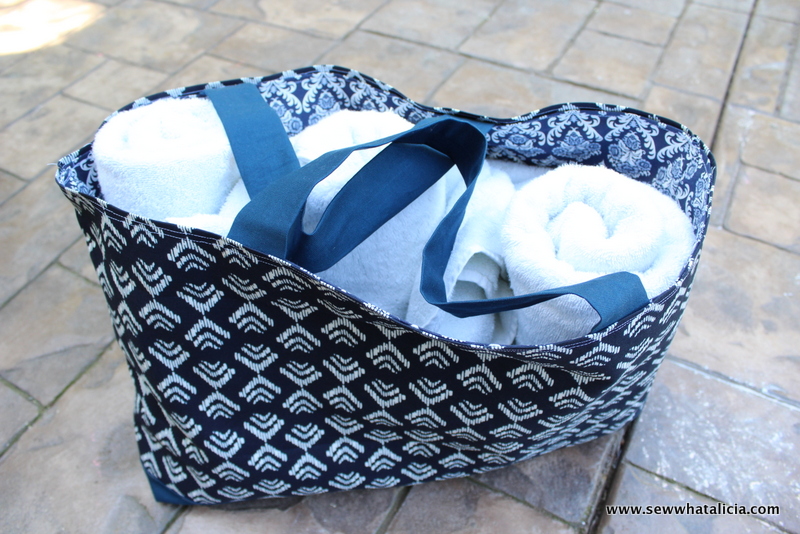
Beach Tote
This beach tote tutorial is here because YOU, my amazing Sewing School friends requested that we learn to make a tote in April. I am obsessed with making tote bags so I was more than happy to oblige! I made this a large beach tote but we will talk about how easy it is to make this in any size. If you are new to sewing check out this post (<—–Just click there) with all the supplies you MUST have!
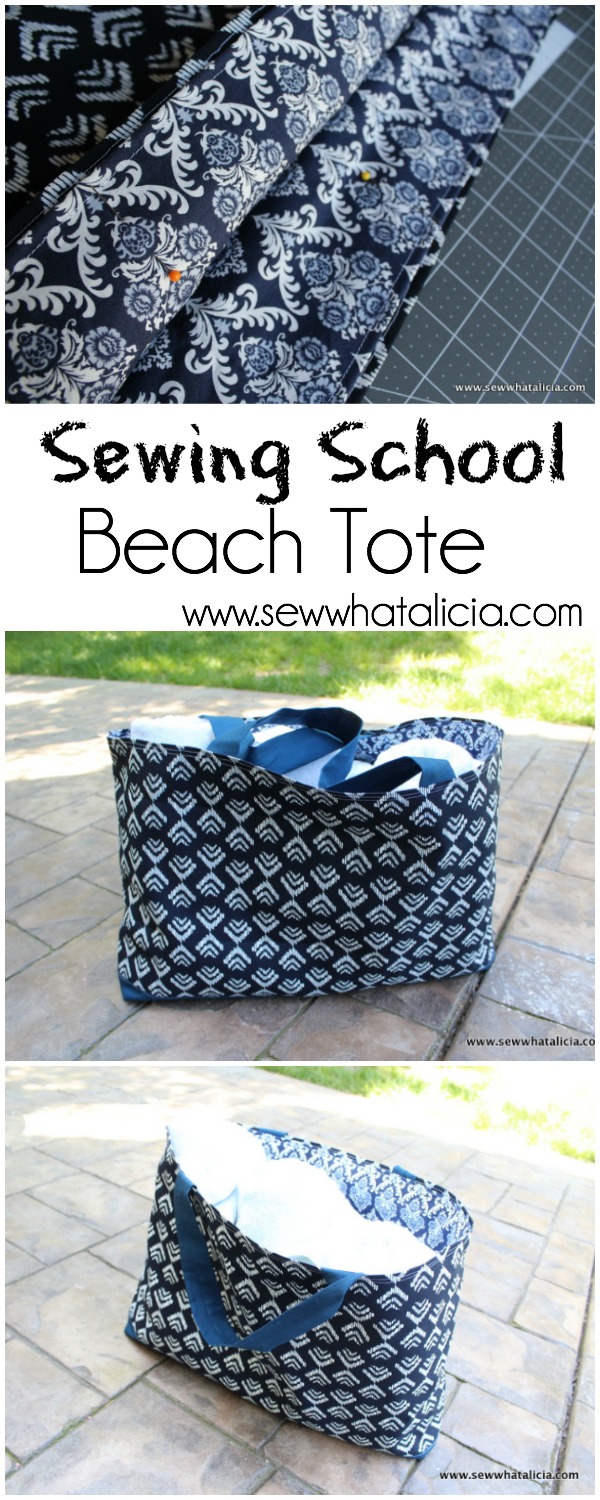
Sewing School -Beach Tote
This is just one of my 50+ easiest sewing tutorials. Check out the rest HERE.
Beach Tote
This is a really quick project that you can make in lots of different sizes. The most important thing to remember is to cut all four sides to same size and you will be able to adapt the pattern depending on how big you want your tote to be. I like to use a canvas or home dec fabric because it is durable and easy to clean.
Supplies:
Main Fabric – 1/2 Yard (I love this one!)
Coordinating Fabric – 1/4 Yard (This one is great!)
Lining Fabric – 1/2 Yard (Here is one more fun one!)
Instructions:
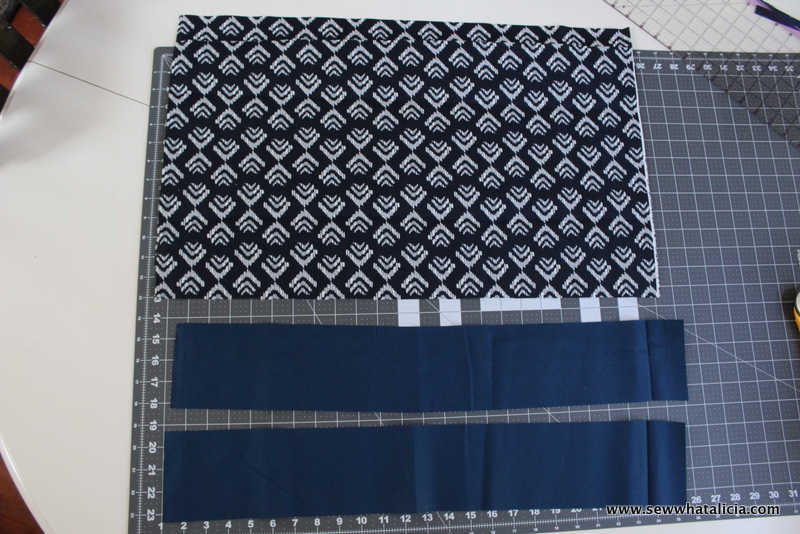
From the main fabric cut two pieces that each measure 10″ x 25″. From the coordinating fabric cut two pieces that measure 4″ x 25″ and two strips that measure 4″ x 20″ (this doesn’t have to be exact, I just used the strip that I had leftover when I cut the first coordinating pieces.) From the lining cut two pieces that are 13″ x 25″.
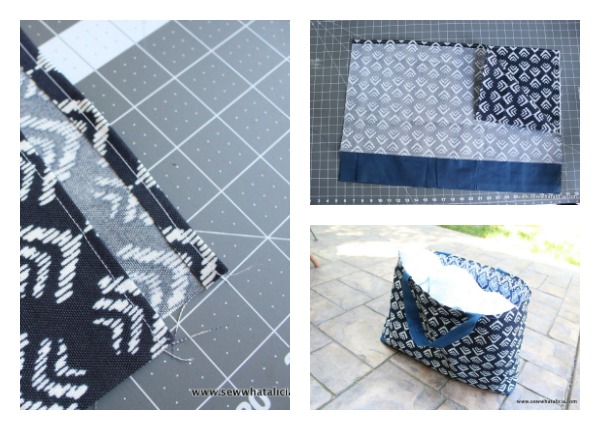
Take the main fabric and line up the coordinating fabric along the bottom edge. Do this for both pieces. Then sew the seam in place.
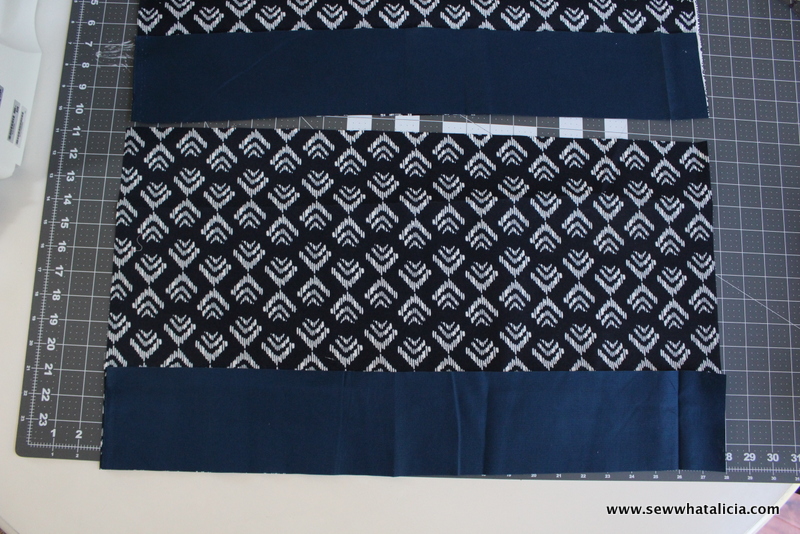
Press the coordinating fabric flat and then top-stitch it into place. (All of these steps you will do twice for the front and back of the tote. Just do it all at the same time.)
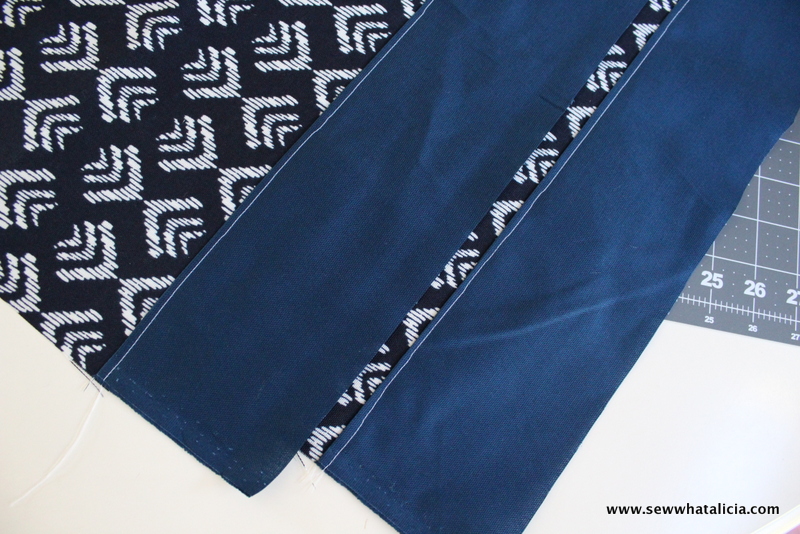
Next fold what will be the top edge of the tote down 1/4″ and press. Top-stitch this seam into place.
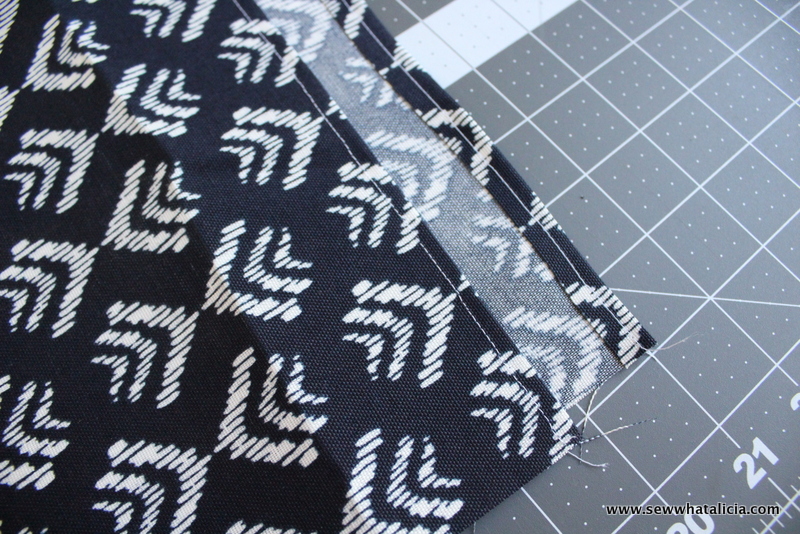
Line up the two sides of the bag right sides together and sew along the right side, bottom, and left side. Leave the top (the part you just folded over and sewed) open.
This step is the only confusing part and so I went ahead and made a video for you. You can watch it several times if you need!
Once you have the corners in place we are ready to turn the piece out and then start the process again with the lining pieces. Now that you know how to do the outside of the tote the inside is super easy. First fold the top edges down 1/4″ and top-stitch in place (just like you did with the main fabric.) Then sew the pieces together around the three edges, leaving the top open. Make the corners just as we did above in the video. The second time around was easier right??
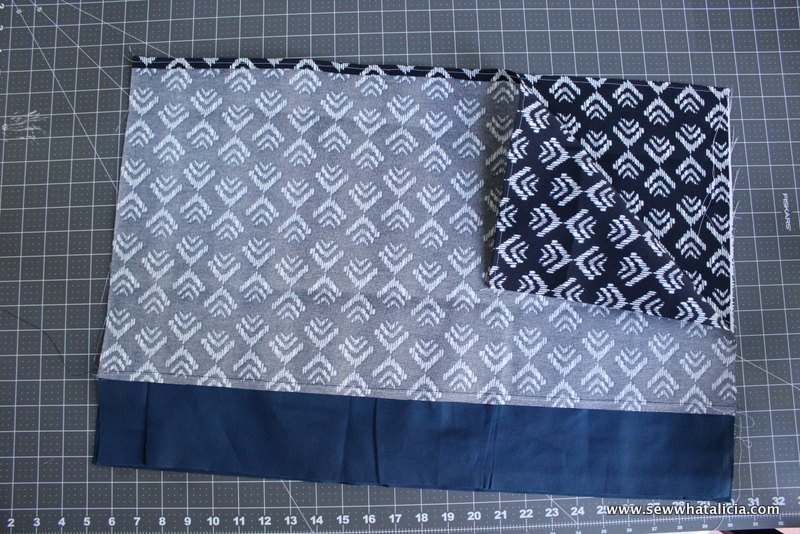
Now the only difference with the lining is we are going to leave it wrong side out. Stuff it into the outside piece that you made and you should start to see the finished product! Go ahead and line up the top-stitched edges and pin the lining in place. I like to offset the inside a bit, maybe 1/8″ down from the outside. I find that it looks a little sloppy if you try and line up the edges exactly.
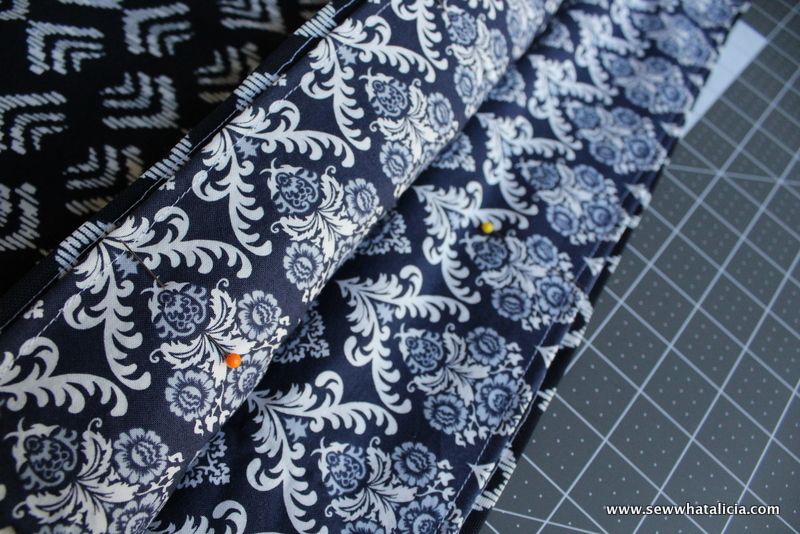
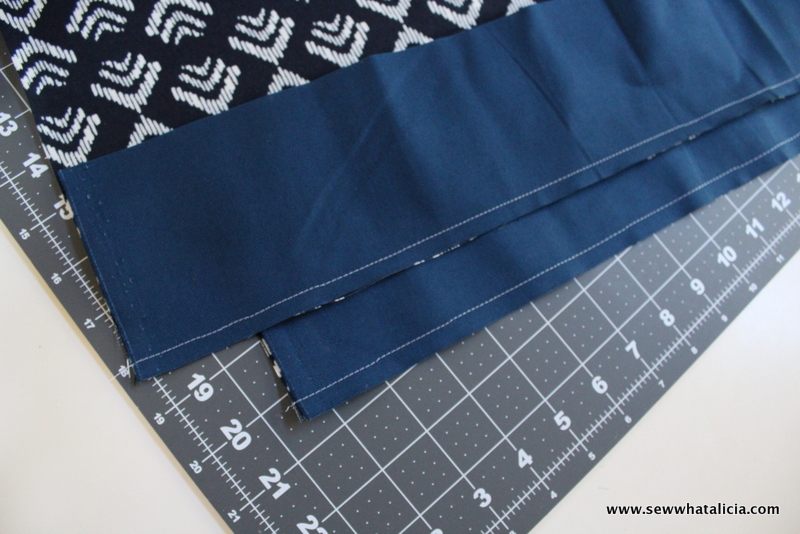
The last two steps are to take the strips you made earlier and fold them in half (right sides together if the fabric has a pattern) and sew along the long edge using a 1/4″ seam. Do this for both strips. Then turn these out, they will be like a tube and you just want to hide the raw edges inside. Then press the seam, I like to press the seam into the middle (as you can see below) I think it looks nicer.
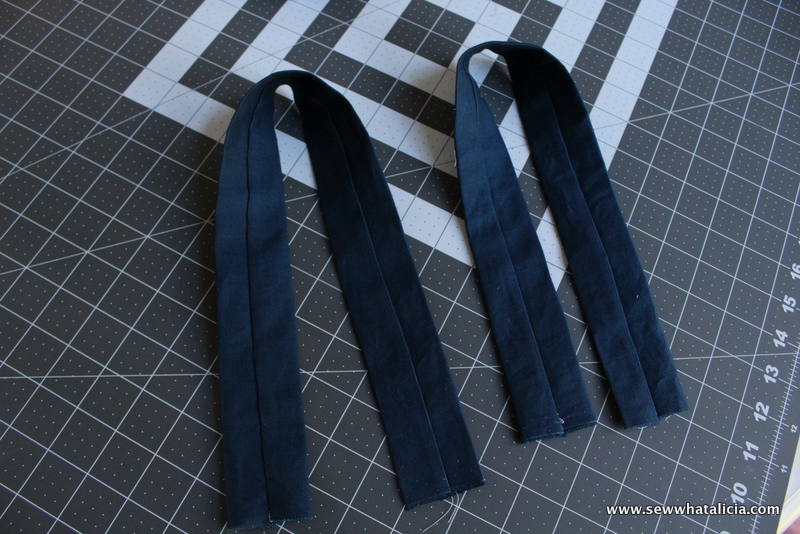
Line the handles up and pin them in place. Make sure you have them lined up exactly across from each other so you can actually use the tote! Then sew all the way around attaching the lining and outside pieces together and securing the handles! Pretty simple right?
Like I said you could make this any size! Here are a few things to remember if you are going to change up the pattern. Be sure to always add 1/2″ to the finished size you want because of seam allowance. Also if you are going to do a box corner you will want to add a bit of extra height because it will shorten the tote when you sew the corner. That is it! You could make one that is 6″ x 4″ and have an adorable gift bag. Or make one a bit taller to gift a bottle of wine! The possibilities are endless!
As always if you have questions head over to Sewing School and ask away (or you can ask in the comments.) And once you have made your own beach tote I would love to see the finished product photo over in the group! Thanks for following along!!
Happy sewing!


Victoria @DazzleWhileFrazzled says
Very cute tote! I’m having the debate of making a swim tote or buying a swim tote. Leaning toward the former! Great tutorial. Visiting from Sweet Inspiration Link Party.
sewwhatalicia says
This one is so easy to make! You should for sure make one…or more than one! Thanks for visiting!!
Keri says
This tote is awesome!! I can’t get enough bags and totes! I love the flat bottom totes especially, and now I know how to make them. I appreciate the tutorial!! Thanks for linking up at Sweet Inspirations!! 🙂
RME says
So cute! I am excited to try this out. Thanks for sharing, I pinned it. 🙂