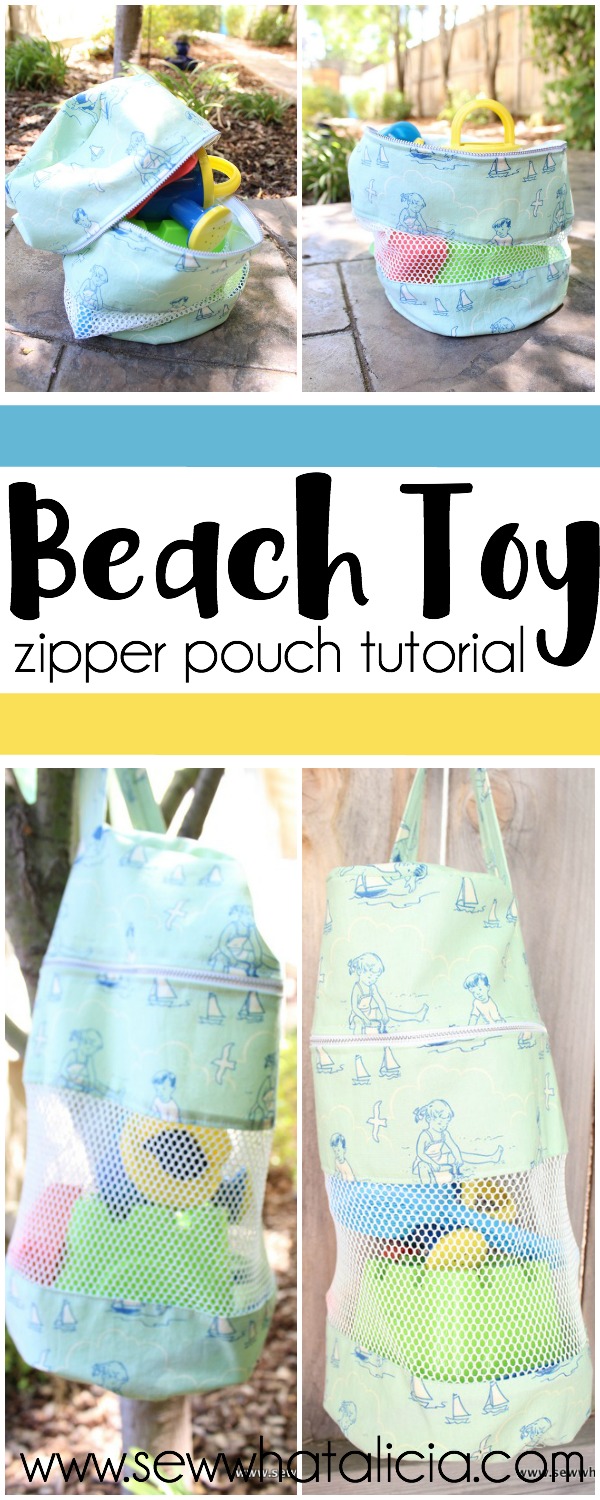
Beach Toy Zipper Pouch
Summer is here and there is so much fun to be had! My kids adore going to the pool and to the beach. But I have to admit packing up all the toys can be a total hassle! This fun beach toy zipper pouch is perfect for packing up all your beach toys or pool tools to cart them around! The mesh is great to let the toys dry and for the sand to fall out! If you need help with your zipper technique check out this class from Craftsy.
This is just one of my 50+ easiest sewing tutorials. Check out the rest HERE.
Beach Toy Zipper Pouch
I am so excited to be sharing this tutorial with you as a part of the Summer Sewing Series over on Nap-Time Creations. Scroll down to the bottom to see all the other projects in the series!!
Supplies:
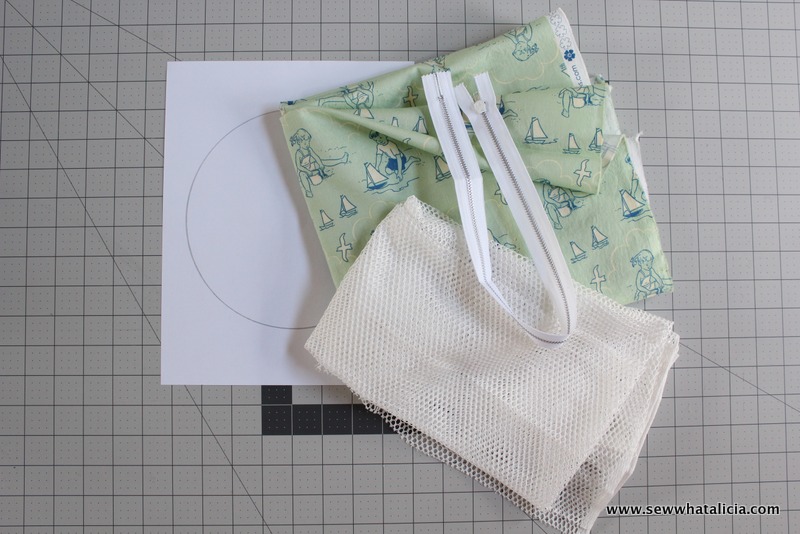
Mesh Fabric – 6″ x 24″
Summer Fabric – (I used a Riley Blake Seaside print which I don’t think you can find anymore 🙁 try looking HERE for some adorable fabrics.
3 strips – 4″ x 24″
2 strips – 2″ x 6″
Two Circles (using template below)
Beach Toy Zipper Pouch Circle Template
Once you have cut the pieces into strips and cut out the circles we are ready to start assembling! This pouch is not lined because I thought more fabric would just create more chance for the water from the toys to get trapped and create a gross situation!
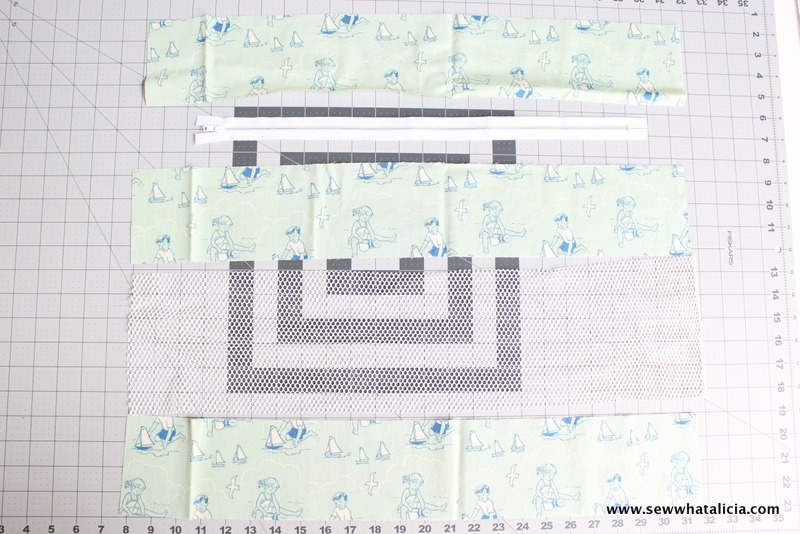
To start we will take those 2″ strips and attach them to either side of the zipper, as pictured below. Then go ahead and set the zipper aside for a bit.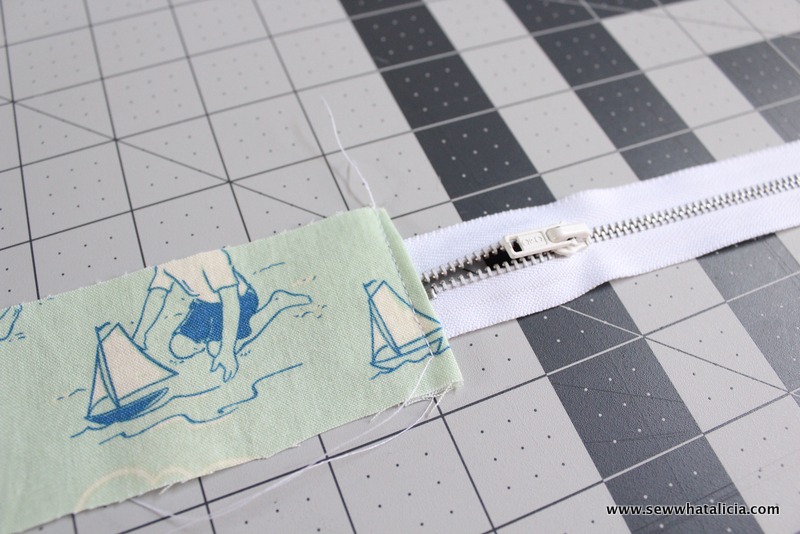
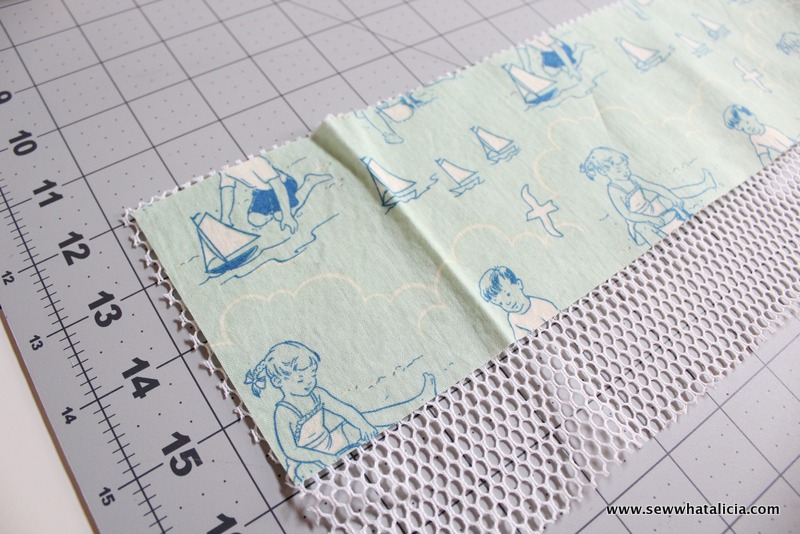
Now we are going to start putting the pieces together. I used a french seam because I am not lining the piece and I wanted it to look as nice as possible and keep the fraying down as much as possible. It is not hard it just takes a few extra steps. Start with the fabrics wrong sides together (as pictured below.) Then sew them together using a scant 1/4″ seam.
Now fold the piece over as it is pictured below. Press the seam so it is nice and flat. Sew another seam using a generous 1/4″ seam.
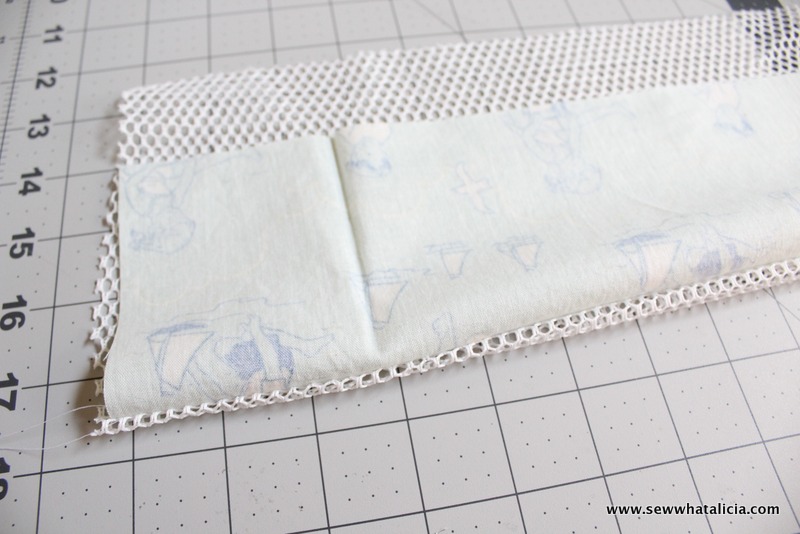
It should look like this. On the front side you should not be able to see any of the first seam hanging out. Now you have two clean sides. The last step is to press one more time. You are going to make sure and press the seam so that you can’t see the seam you just created through the mesh.

Like this: 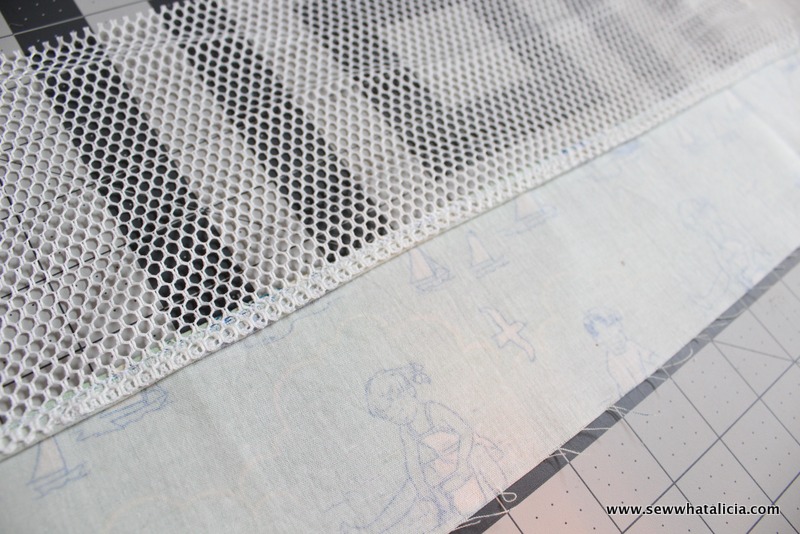
And lastly top-stitch that seam into place.
 Repeat the process to attach the second strip to the other edge of the mesh. You should end up with a piece that looks like the one pictured below. Then press the top edge under 1/4″ (also pictured below.)
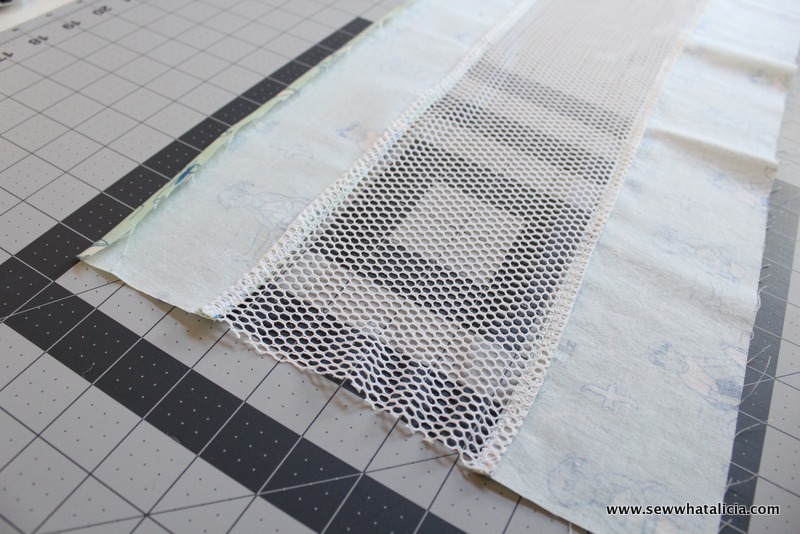
The edge that you just pressed under is where you are going to attach the first side of the zipper.
Next press the edge of that last fabric strip under and attach it to the other side of the zipper. 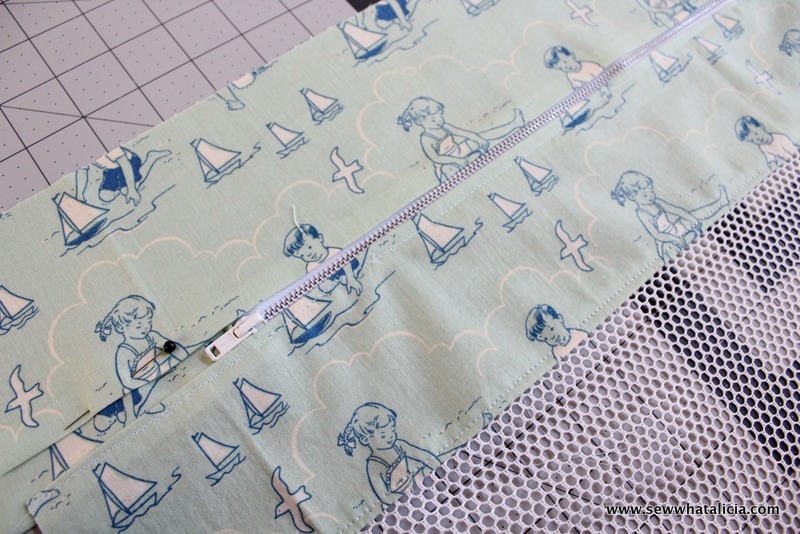
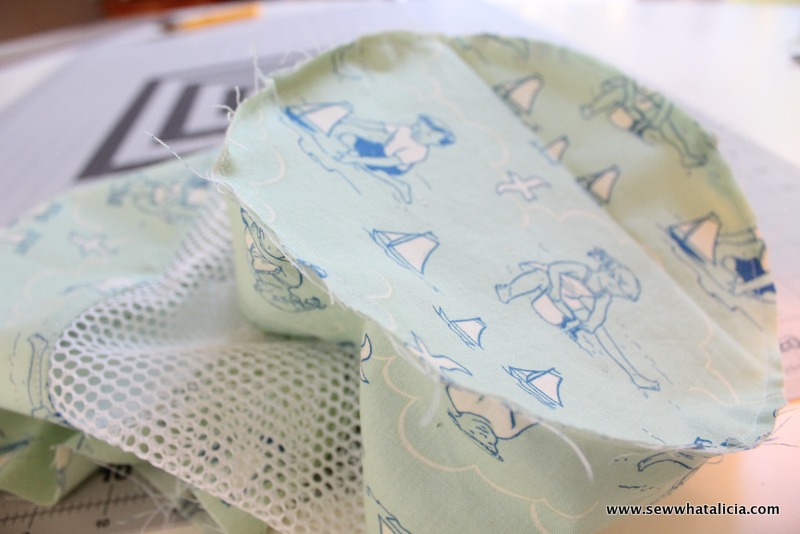
Now we are ready to sew the two edges together. We are going to do a french seam again. Sew the two edges wrong sides together.
Then flip it the other way, press, and sew again (same french seam process as we used before.) Now you should have a tube that is ready to attach to the two circle pieces that we cut out at the beginning.
Now we come to the part that is always hard for me as a blogger…the do as I say not as I did portion of the tutorial! I was experimenting with using the french seam on these circle edges as well. Don’t, just don’t! It was funky and didn’t work. It also made me frustrated to the point that I forgot to keep taking pictures. Don’t fret because you can see exactly how to attach the circles to the top and bottom on this Slouchy Toy Sack Tutorial I did a while back! The last thing I did was to take a bit of a strip to make a handle. I folded it in about 1″ on either side and then sewed it down to keep the edges from coming up. Then put it on the top and place the raw edges in as you sew the top circle on.
That is it! A fun and adorable beach toy tote!
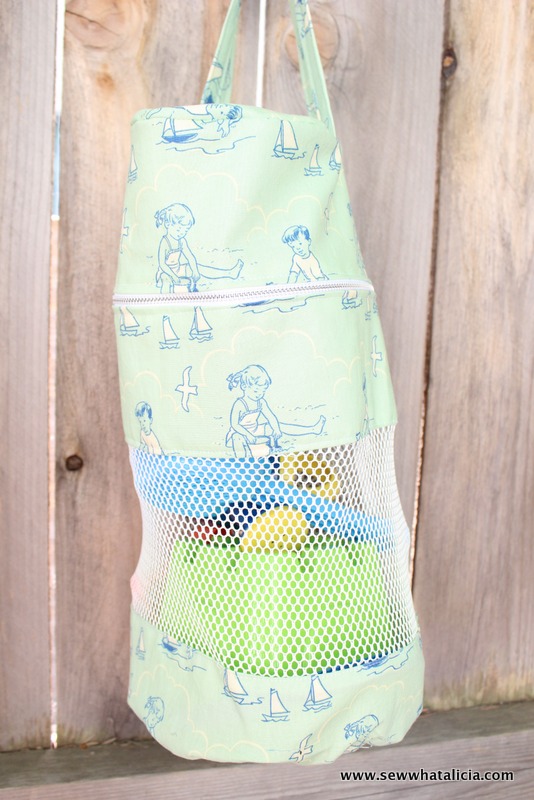
I hope you enjoyed this beach toy zipper pouch tutorial! Where will you take yours this summer?
Check out some more fun summer tutorials over on these amazing blogs! (Links below image)
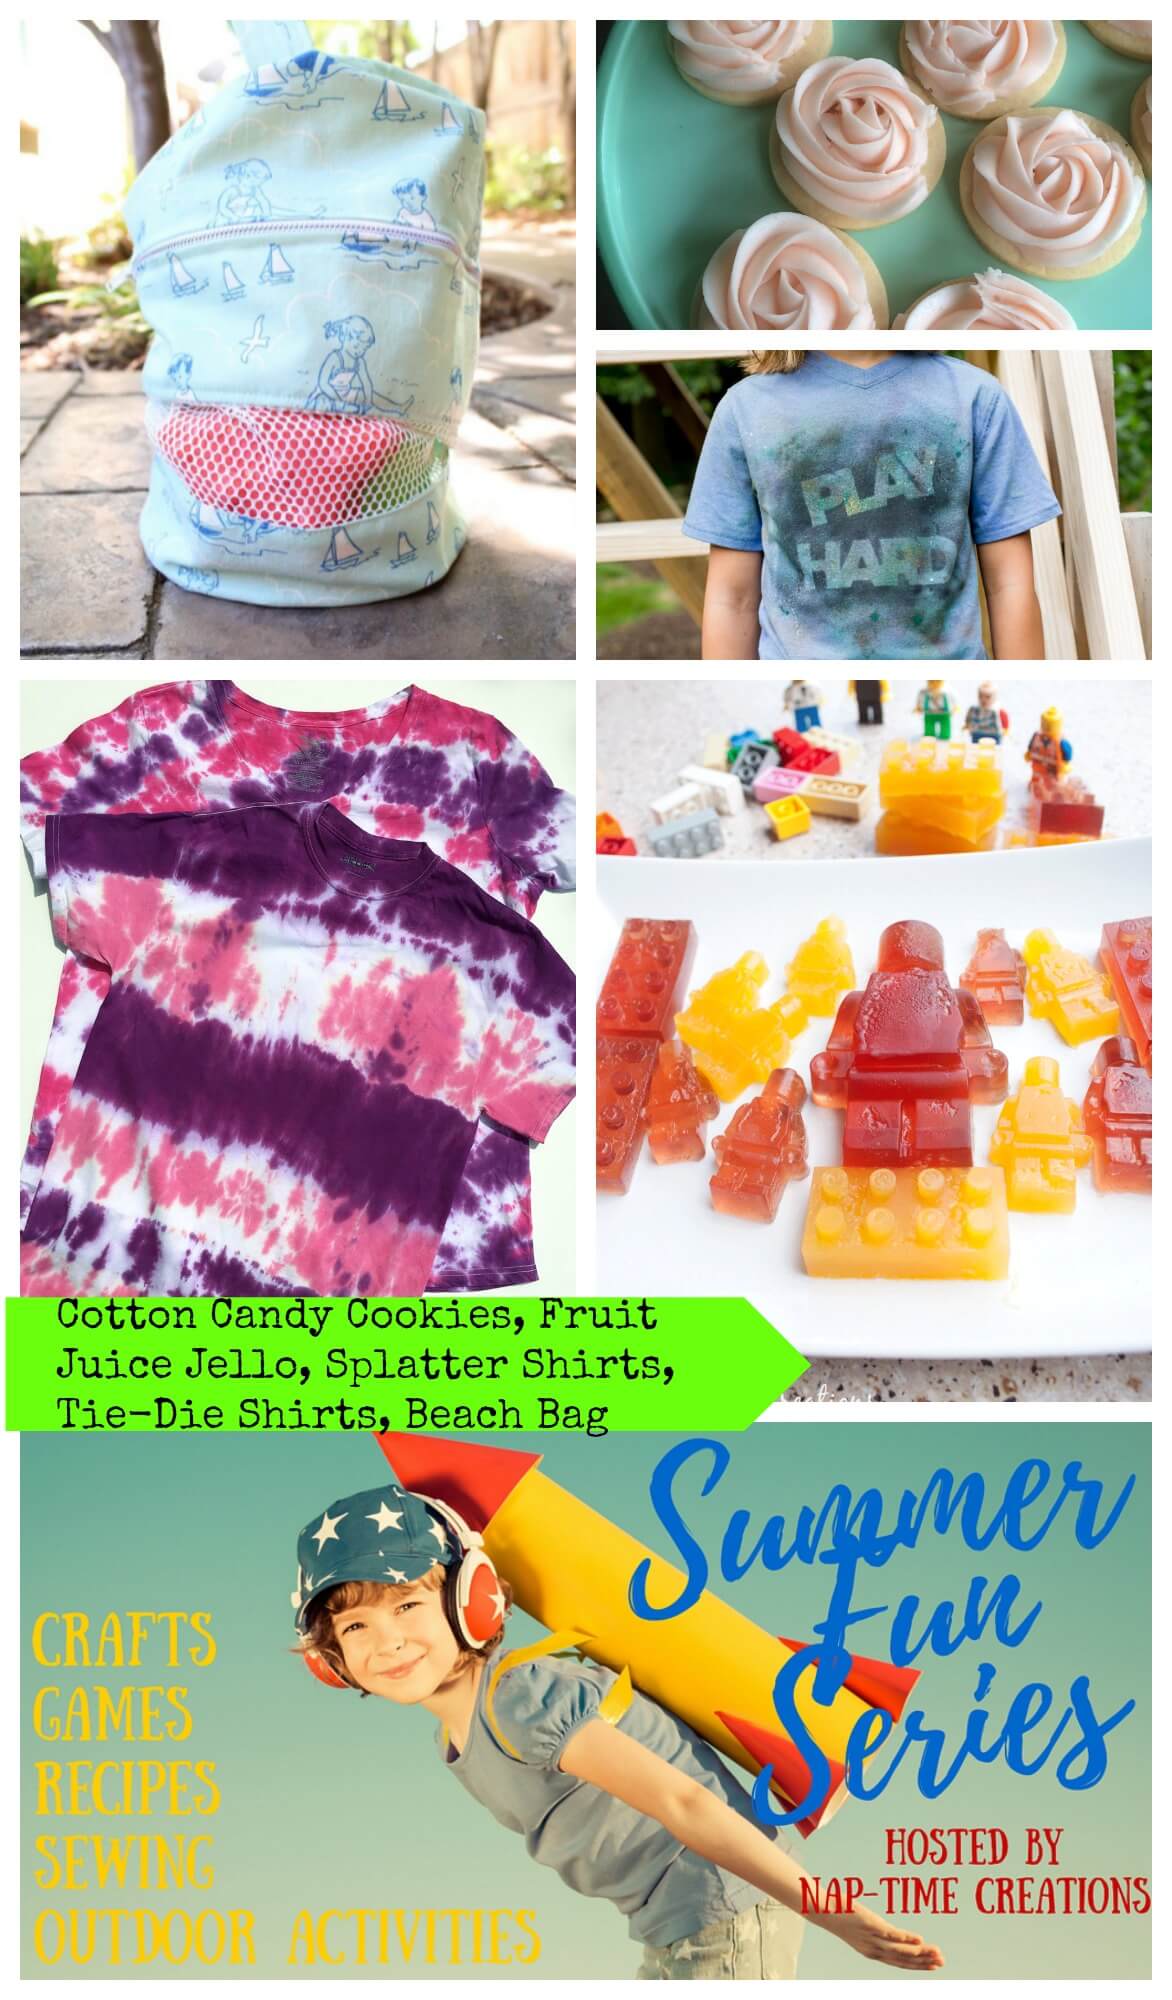
Fruit Juice Jello Lego Snacks – Nap-Time Creations
Splatter Shirts – Andrea’s Notebook on Nap-Time Creations
Cotton Candy Cookies – Sweet Jenny Belle Bakery
Tie-Dye Shirts – Craft Critique


pageflutter says
This would be awesome to store my kids’ outdoor toys. I always like something that can keep them off the ground. Thanks for the tutorial, Alicia!
sewwhatalicia says
You are so welcome! This is such a versatile bag you could do so many things with it!
anneweaver1974 says
Smart design! I’ve got a Craft Gossip post scheduled for tomorrow that features your tutorial: http://sewing.craftgossip.com/?p=88486 –Anne