How to Use a Zipper Foot
Sewing a zipper seems to be the thing that beginner sewing enthusiasts are most intimidated by! If you have a zipper foot and a basic sewing knowledge then installing a zipper is a piece of cake!! This tutorial will walk you through how to use a zipper foot so you feel confident creating all the zipper projects.
How to Use a Zipper Foot
Zippers aren’t scary! This isn’t my first time writing about zippers, you can see all the zipper posts HERE.
How to Put in a Zipper:
To put a zipper in with your sewing machine you need just one thing, a zipper foot. If your machine didn’t come with a zipper foot you can go to Amazon and search zipper foot plus the name of your machine, for example Brother Zipper Foot, and you will find several great low cost options. Many of the machines have the same system for attaching the feet so don’t be alarmed if there are other machines listed because they are interchangeable across machines (not all machines are like this though so be sure it does list your brand of machine.) You can also check your sewing machine manual for an actual part number and order it using that part number to be sure it is exactly the foot you need.
Place the foot onto your machine. I always place the foot so that the needle is to the left of the foot. The needle should fit in the small square slot in the foot (as pictured below.)
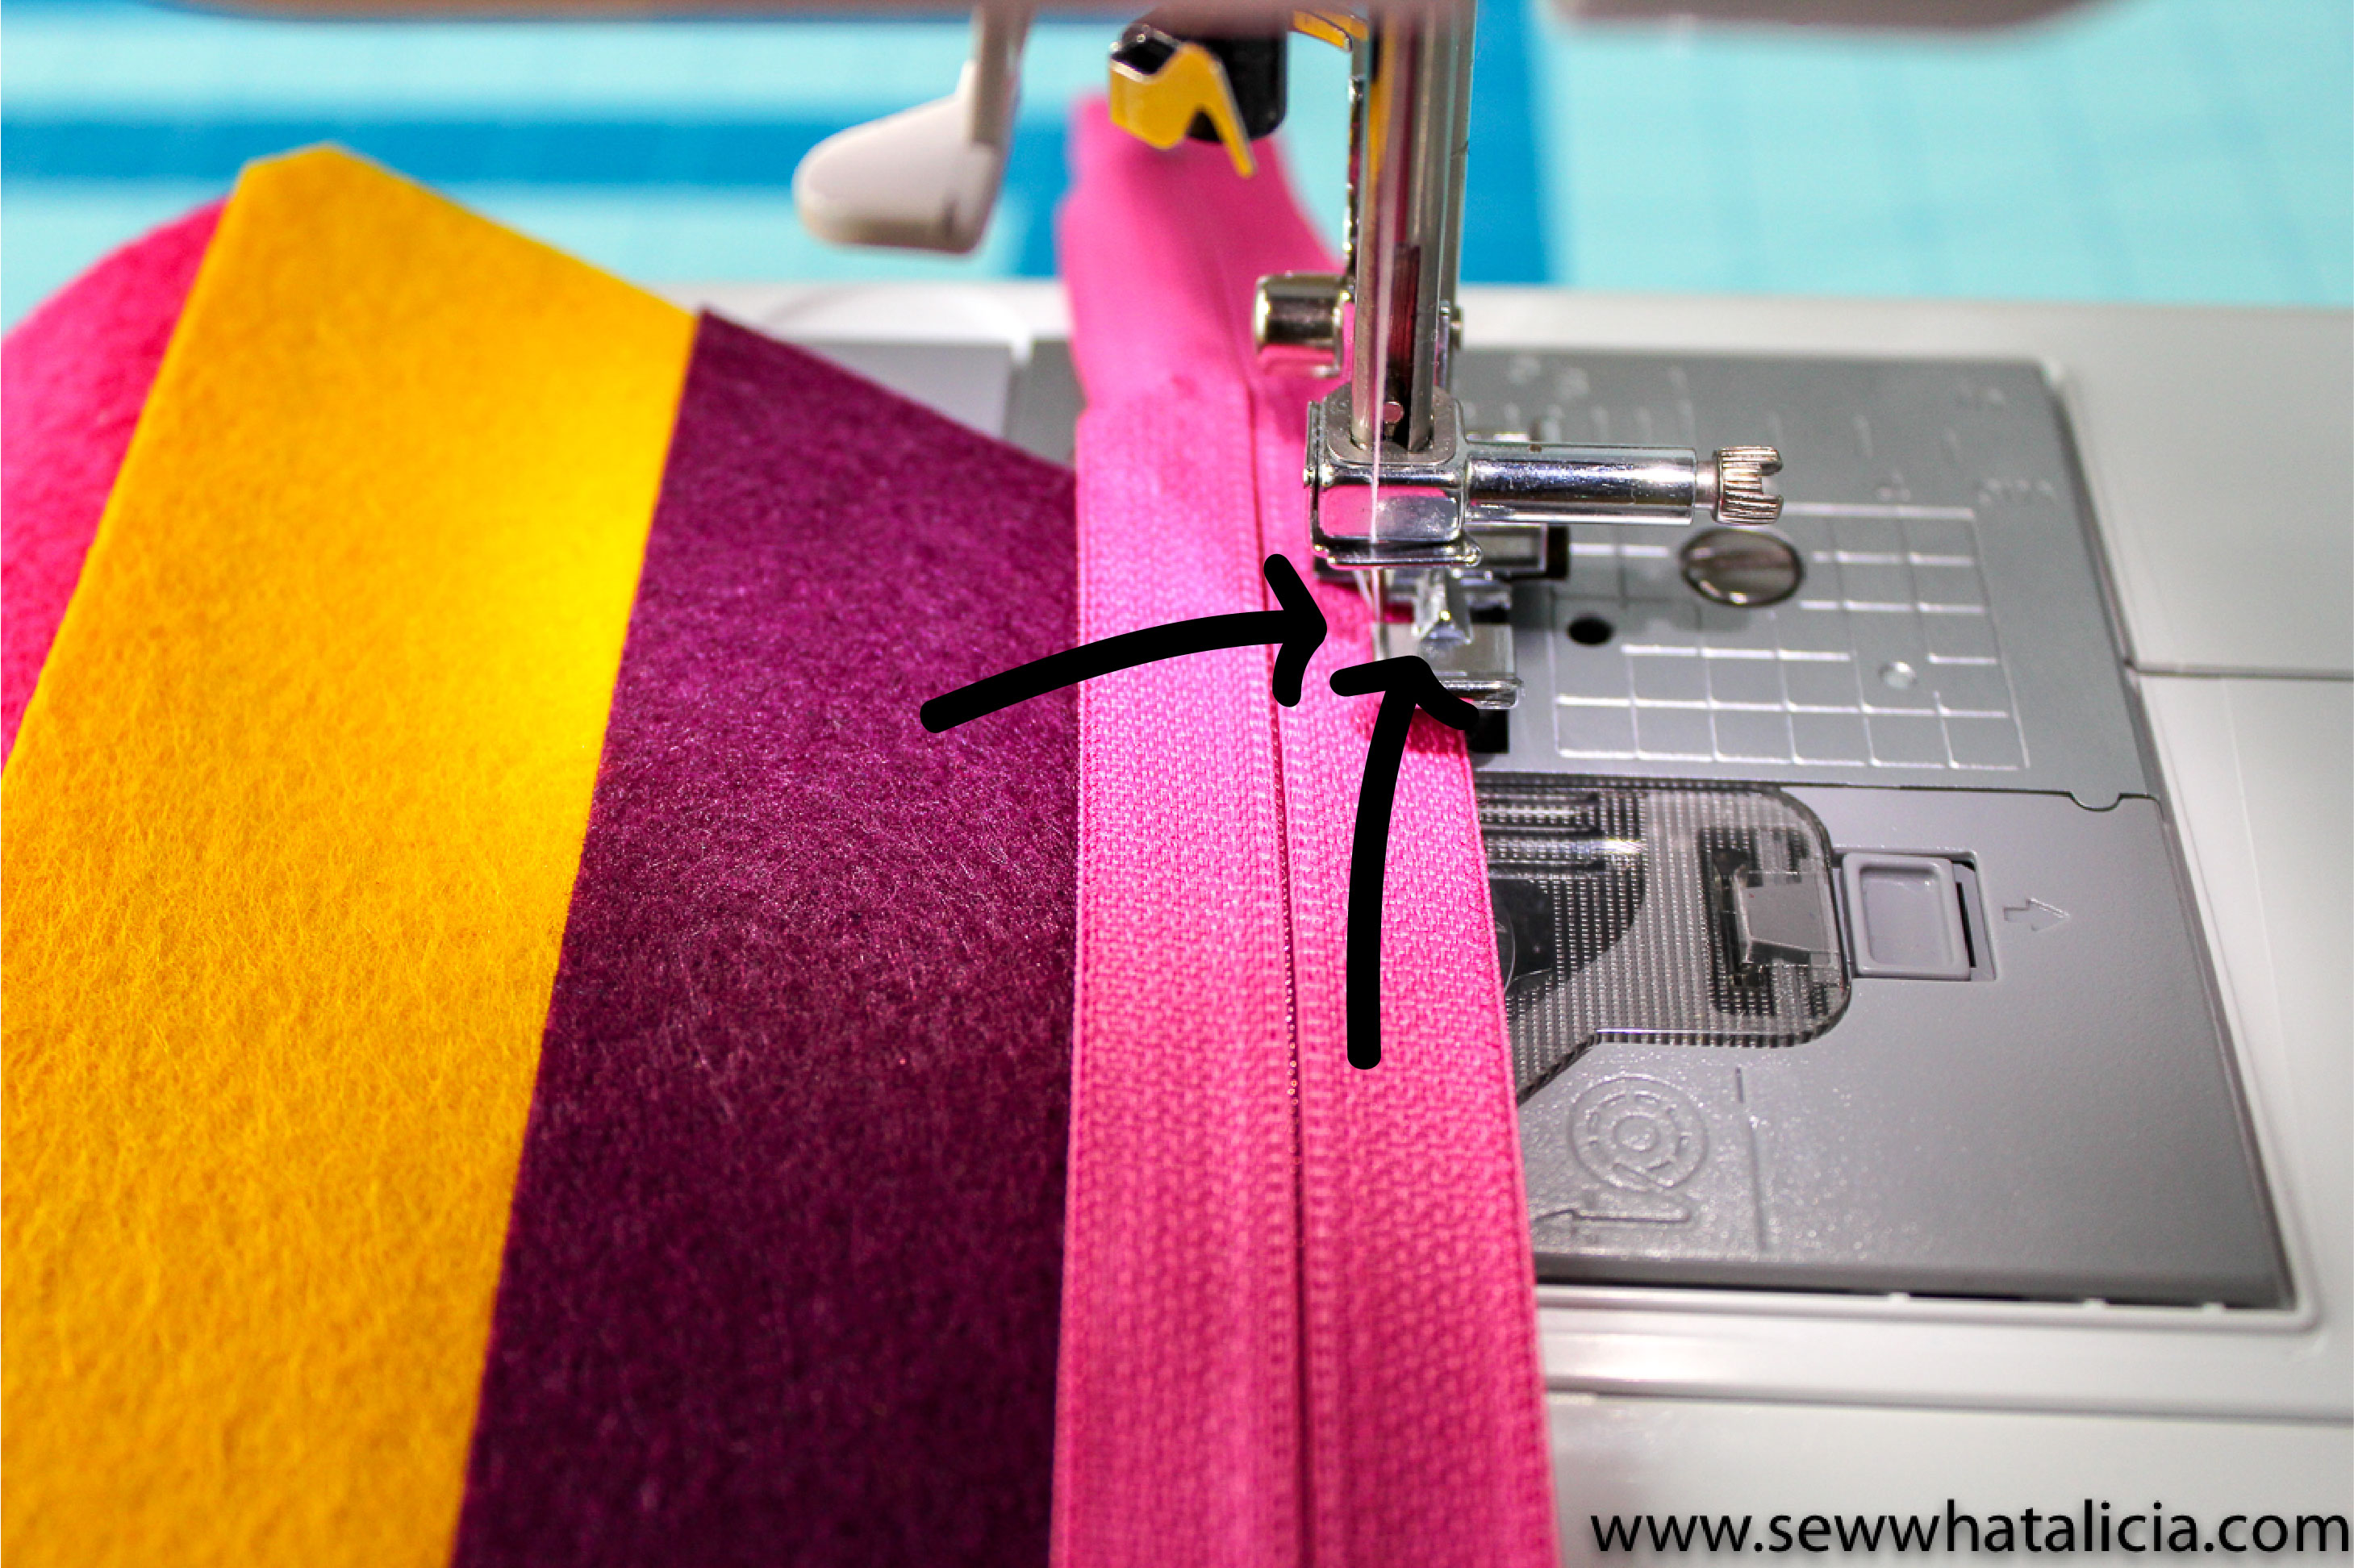
Place your zipper with the right side/teeth side down on the right side of your project. Line the top of the tape up with the top of your project.
TIPS:
- Be sure that the zipper pull is away from the section you are sewing. If your zipper is longer than your project you can simply move it to the top or bottom. If your zipper is not longer than the project sew half of the zipper with the pull down and then stop, lift your foot, move the zipper to the finished section, and finish sewing.
- I prefer to sew with the zipper closed (as pictured above) whenever I can. This is a personal preference, it doesn’t really matter if the zipper is closed or open during sewing as long as the pull isn’t in the way (see the above tip!)
- Don’t try and sew too close the the teeth of the zipper. If you are wanting to see less of the zipper tape consider using an invisible zipper. If you sew too close to the teeth the zipper is more likely to get caught and cause the zipper to be non-functional.
- Top-stitch on the front to help the zipper lie flat and keep it from getting stuck when using the zipper. This will also keep the wrong side of the fabric and zipper from poking up and being visible each time you use the zipper.
- Add a scrap of fabric to both ends of the zipper. (Like in this tutorial) That way you have a nice crisp edge and it gives it a much more professional look.
- You can sew with a zipper that is too long and then trim the ends. This is great if you have inherited a bunch of zippers or if you buy a grab bag, like THIS ONE and don’t have a use for longer zippers. You can also purchase extra pulls to create new zippers from the excess teeth and tape if you do cut the zipper apart.
MORE Zipper Foot Uses:
I am all about using the items that I have for more than one purpose. You COULD buy a separate foot for just about every single purpose. But that is pricey and really not necessary. Here are a bunch more ways I use my zipper foot!
- Invisible zipper – there is a foot for that, but why? You can totally use your regular old zipper foot to install an invisible zipper.
- Piping – yup there is a foot for that. Nope I don’t use it! The zipper foot is great for piping because it has a low profile along the side so you can get your needle in nice and close to the edge of the piping!
- Pom trim – not sure if there is a foot for that. But the zipper foot works amazingly well for attaching pom pom trim. Place the pom facing away from the low profile side of the foot and attach!
- Top-Stitching – The zipper foot works great for top-stitching around tight places. Like when you are trying to top stitch around a curtain weight or magnetic bag closure.
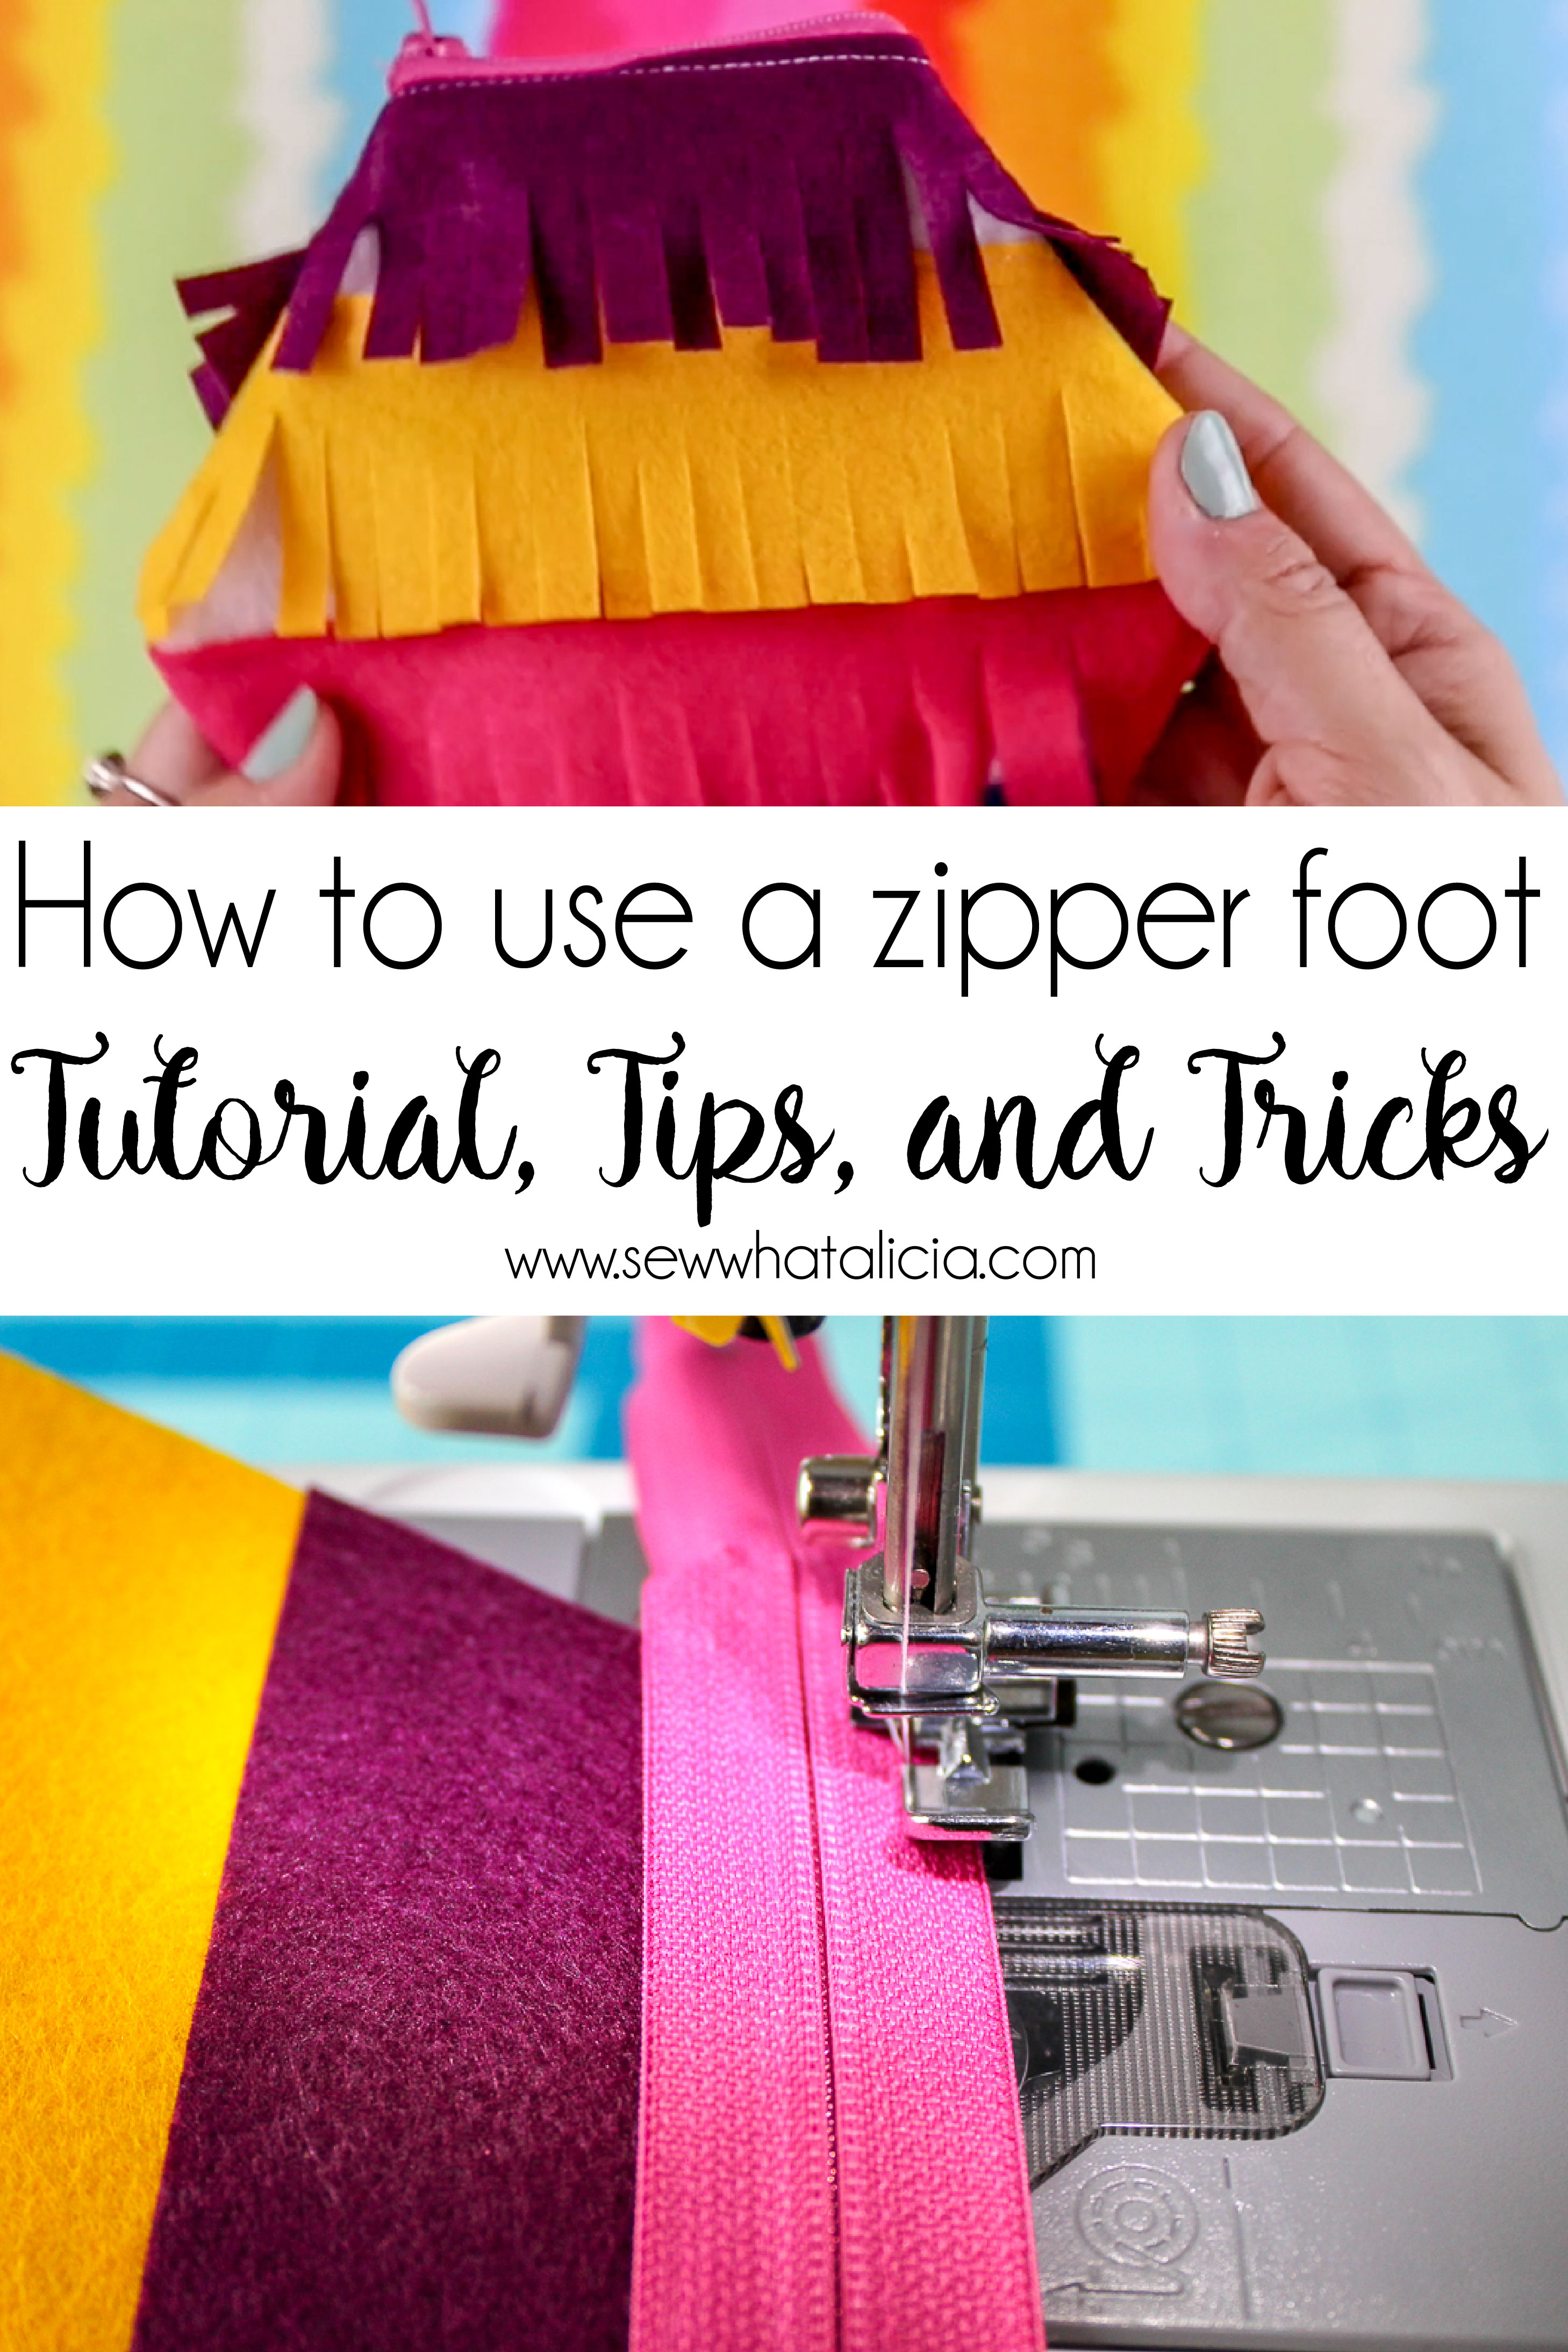
Felt Fringe Pouch Instructions: (See video tutorial below)
Craft Felt or Felt by the Yard
Zipper – I prefer these All Purpose Plastic Zippers but the method for attaching the zipper is the same regardless.
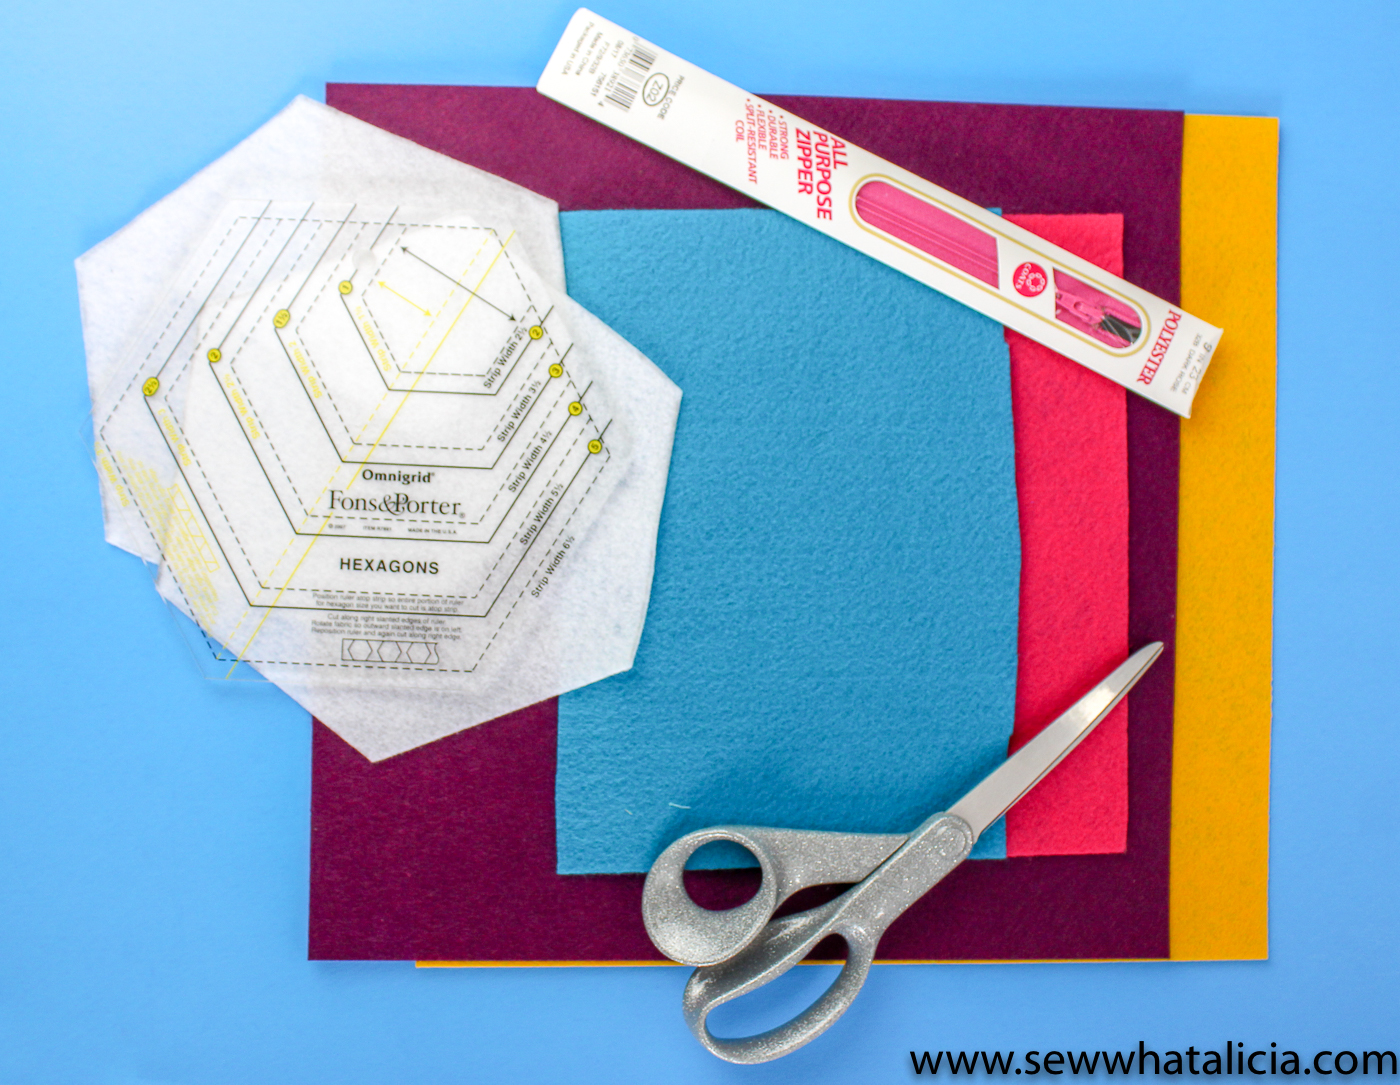
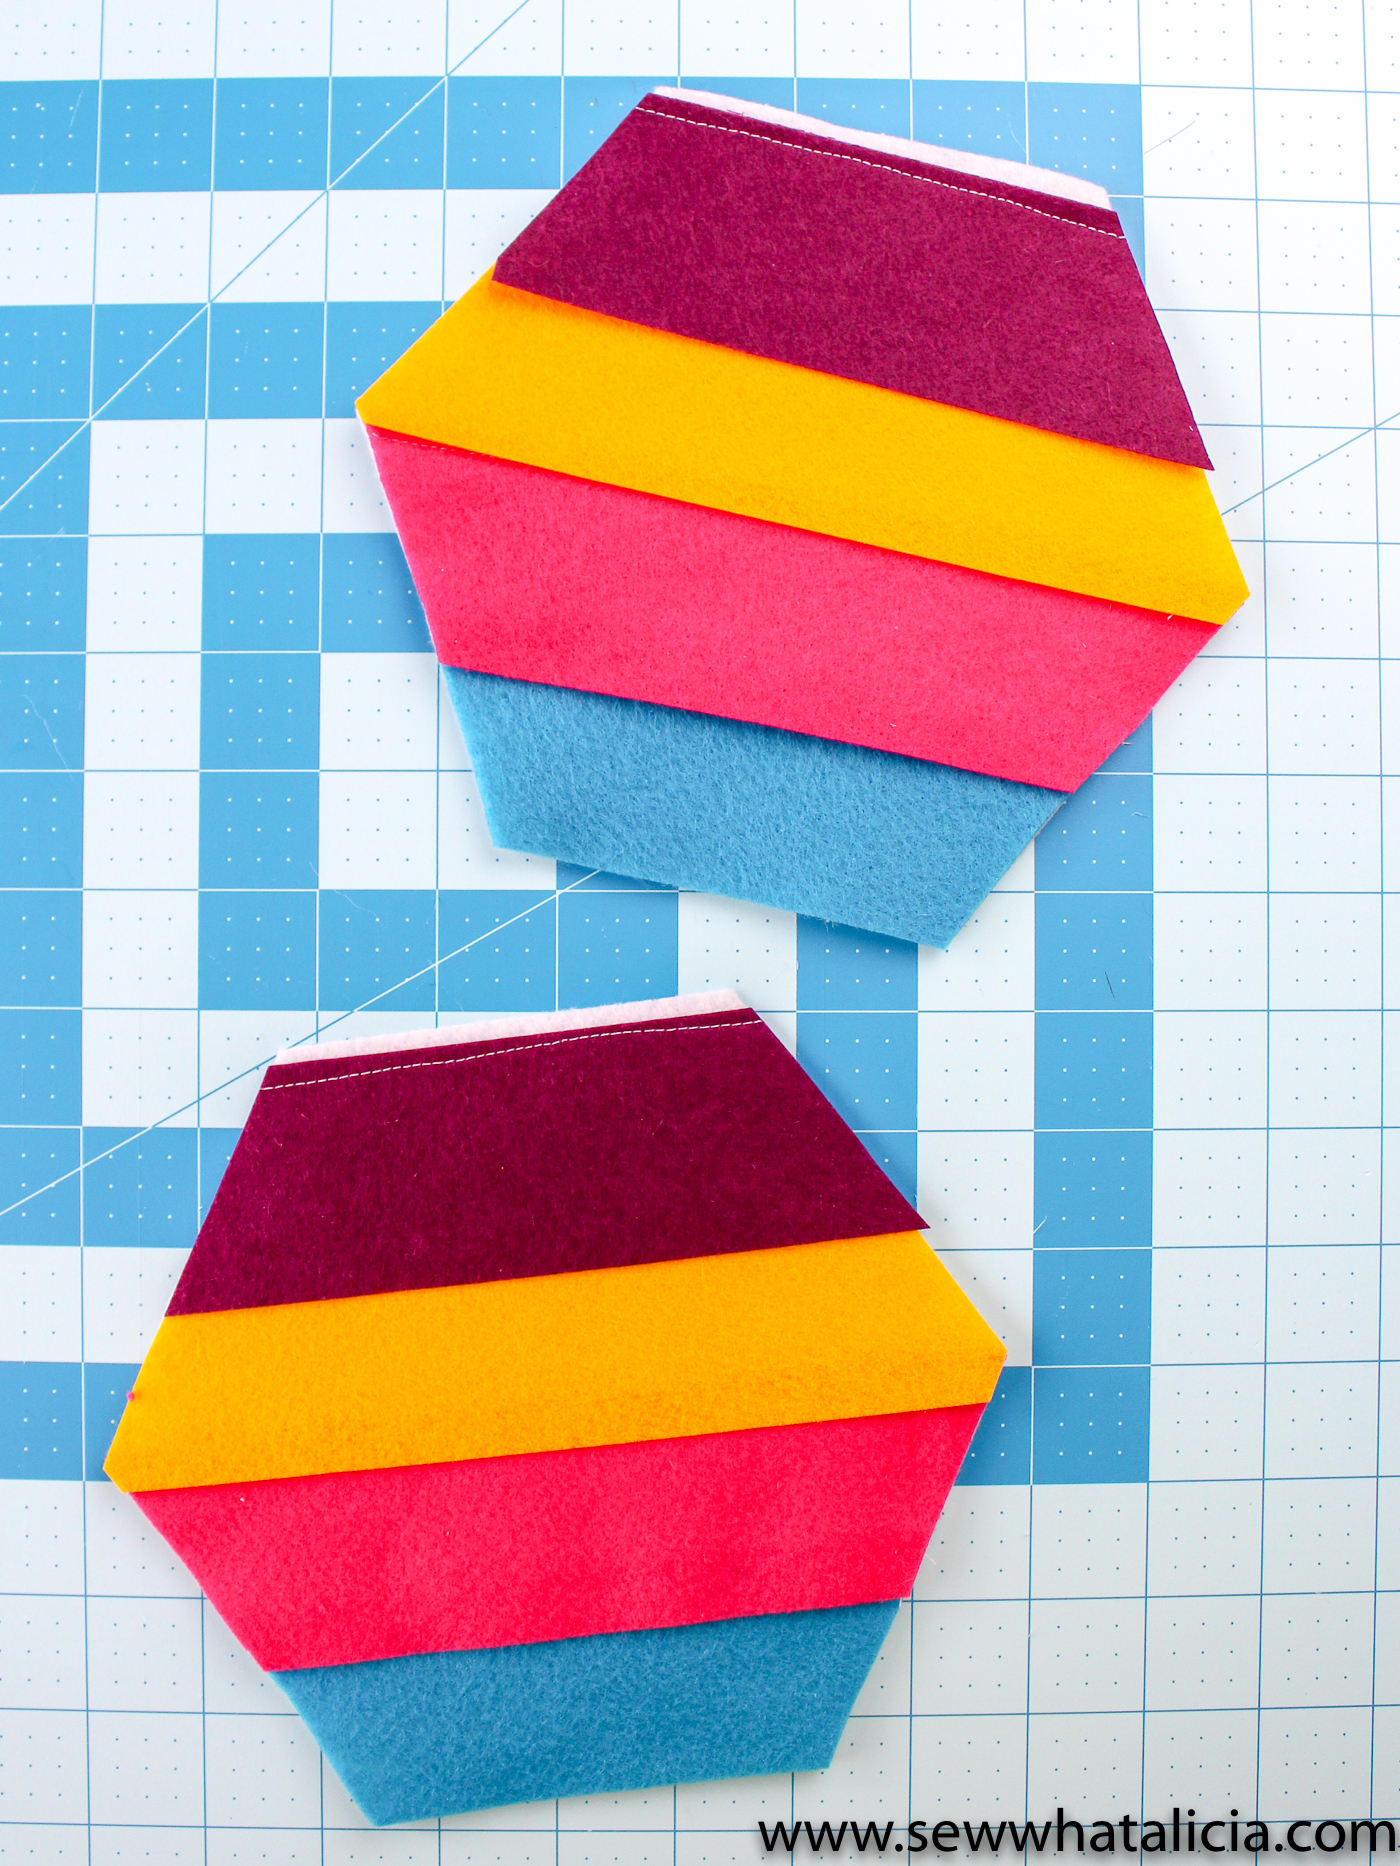
Cut two large felt hexagons using the ruler or print a hexagon shape and use that as a template.
Cut 2″ strips from the various colors of felt. The largest hexagon on the ruler shown above requires 4 strips per side, 8 total 2″ strips.
Sew the felt onto the hexagon. Start with the color that will be on the bottom of the pouch. You will sew along the top edge of the felt.
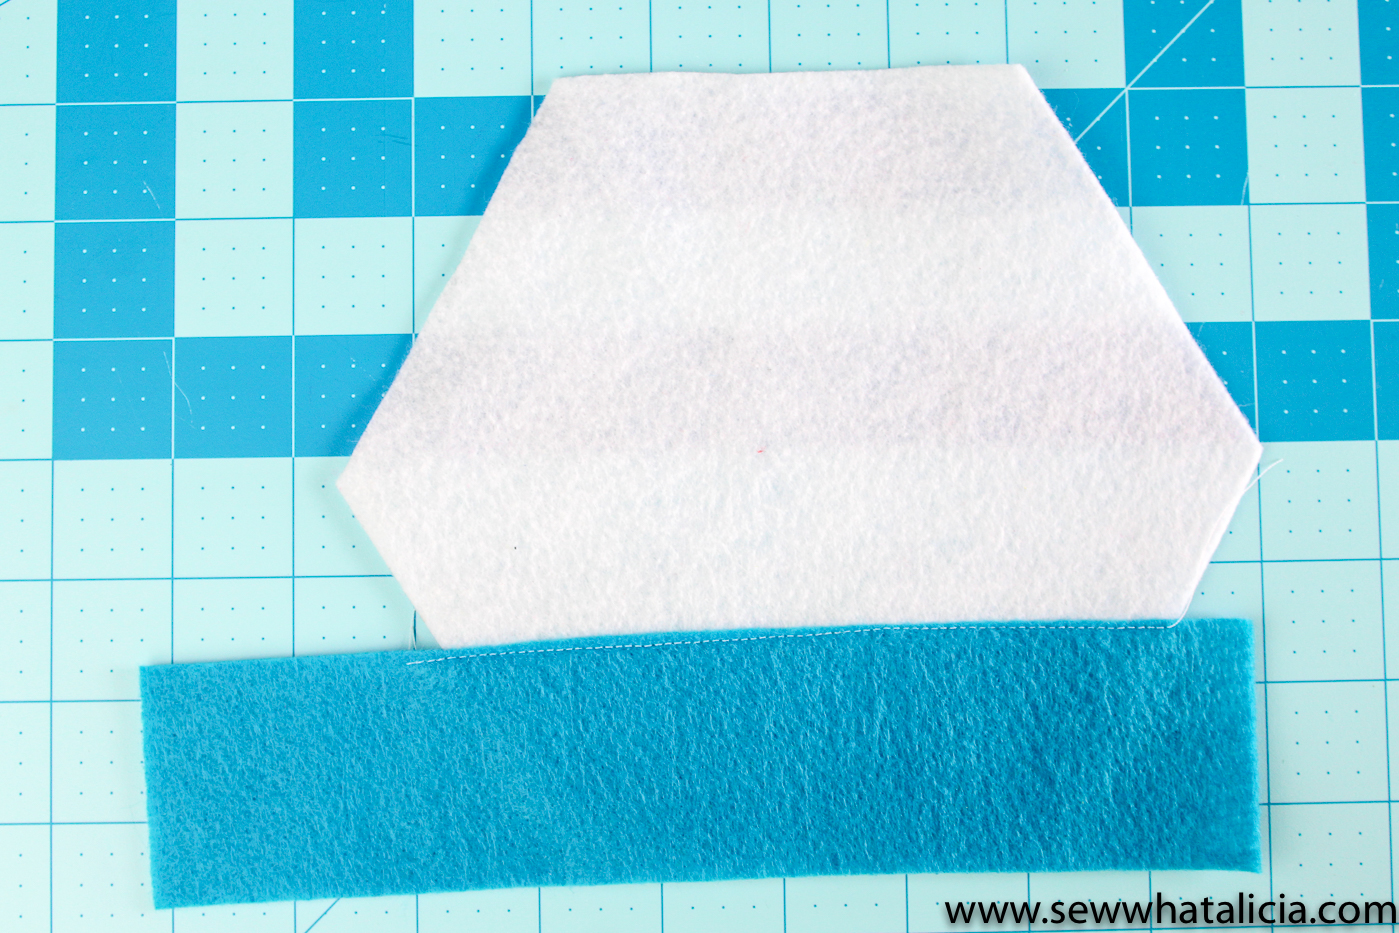
Add the other colors of felt in the same manner. Leave a 1/4″ strip along the top to add the zipper.

Trim the excess felt.
Place the zipper along the top edge.

Sew the zipper in place on both sides. Top-stitch the zipper down along the first seam you sewed.
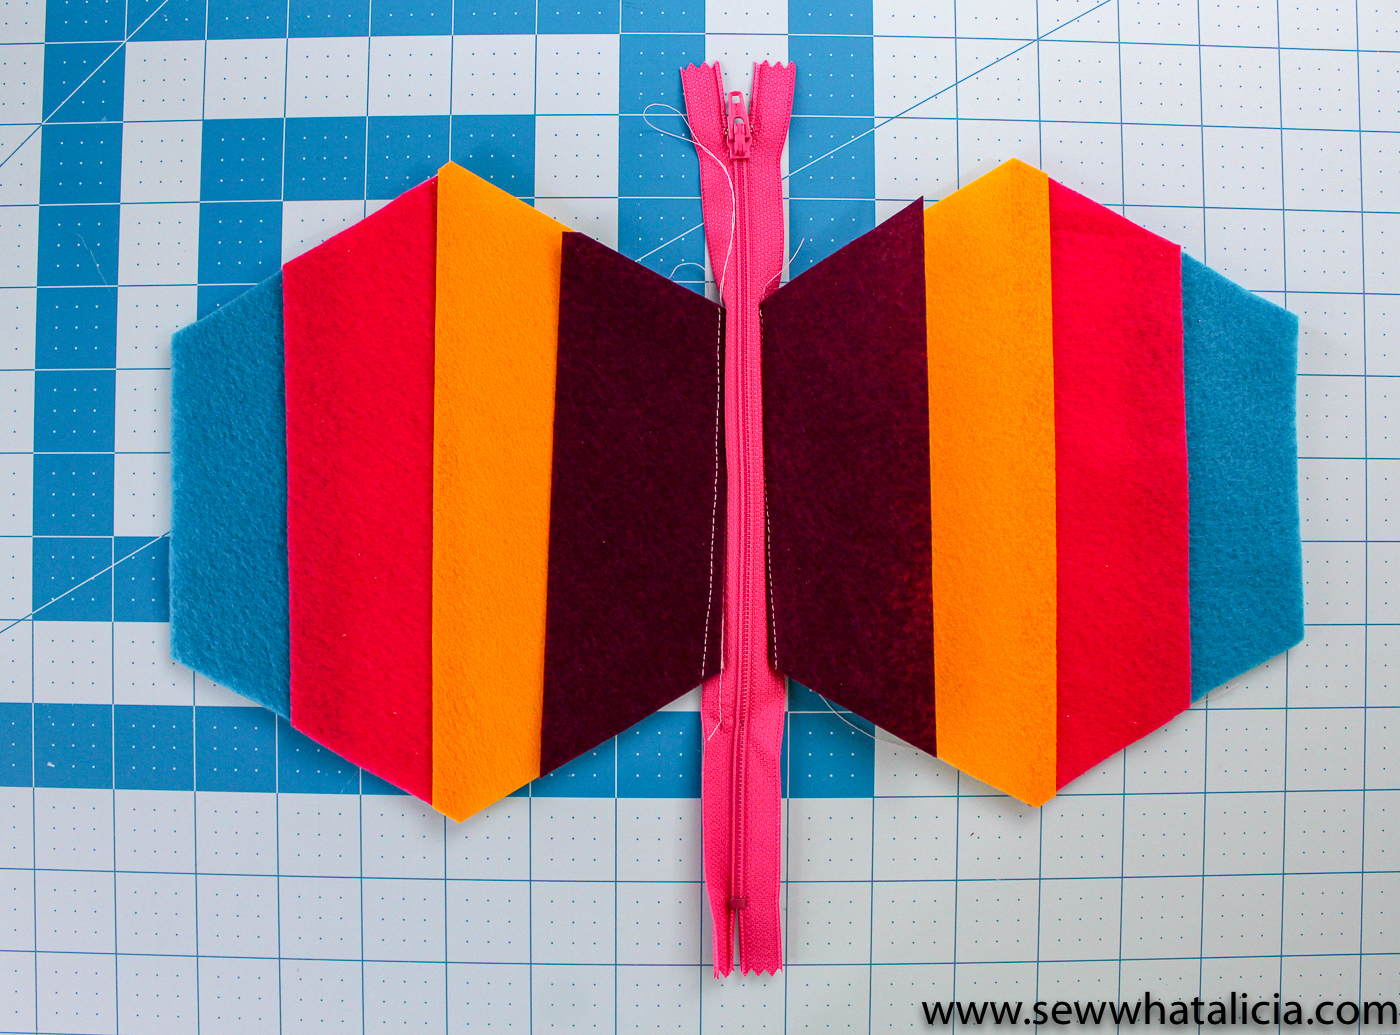
Place the right sides of the pouch together. Try to line the colors up as much as possible. Sew around the edges. Back-stitch to reinforce the ends of the zippers. (You won’t sew the side with the zipper.) Trim the zipper ends.
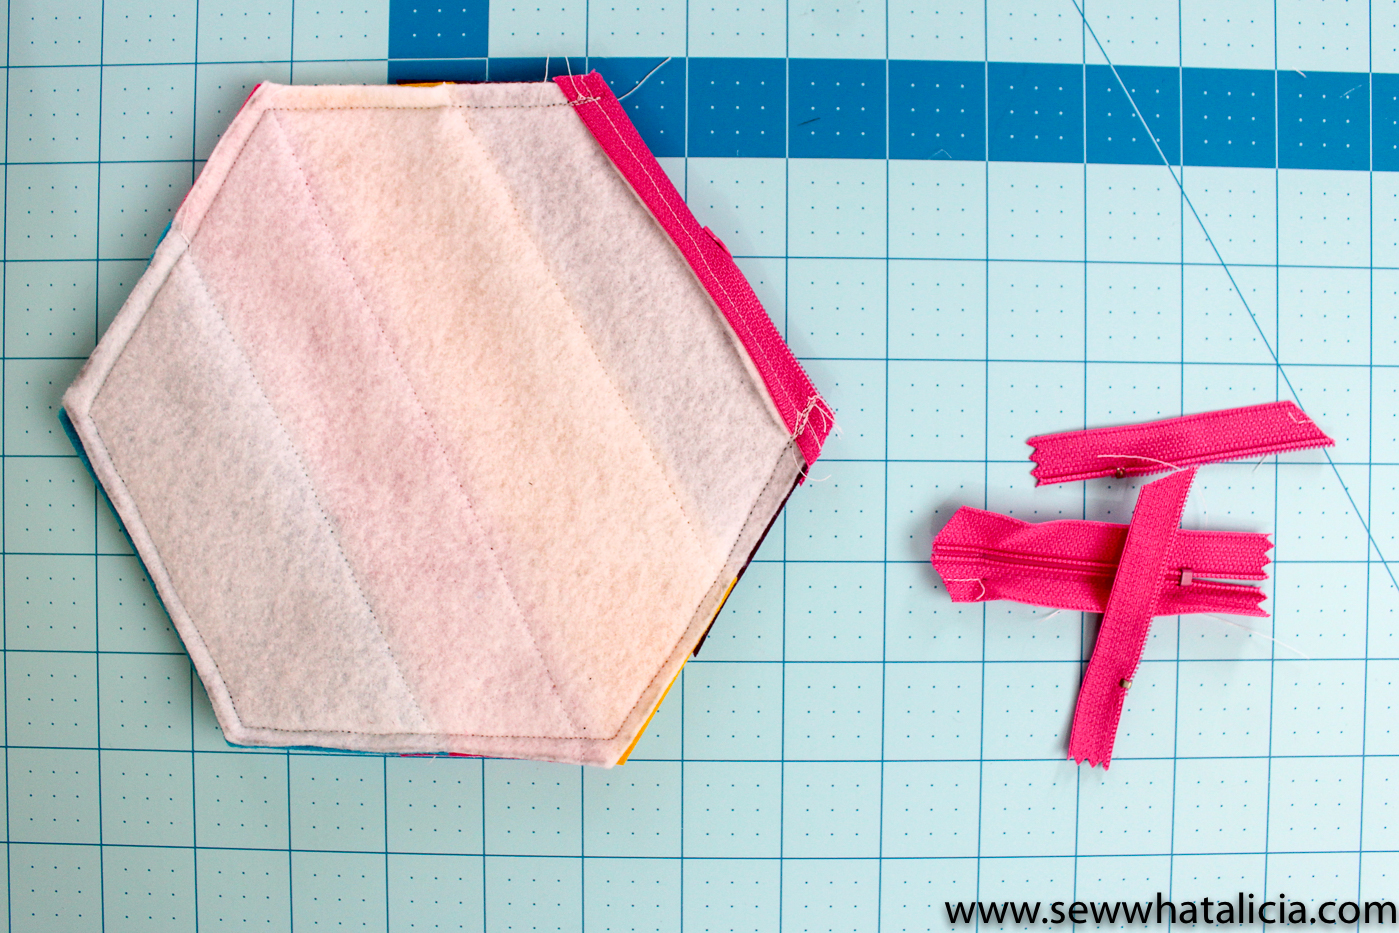
Turn the pouch out. Use scissors to fringe the felt on both sides.

That is it! Watch the video below for visual instructions for this pouch!! Have questions about how to use a zipper foot to install a zipper? Share with me in the comments below.


D Fulk says
Thank you so much for sharing. I wanted to verify I was using my zipper foot properly. And I now realize to MOVE the top of the zipper out of the way. (I knew there had to be an easier way!)
Thanks again!