Print then Stitch Valentine’s Day Cards
There are lots of practice cards out there for stitching. But these cards are nothing like those! These cards also double as Valentine’s day cards. No more boring stitch practice. Let the kids create their own cards this year and learn to stitch at the same time. Scroll down for tips and ideas for using these cards to stitch Valentine’s day cards!
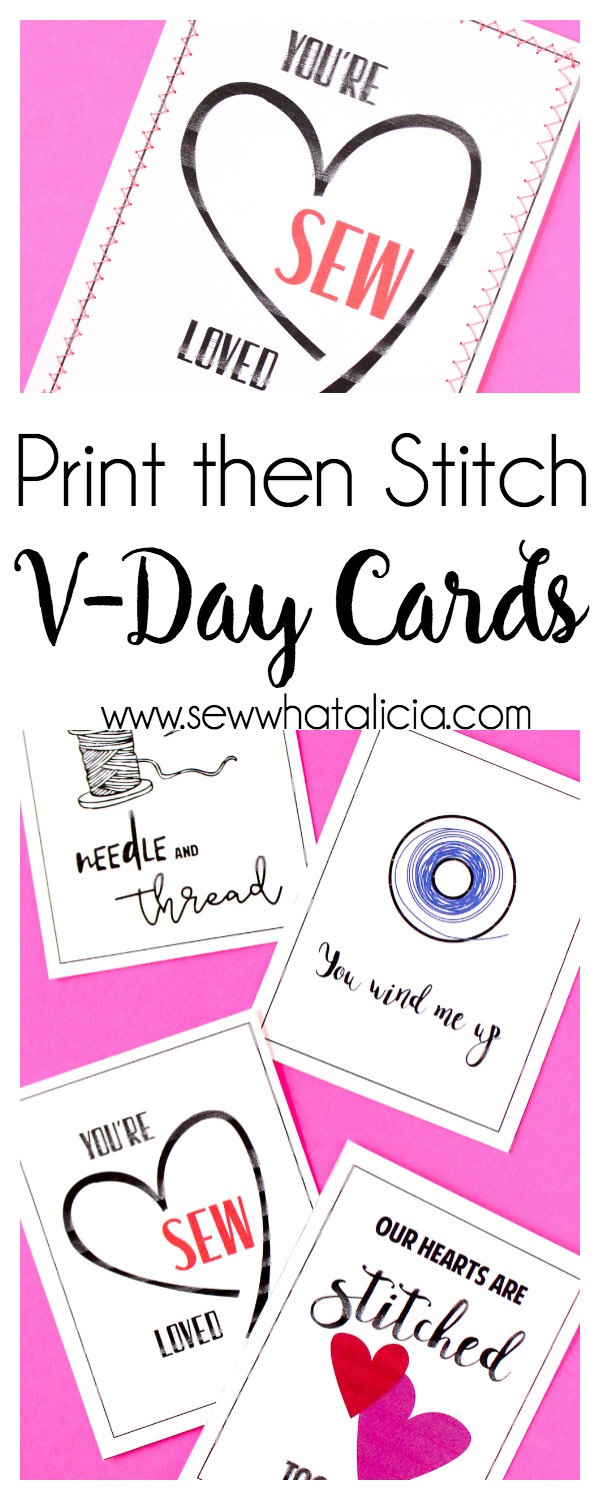
Print then Stitch Valentine’s Day Cards
Supplies:
Red, Pink, White Thread – I recommend this variety collection if you don’t have a large thread selection.

Instructions:
Print the cards. Trim the cards using the middle lines as a cutting guide. You may want to trim around the edges too depending on how it prints.
You can really stitch these however you want but keep reading for my suggestions for adding stitching.
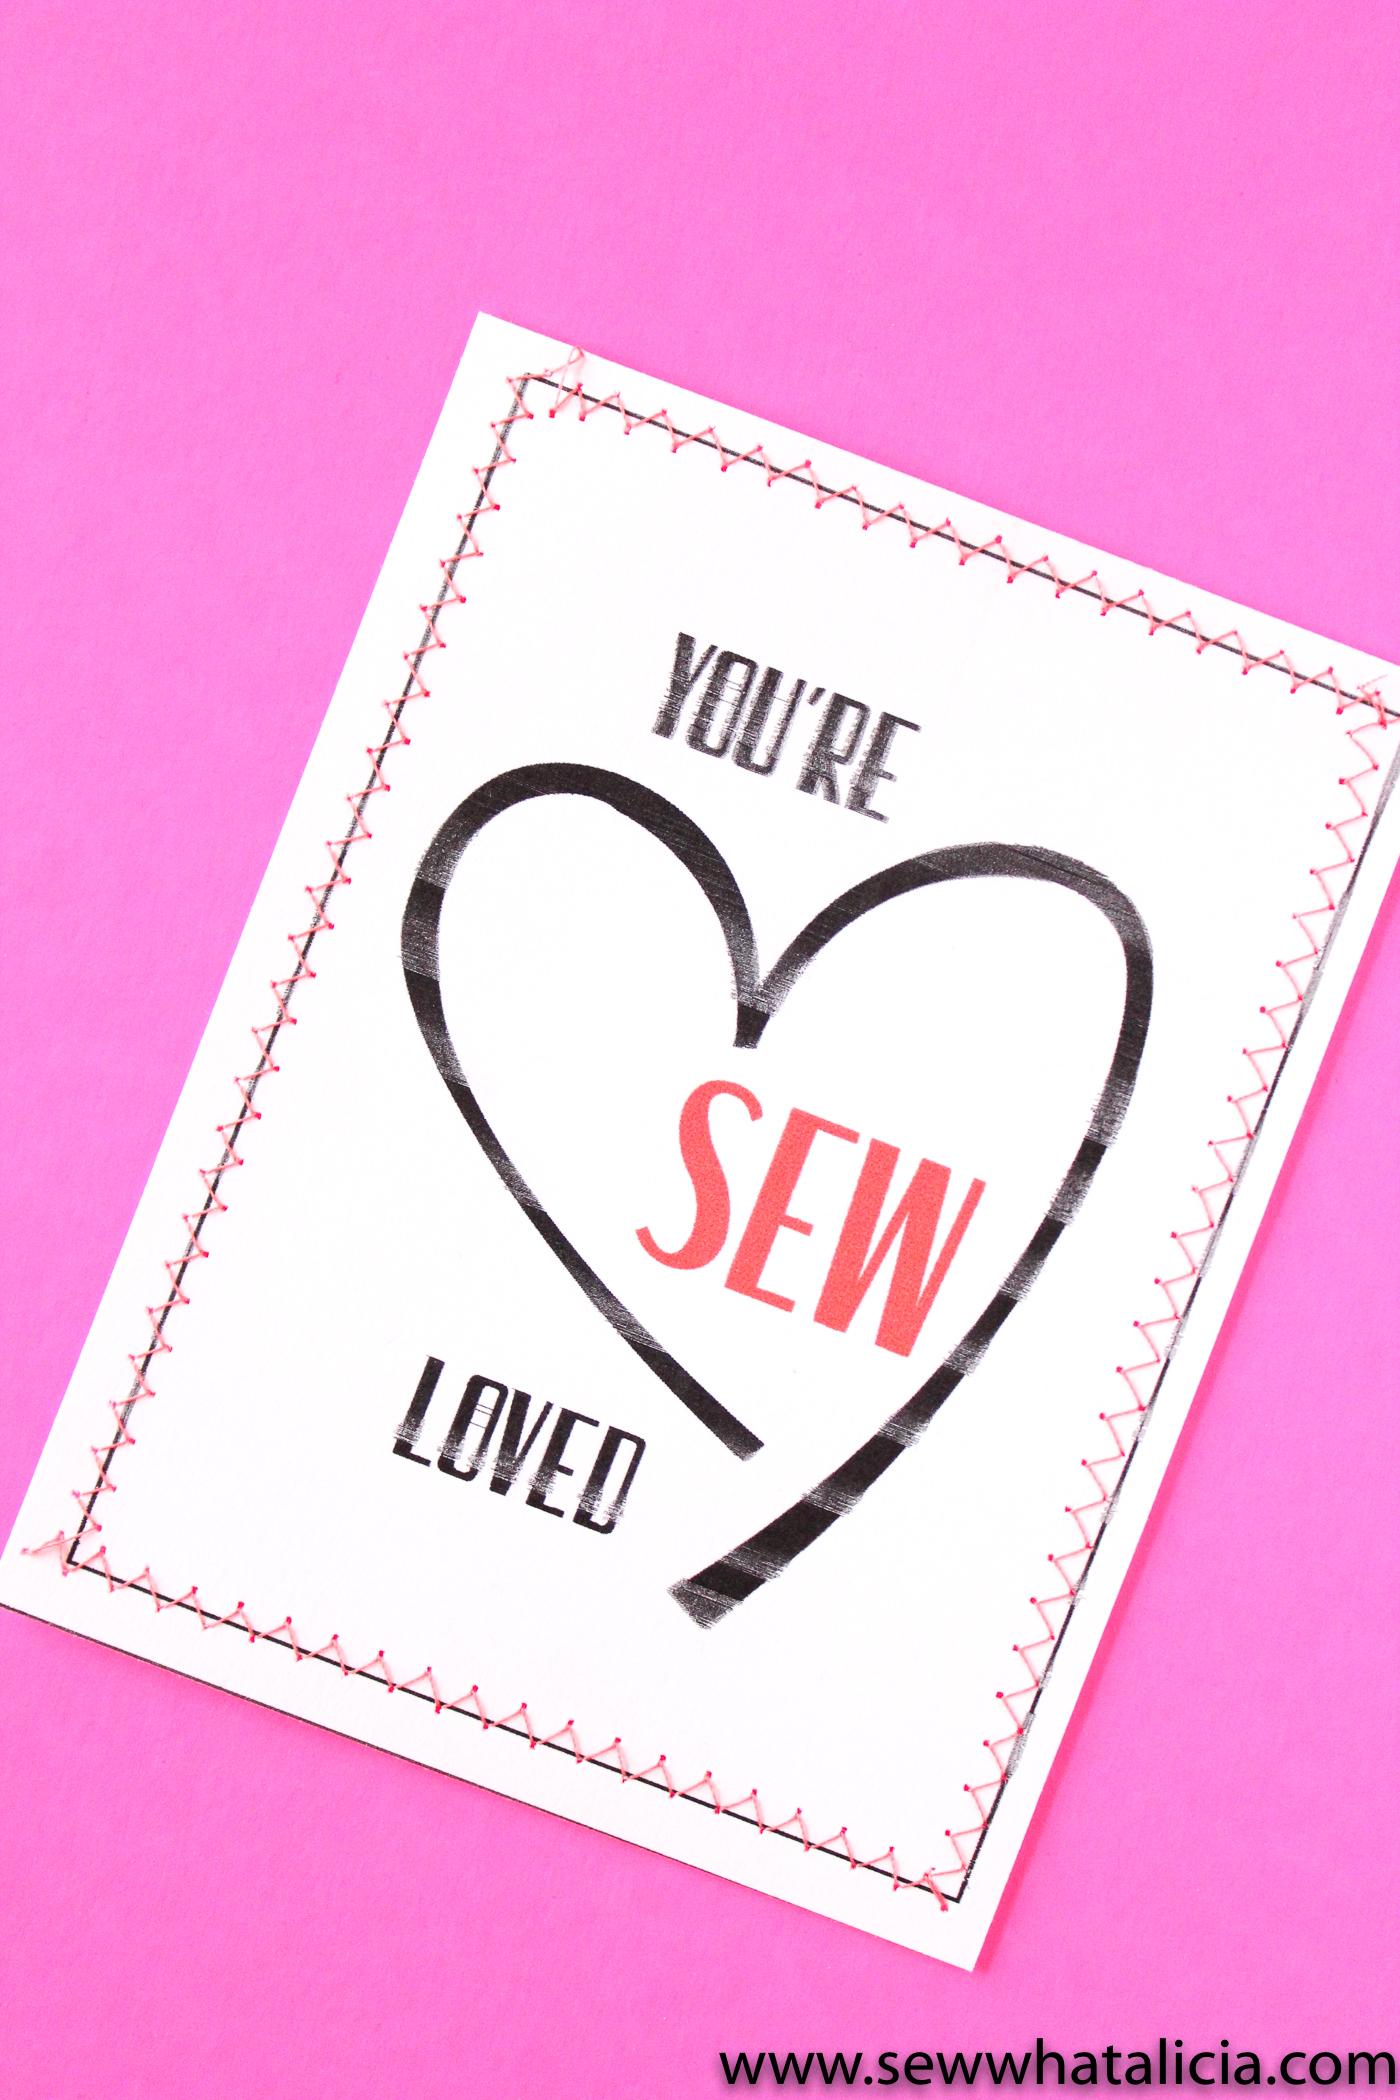
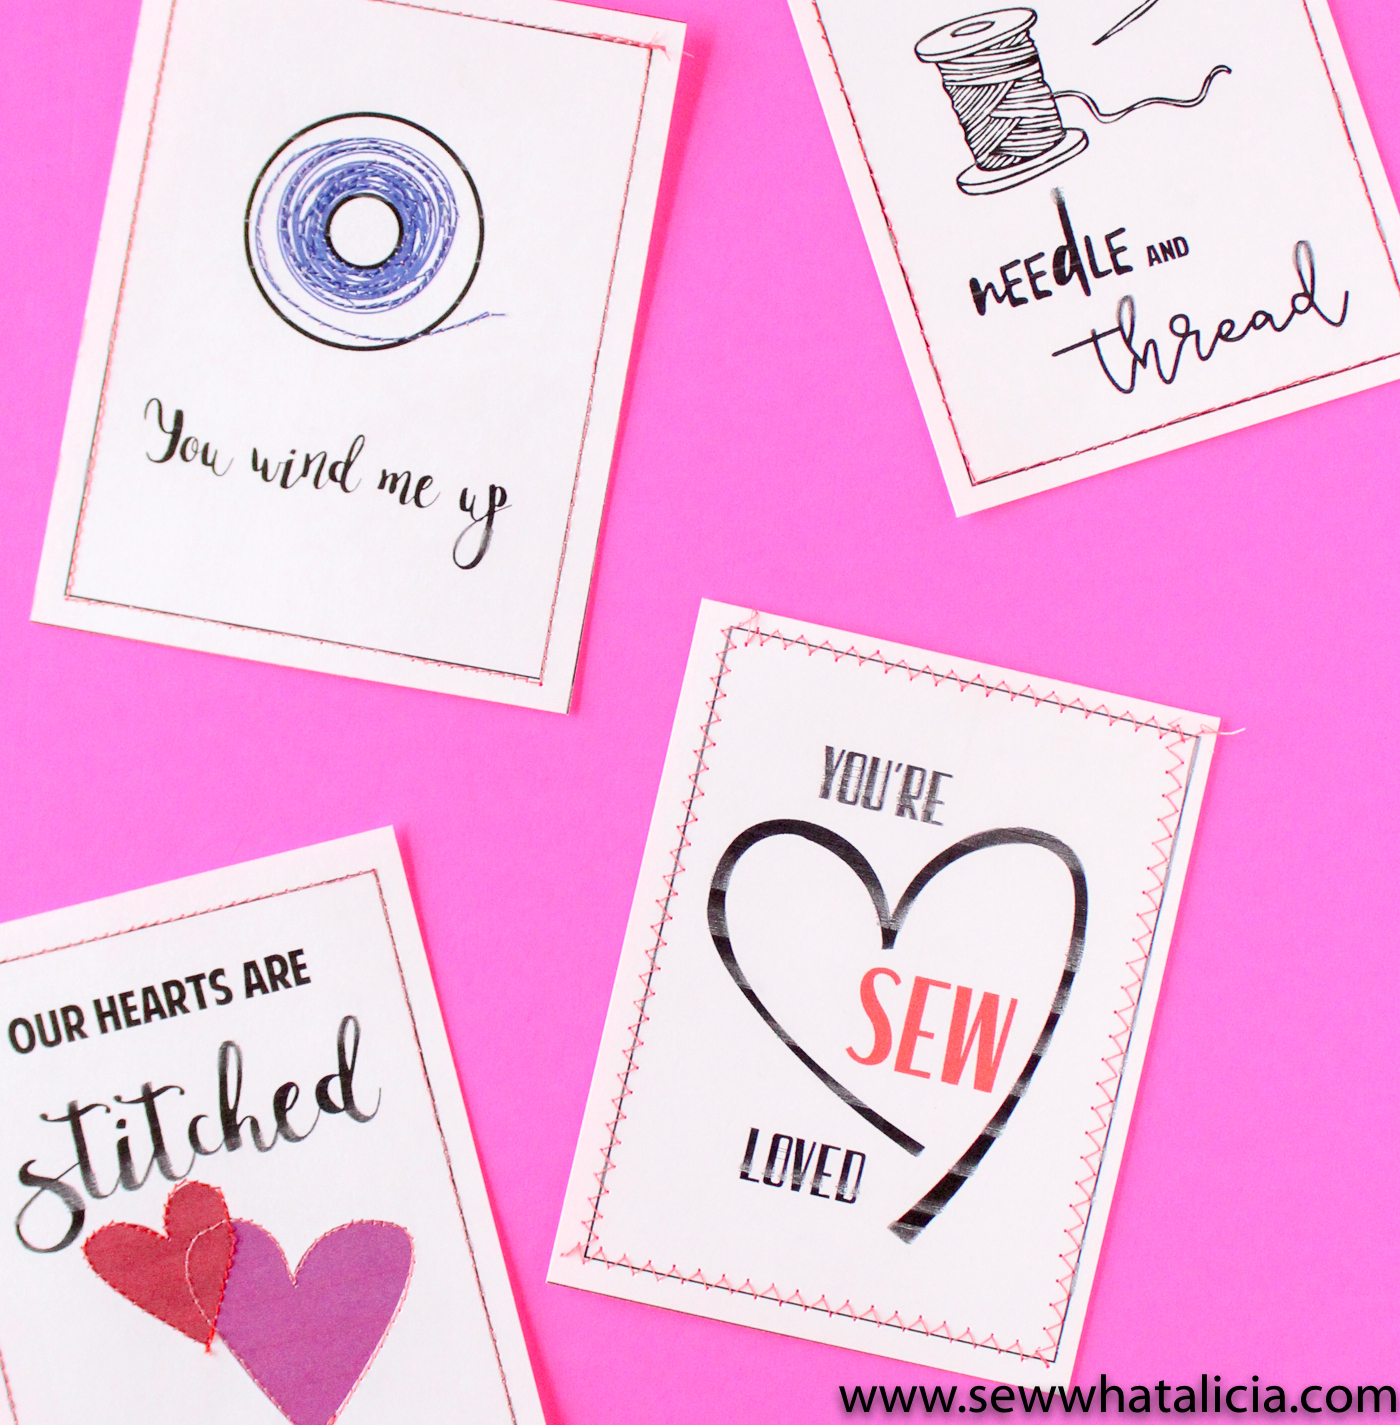
Start with the “you’re so loved card.” Set your stitch to a zig zag stitch. Use the lines as a guide for create a square using the zig zag.
*Newbie Challenge: Try and make sure that you are straddling the line with your stitch. Try and keep the line directly in the middle of the zig zag stitch.
Keep the needle location in mind when you life foot to turn the paper. This is where the stitch could go awry.
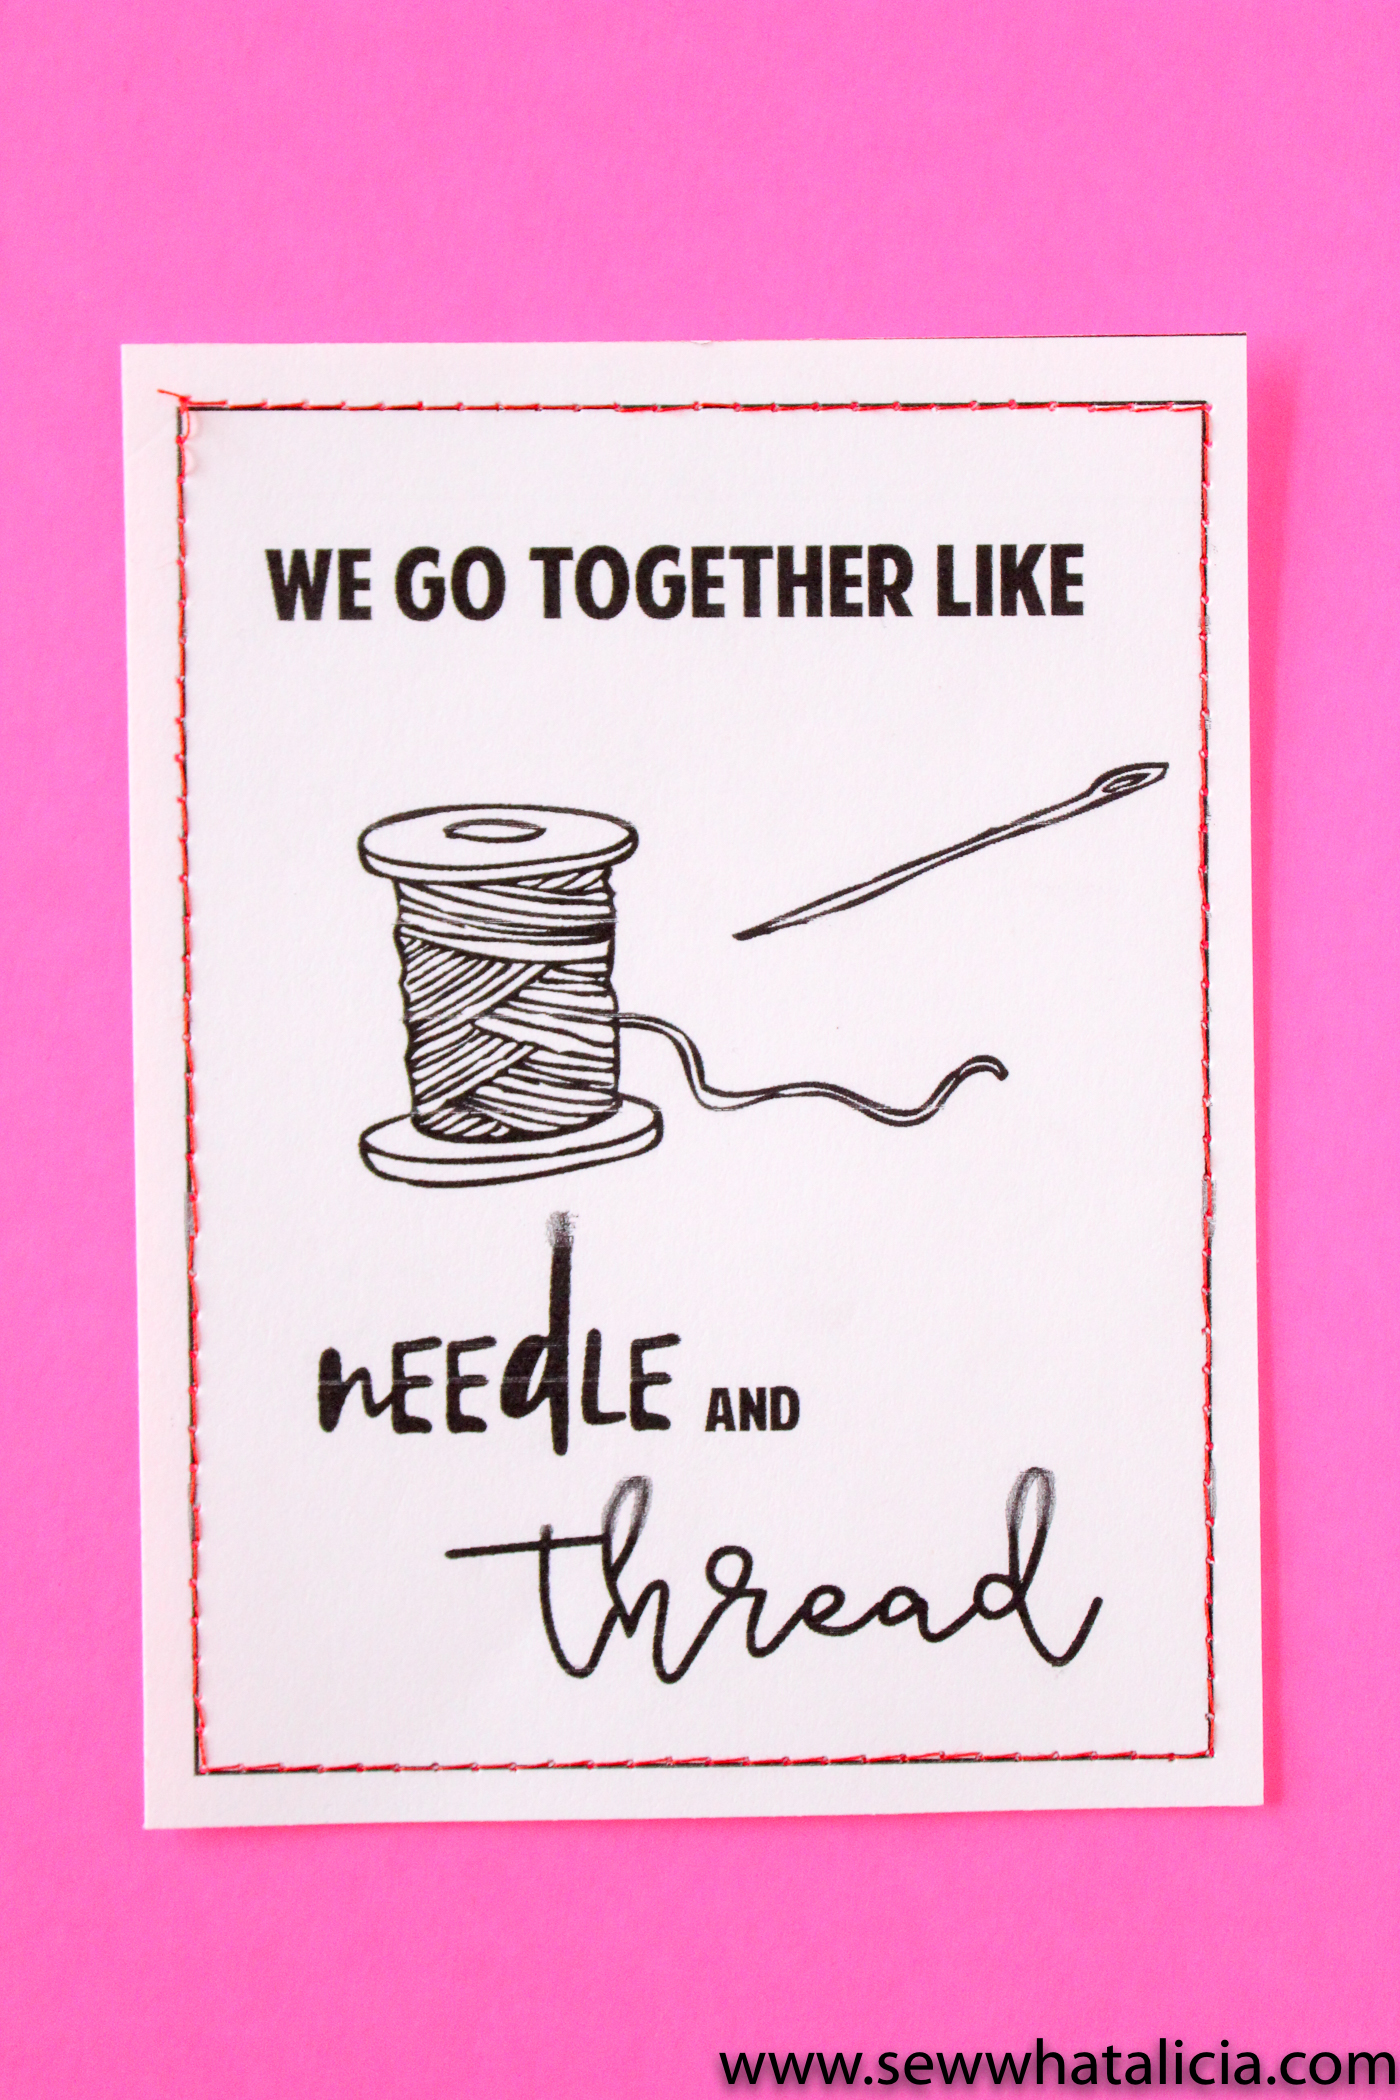
Next let’s work on the “needle and thread” card. Use a straight stitch this time to go around the box. You could also do another box within the box in another color. Try using the outer box as a guideline and sew 1/4″ inside the box.
*More advanced would be to fill in some of the thread with your stitching.
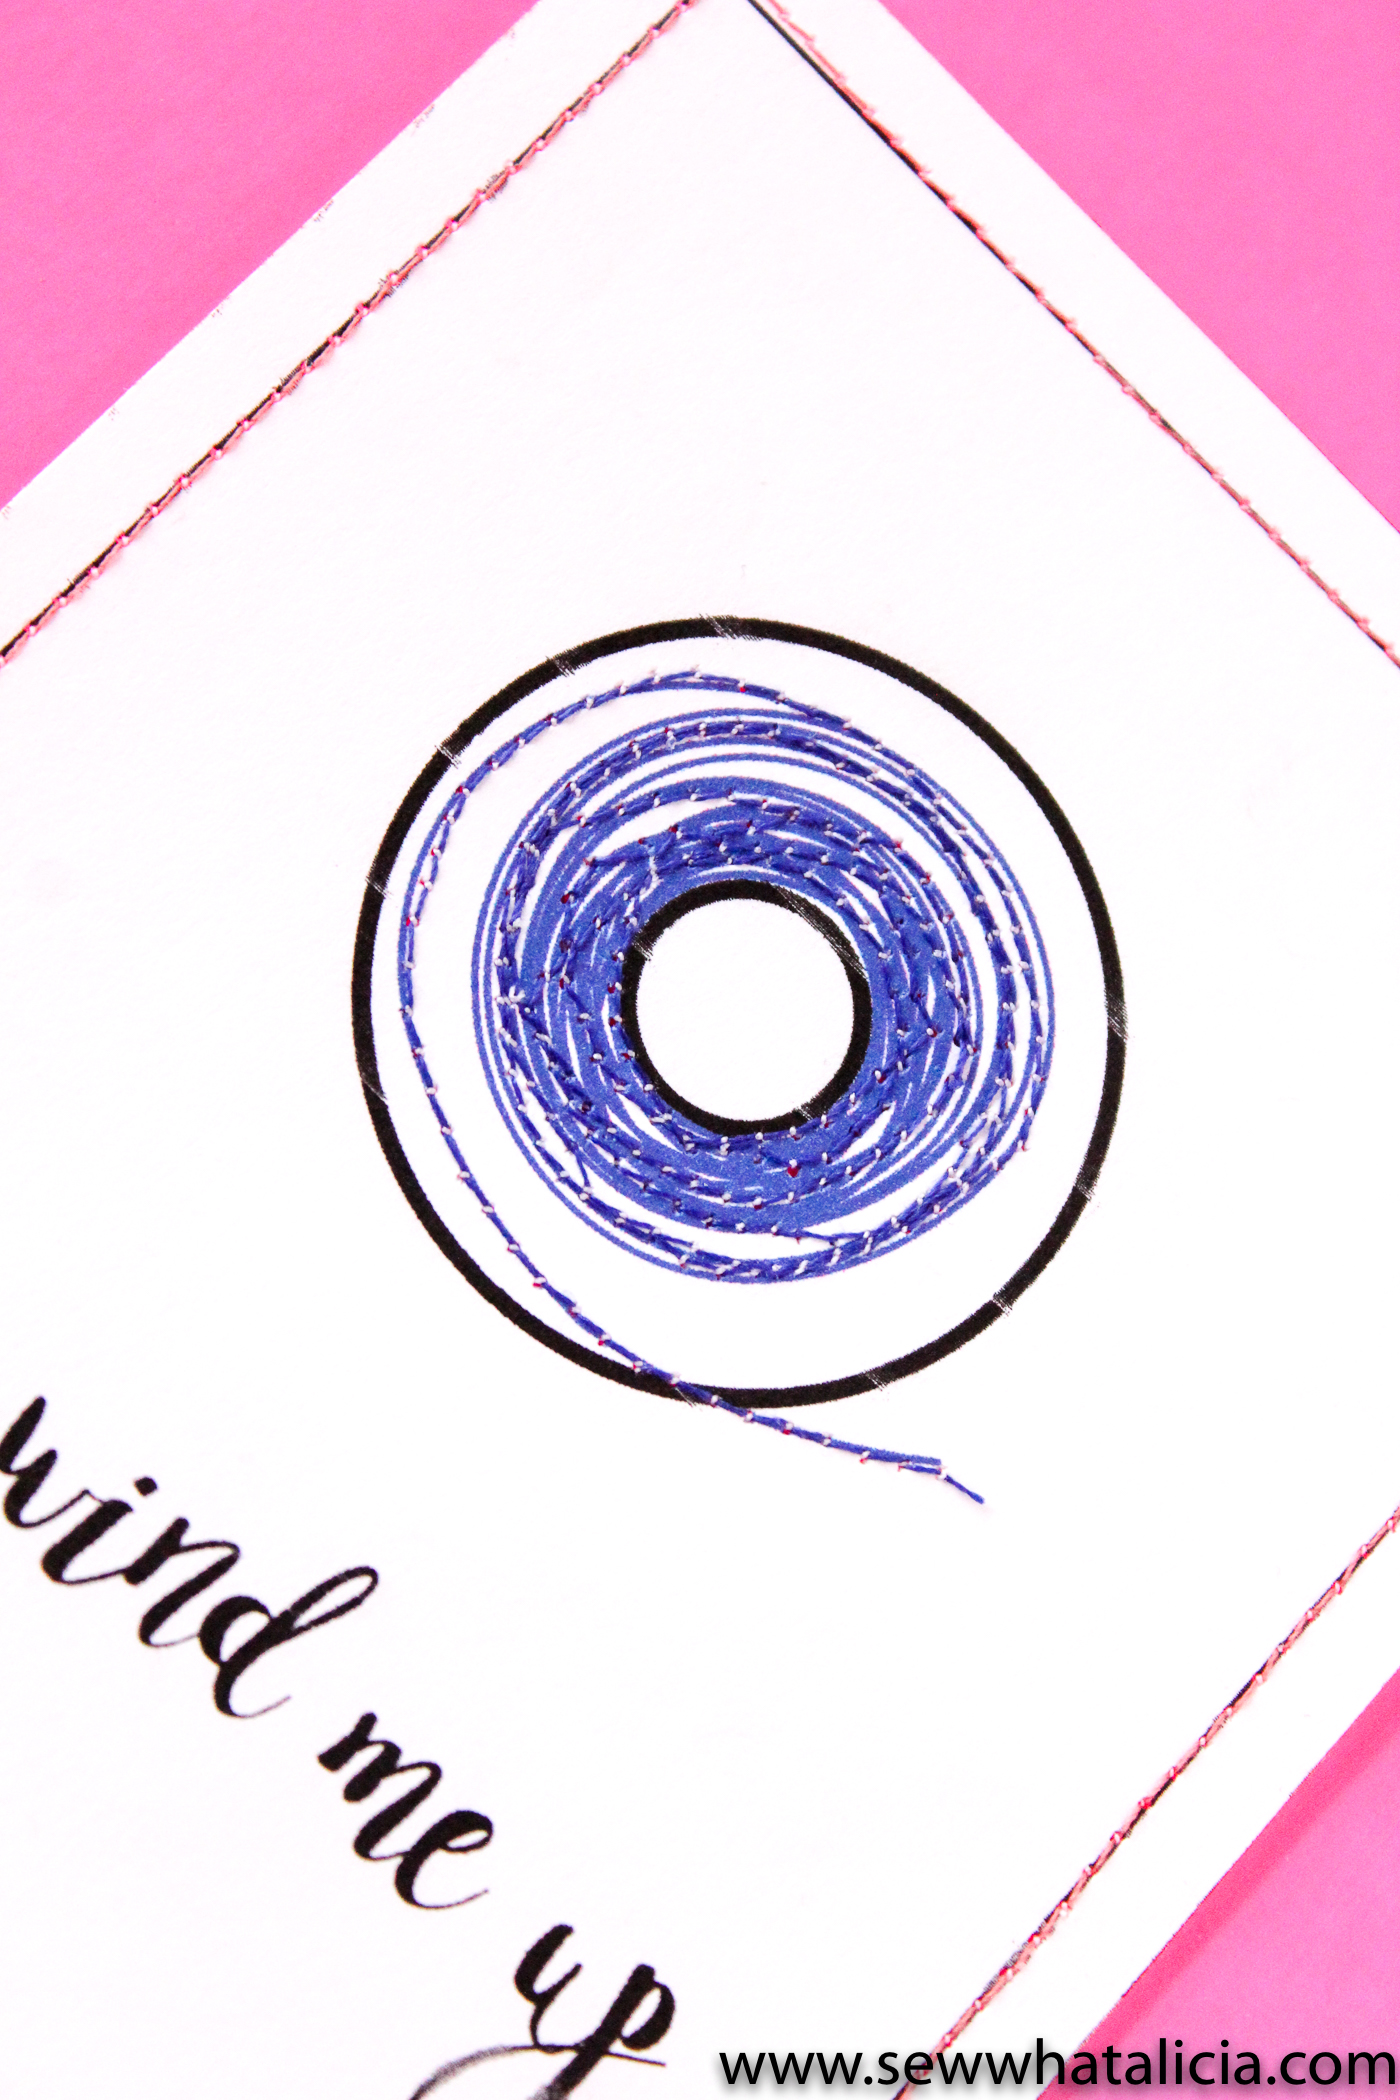
Now let’s move on to the bobbin card. You can again go around the box with a straight stitch (or use a zig zag, whichever you prefer.) Then you are ready to work on some circles. This is a great place to practice because it isn’t crucial that your circle be perfect. Start on the outside line of thread and work your way in. This will give you time to get the feel of lifting and turning and also turning the piece without lifting the foot.
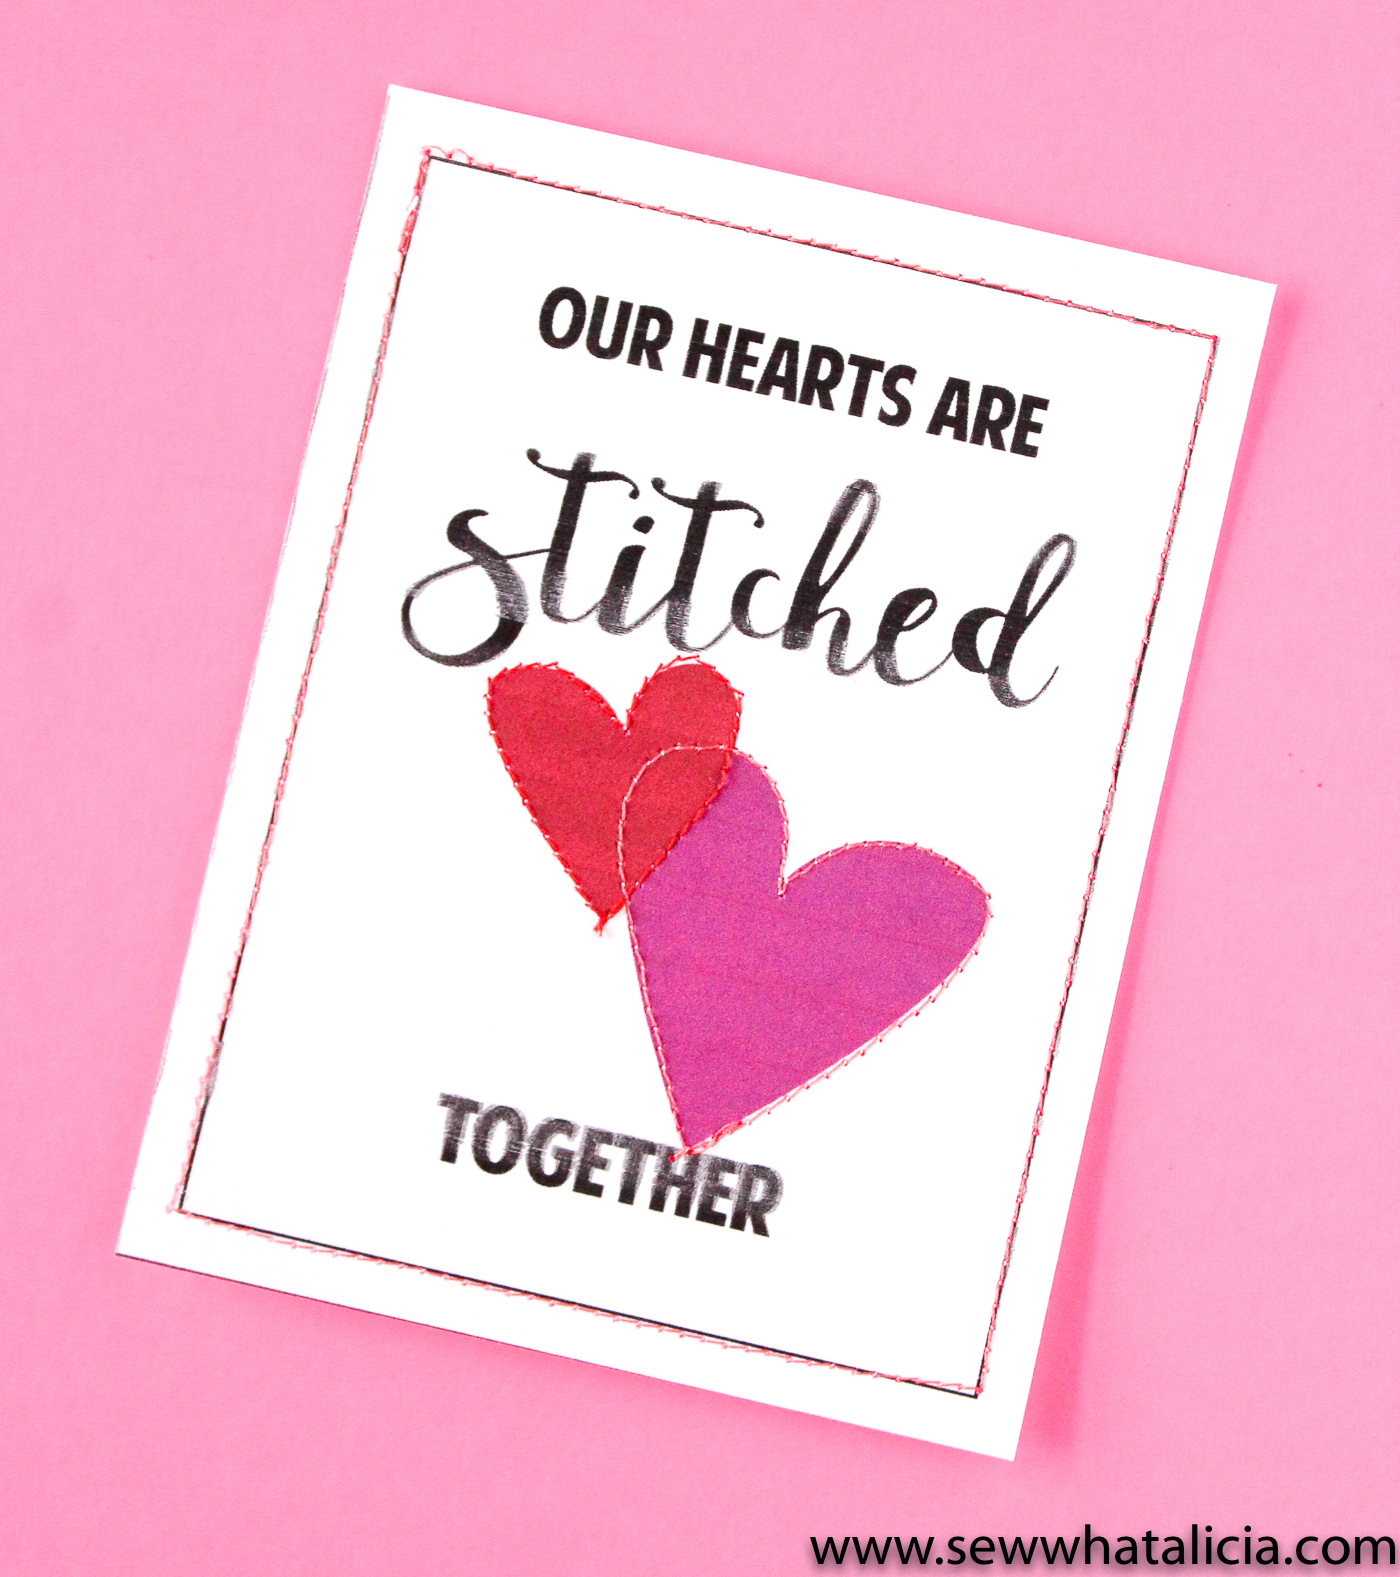
Last let’s put it all together to create the stitched hearts card. Using a straight stitch outline the card and then move to the middle to outline the hearts. You will have to carefully watch the heart and lift your foot to turn the piece. Try changing thread color for the second heart, and free drawing the edge of the bottom heart to create that stitched together look.
If you print several of these pages and work through them you will feel much more confident with your stitching. These ideas are just suggestions and you are meant to feel free to improvise and play around with the stitches. That is the great thing about stitching on paper. It is much cheaper than fabric and if you mess up you can just print another and start again! No seam ripping necessary!
Will you sew these cards up or will you make them with the kids? Share with me in the comments below.


Rita says
Love these! And plan to do them. My question though is that I don’t see any info. about needles, are you just using the usual all purpose needle or a heavier jeans needle? Thanks for sharing these.
sewwhatalicia says
Use an all purpose needle. If you make a lot then you will want to change your needle afterwards. But did you know technically you are supposed to change your needle after each project! Crazy right?
Sherri says
These are adorable! What a clever idea – you’re so talented. Thank you for sharing!
sewwhatalicia says
Thanks Sherri!! <3