Print then Cut Cricut Tips and Tricks
Print then cut is one of those things that was super intimidating for me to even think about before I learned to use it. I figured I am not the only one who was scared and intimidated so I thought I would break it all down here for you. If you are intimidated don’t worry you are certainly not alone! Keep reading for my tips and tricks and some things you definitely should NOT do! Plus get a few free fun files (scroll down for the free files) to get you started with print then cut.

Print then Cut Cricut Tips and Tricks
If you have never used print then cut before scroll down for all the tips and tricks, don’t worry about calibrating your machine. If you have used print then cut but have started having trouble since the design space update here are a few things to try before pulling your hair out!
- Recalibrate your machine. Instructions for doing that from Cricut HERE.
- Be sure that you are not using Safari as it is no longer compatible with Design Space…ask me how I know. It involves hours of frustration and a long chat with Cricut support!
- Watch the video below to see how it looks to set up print then cut in Design Space after the updates (this video was created on April 21st 2019 after the massive Cricut Design Space updates.)
Can you print on Cricut vinyl?
You sure can. THIS is the printable vinyl that I am using in this tutorial. The printable vinyl is not quite sticky enough to be called a sticker. So I wouldn’t recommend it for making kids stickers since they are going to take them on and off and the vinyl would quickly lose it’s stick (read: the printable vinyl is not reusable like a sticker might be.) I do recommend it for party decorations on goody bags, or book covers and notebooks, and other places where you want it to be removable OR where you won’t be removing the sticker and placing it again.
It might go without saying but you cannot print on just any vinyl. There is vinyl that is designed specifically for printing. The printable vinyl is the size of standard printer paper so that it will fit in your printer.
You can also print on heat transfer vinyl. THIS is a great one from Expressions Vinyl.
Can Cricut cut sticker paper?
The answer is yes. But sticker paper is one of those touchy subjects in the Cricut community. I DO NOT recommend using Cricut brand sticker paper. The problem with most of the sticker papers on the market is that they clog up your printer. I cannot tell you the number of stories I have heard about printers being ruined by sticker paper!
Instead I recommend using printable vinyl, like THIS. It doesn’t have the same level of stickiness as sticker paper but it is much more user friendly in every other way.
Looking for another way to make stickers, try making a vinyl decal instead.
Can I use transfer tape on printable vinyl?
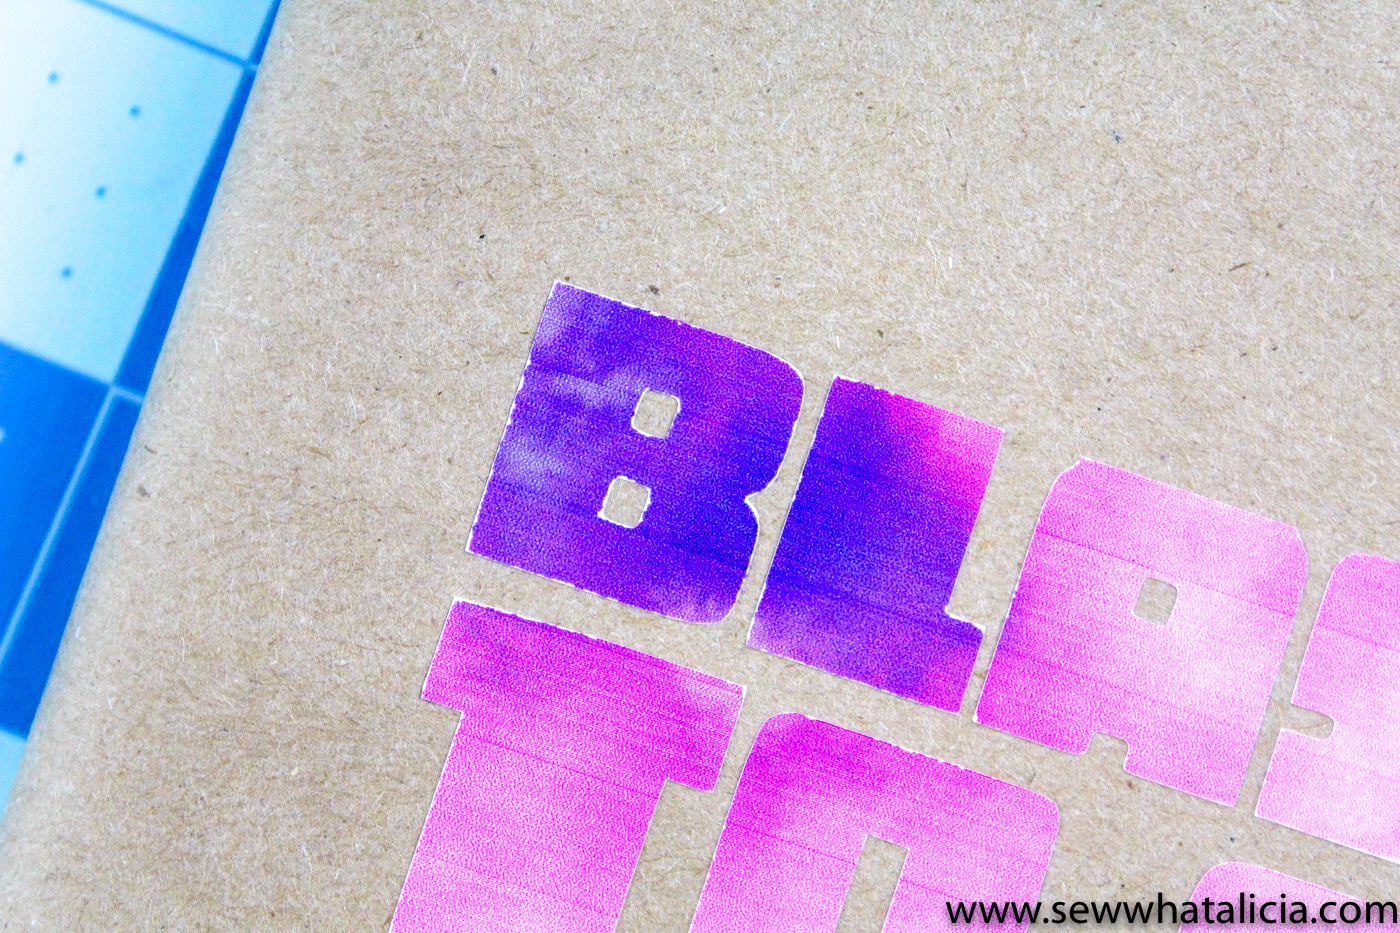
There is no clear answer for this question. This section will show you what happened when I used transfer paper on the printable vinyl and then you can make your own decision!
I had two concerns when I decided to try this out. I used THIS transfer tape and I put my vinyl onto a butcher paper book cover.
The first concern was, is the vinyl sticky enough to release from the transfer tape? The vinyl came off the transfer tape really easily. So that first concern was not a problem.
My second concern was would the color stay on the vinyl when I used the transfer tape.
I took a close up shot of the letters so you could see that a very small amount of color came off on the tape. This is only noticeable closeup. It is even less of an issue on the pink letters because the contrast is not that great between the paper and the pink letter. The darker letters were more noticeable. A less sticky transfer paper might have avoided this problem but I didn’t test it. Just know that you may lose a touch of color around the edges if you use a transfer tape on your printable vinyl.
So in conclusion, I would definitely use transfer tape on the printable vinyl again. The color loss was not so severe that I minded. The process for using the transfer tape was exactly the same as any other vinyl.
- Weed the printable vinyl.
- Cut a square of transfer tape just a touch larger than your words or image.
- Use a scraper tool (I like this XL scraper), or credit card, to rub the transfer tape onto the vinyl.
- Place the vinyl onto your surface. Use the scraper again and peel the transfer tape away from the lettering. I find that rolling the transfer tape away is more effective than pulling the tape up.
How do I upload files to design space for print then cut?
There are two types of files that I like to use for print then cut. They are handled in two different ways (as you can see in the video below.)
For an SVG you will need to import the file. Then flatten the image and it will automatically be set to cut | print.
For a PNG you will import the file. Then it will give you the option to save as a cut file (which takes away the color) or to save as a print then cut.
Resize your file to fit onto the printable vinyl. It will need to fit within a standard 8.5″ x 11″ piece of paper. It will also need to be small enough to fit within the guide box. The guide box is the black box that goes around your image. This box allows the Cricut to see where it needs to cut. You can see the light allowing the Cricut to read the line in the image below.

Grab your free print then cut files here.
Note these files have not been tested as standard cut files. They are designed and tested as print then cut files.
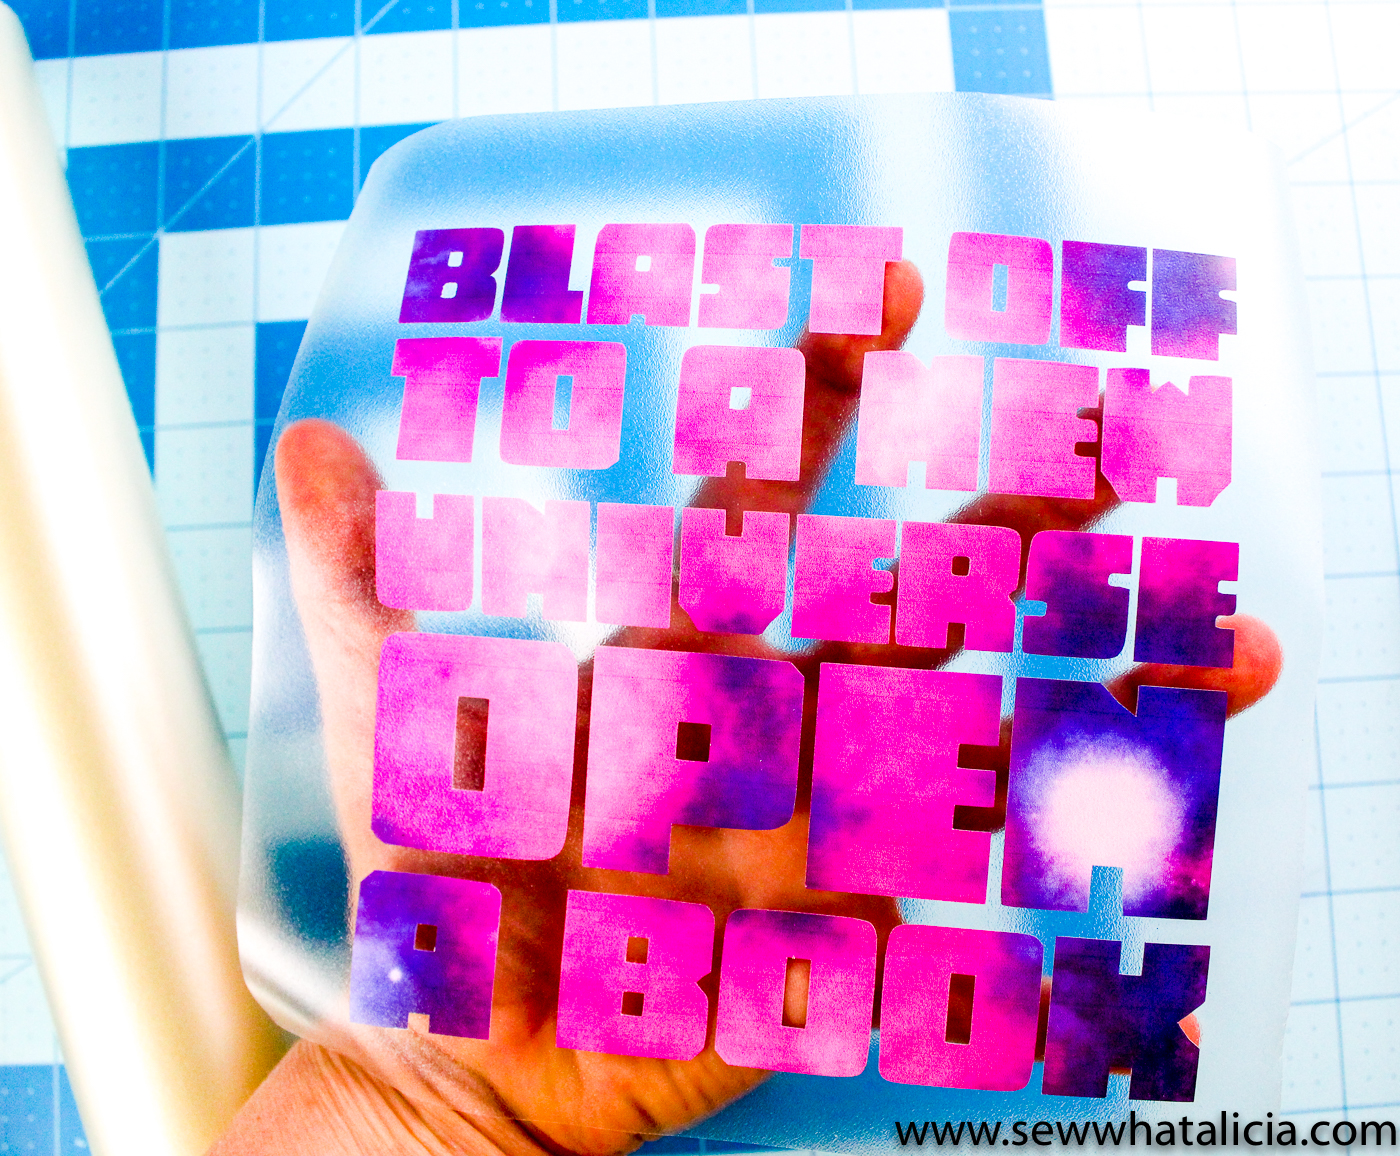
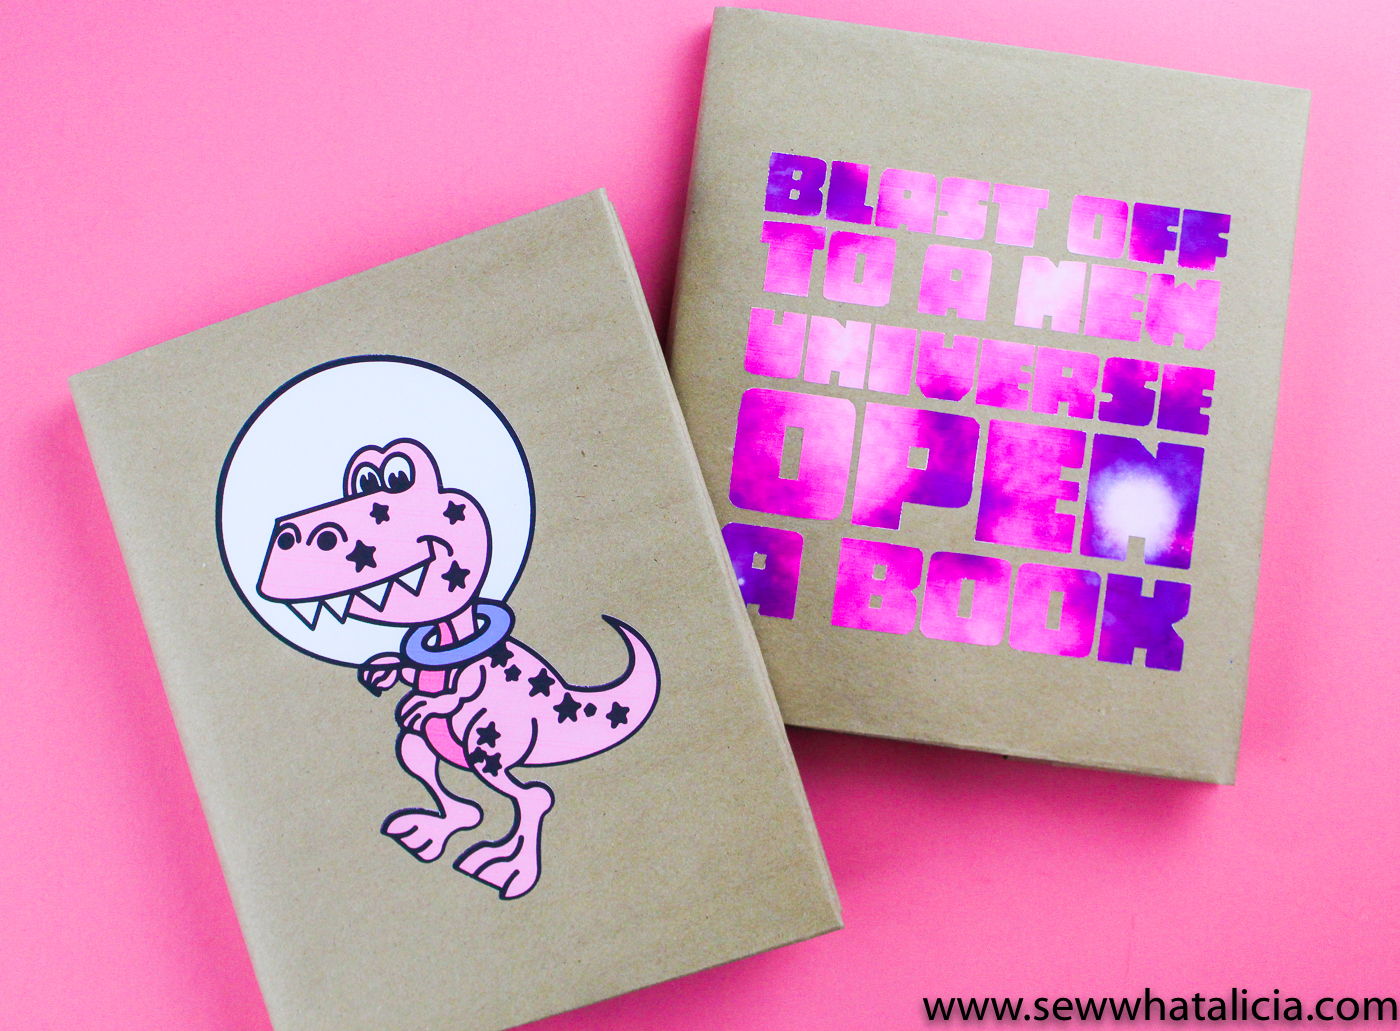
Universe Quote – PNG
Pink Dinosaur – PNG
Bonus Blue Dinosaur – PNG
What printer should I use?
Cricut recommends using an inkjet printer with the printable vinyl. You want to make sure you are using a printer that prints really high quality color images.
HP Printers like THIS one are the most highly recommended in the Cricut groups that I frequent. Plus HP has an instant ink plan which is super helpful to make sure you always have enough ink on hand! I am not affiliated with HP I just really hate not having ink when I want to print something!!
How to use print then cut:
To summarize everything in this post, here are the steps for this project.
- Upload your image(s) to design space.
- Print your image(s) using your printer. The image will print with a black square around the outside. This square is a guide box that shows the Cricut where to cut the image.
- Place the printable vinyl onto your green standard mat.
- Cut your image.
- Use transfer tape for the wording. For the dinosaur you can carefully peel and stick with your hands.
- Place your image(s) on your surface. I folded book covers out of butcher paper and placed them onto books for the kids to read this summer. Then I added the printable vinyl onto the book covers.
Still have print then cut Cricut questions? Share with me in the comments below. If you’re looking for print then cut troubleshooting, check out THIS post.


Leave a Reply