Planning Craft Projects – Bullet Journal Style
My college roommate recently started a blog (www.pageflutter.com) and she has gotten me hooked on this bullet journaling stuff! We spent like an hour chatting on the phone recently about bullet journaling and I have implemented a new system for planning craft projects using the bullet journal system that I wanted to share with you all.
Planning Craft Projects – Bullet Journal Style
What you need:
Journal – This journal that I am using has small dotted lines going across. They also have great journals with just dots that are great for adding graphs to for planning. It is up to your personal preference. This one is a really great option.
Pens – These Sharpie Fine Marker Pens are my absolute favorite. There is a variety of colors so you can represent different fabrics and textures with different colors. I also LOVE these Bic Mark It Ultra Fine markers (pictured below) because I love the way they write and they are a little thicker to hold which is good for me since I am tense and hold my pen tightly!!
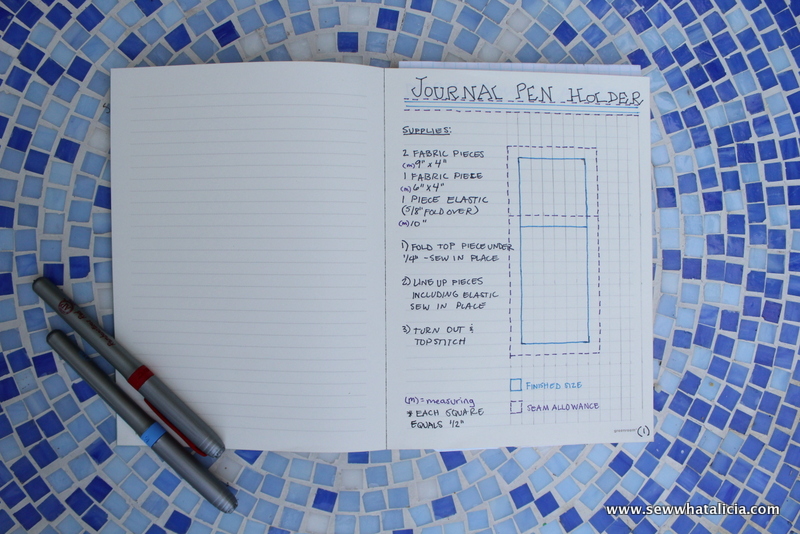
You can use a ruler or a t-square but I have found a genius hack that I am going to share with you! I have always used graph paper to plan projects. But that has led to a lot of loose pieces of graph paper hanging around and getting lost. This way all my projects are in one place. What I have done is taken one of those pieces of graph paper, folded it in half, traced all the squares with one of those black pens from above. Then I keep the paper in the back of this journal and I trace the graph paper as big as I need it for each project. That way I don’t have to spend a TON of time measuring and marking out a graph each time. And I am kind of weird about writing on graph paper. I love that I have the lines to write on and the graph to plan on in the same page!
So you have the journal and all the tools. Now what? Here are the basics of how I plan each project.
 Title – Make sure it is something that you will remember what it is! Simple and descriptive, nothing cutesy (for me that is what works best.)
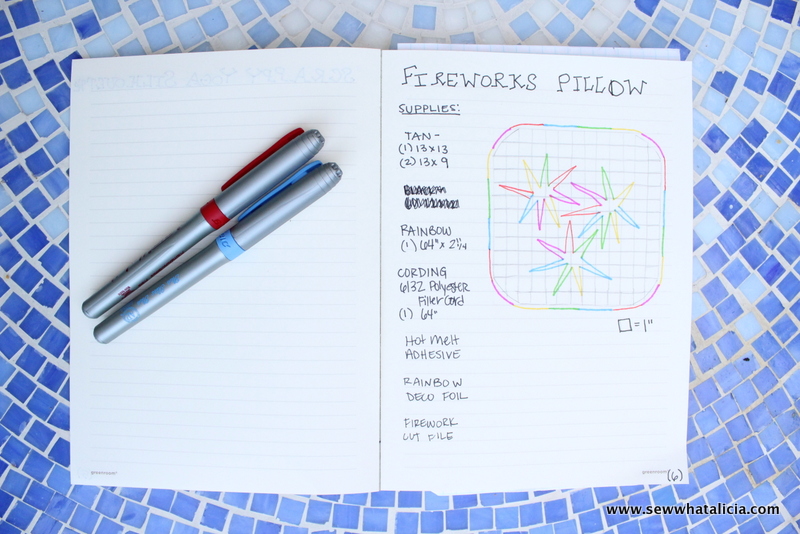
Supplies – I have to be very specific because I will walk away to grab a glass of water and forget what size I cut something!! My short term memory is horrible!
Directions – I am NOT specific with these details. If I have the general measurements it is easy for me to figure out how I made something. I just put the basic steps and any details that are not a natural progression for me. (This is a personal preference you can be as specific as you want with these.
Sketch – I make a general sketch of the shape and decorating that I want to use, in the fireworks image above you can see a ROUGH sketch of the fireworks.
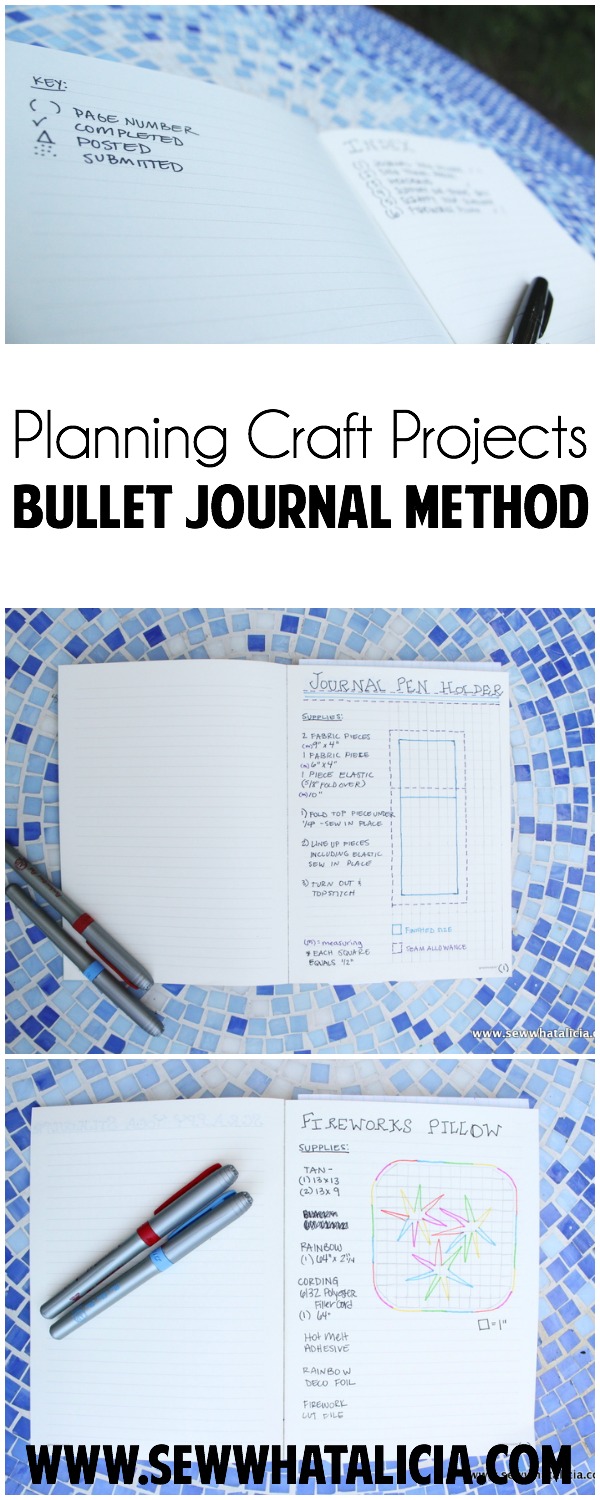
Key – Make yourself a key to explain the different symbols you have used. Also include the scale that you used in your graph.
Page Number – If your journal doesn’t have page numbers make sure you add them as you go along so that you can index all your projects.
One more note, I choose to use only one side of the paper. If you want to add more details to the directions then I would definitely recommend that you use both sides of the paper! If I were to do this I would put the directions on the left hand side of the paper and the sketch on the right side!
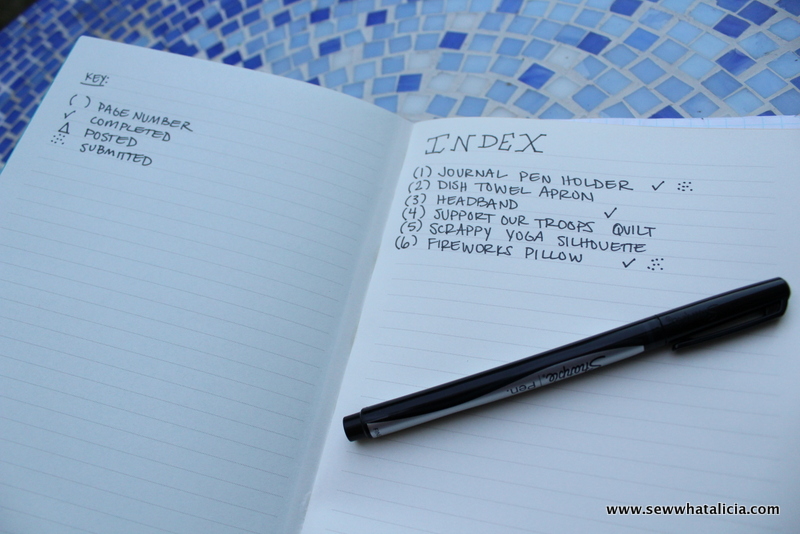
Let’s talk about the index. My index is very simple. I have the page number in parenthesis next to the project title. Then I have a system for tracking each project as it relates to my blog.
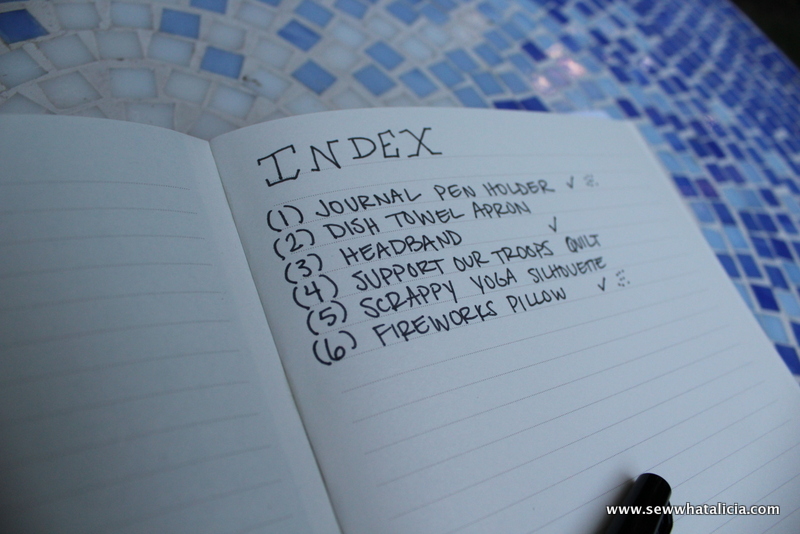
I have a key for tracking each project for the blog. I also submit projects to lots of other places on the world wide web and so I have a method for tracking that as well. 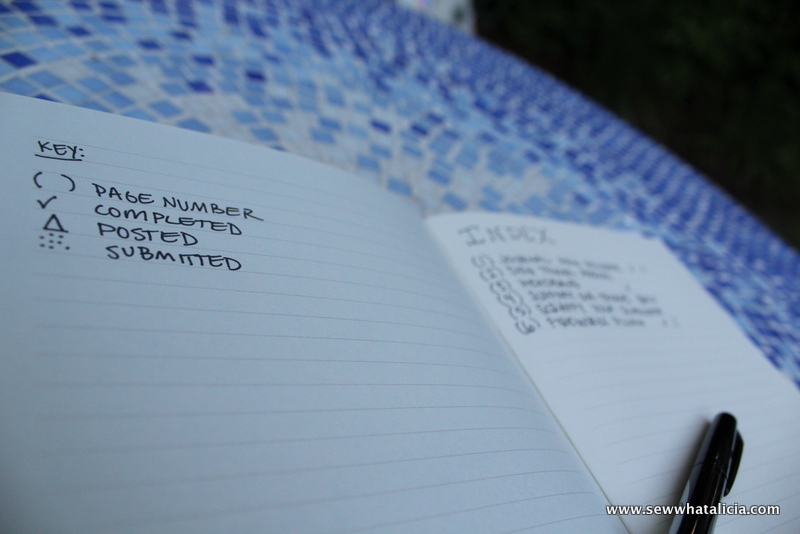
This is how I am planning craft projects using the bullet journal style. How do you plan your craft projects?


Leave a Reply