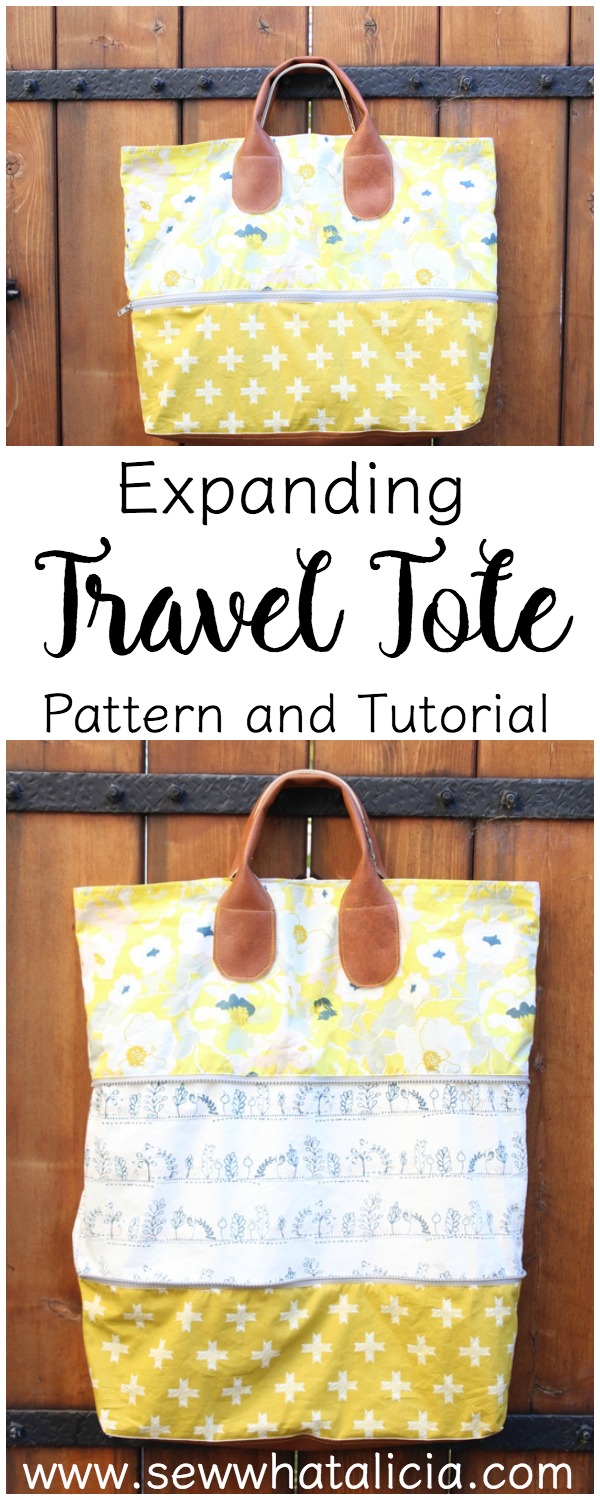
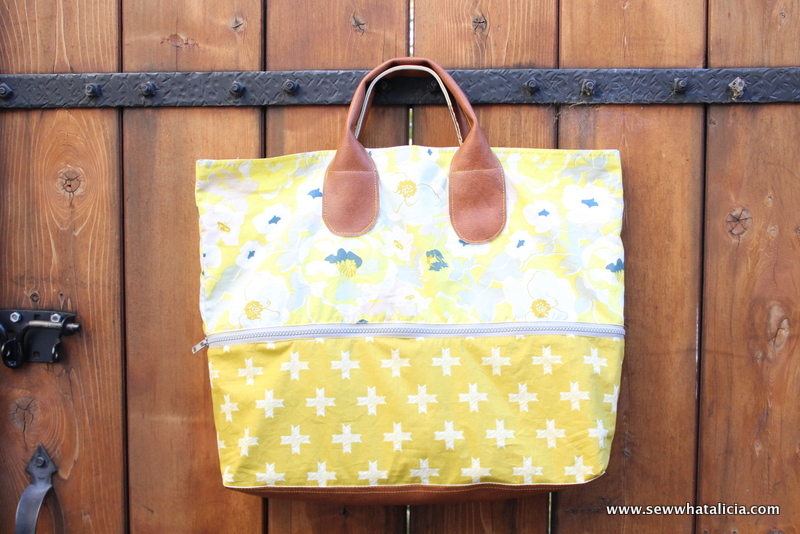
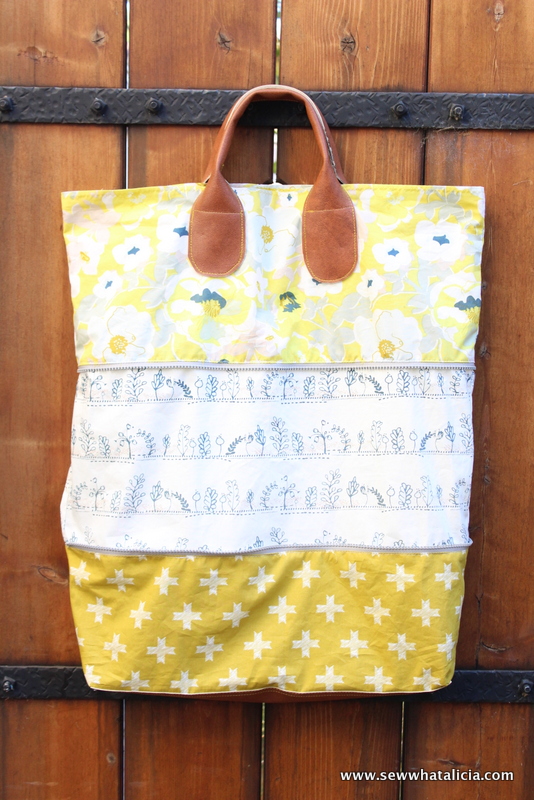
Expandable Bag Pattern and Tutorial
I am in LOVE with the fabric for this month’s project. It is Heartland by Pat Bravo for Art Gallery Fabrics. I have a big trip planned over the holidays and I had a feeling some of you might need a travel bag too! This expandable bag pattern is perfect because the bag opens up to allow you lots of room! I can’t be the only one who comes home from a trip with way more than I took!
Expandable Bag Pattern and Tutorial
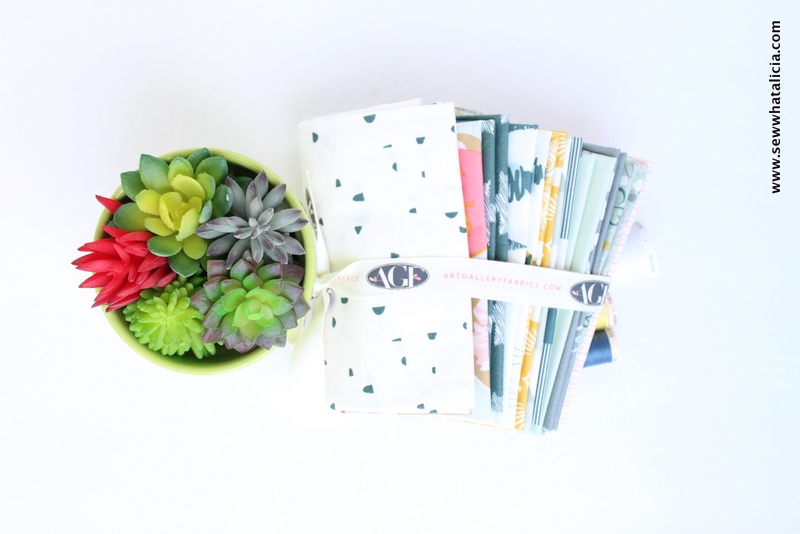
This post was sponsored by Art Gallery Fabrics. They have supplied the fabric for the tutorial and the giveaway. All opinions are my own and you may already know I use this fabric on the daily and I absolutely love it!
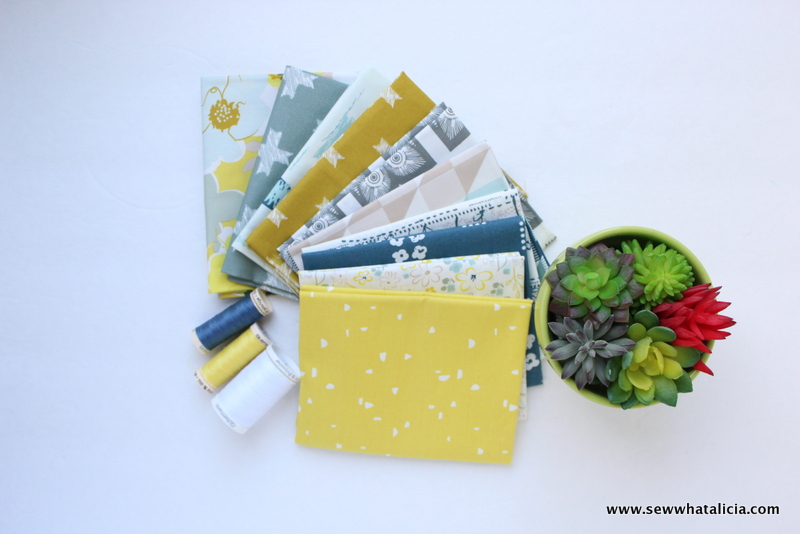
Supplies:
6 Fat Quarters of Heartland Fabric by Pat Bravo for Art Gallery Fabrics
1 – 40″ zipper
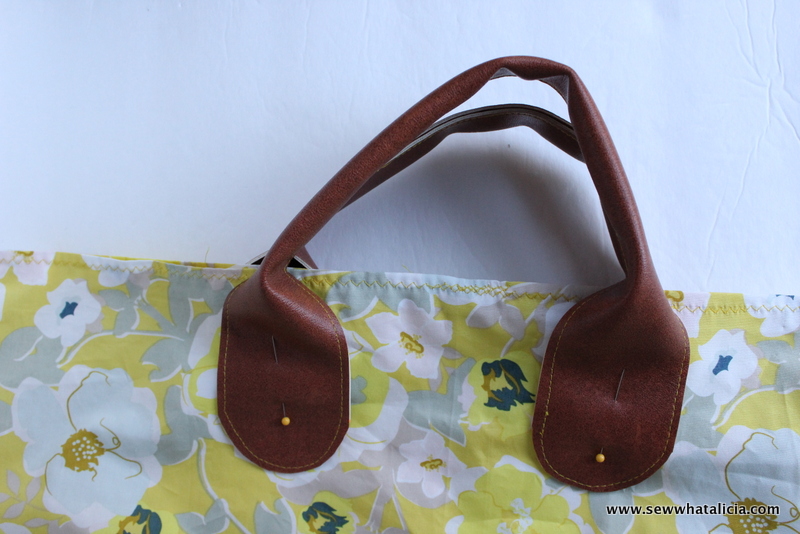
Purse Handle or Strap – See my tutorial for creating your own faux leather purse strap HERE.
Instructions:
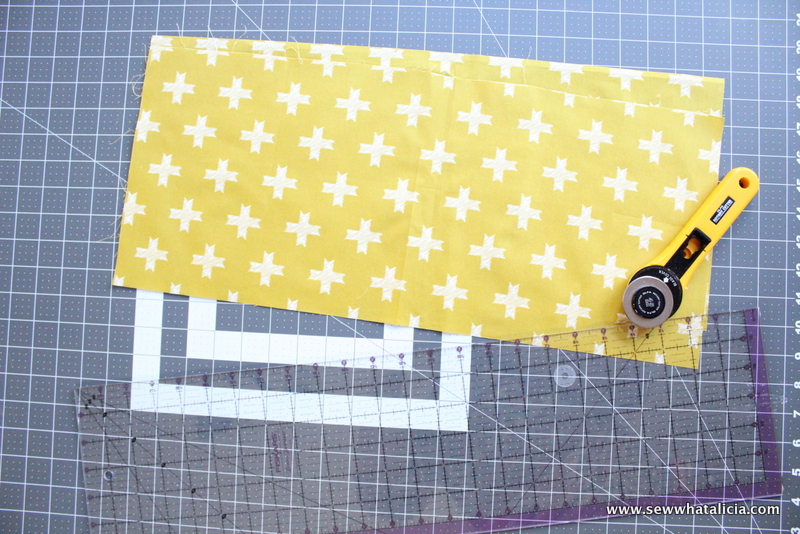
You are going to cut all 6 fat quarters into the same size pieces for this expandable bag pattern. This tote is totally straight forward and uncomplicated. Cut all 6 fat quarters into two pieces measuring 9″ by 21″. This leaves very little scrap, which is always a plus for me! You can vary the size of the fabric but if you change the length then you will need to get a different length zipper. Your pieces should be half the length of your zipper plus 1″ for seam allowance (using a 1/2″ seam allowance.)
Once you have 12 pieces measuring 9″x21″ we are ready to start sewing them together. Grab the two pieces of the same fabric that you want to be the outside bottom of your bag. With right sides facing sew along the two short edges and the bottom of the fabric.
Next we are going to create the box corner. Did you ever do origami? Take the point at the top edge of one of the sides and fold it into the middle (right sides together.) This will open up the corner on the same side. Repeat so both corners are open. (See picture below, it is hard to explain!!!) A quick point to remember is that you want to make sure before you line the seams up as you fold.
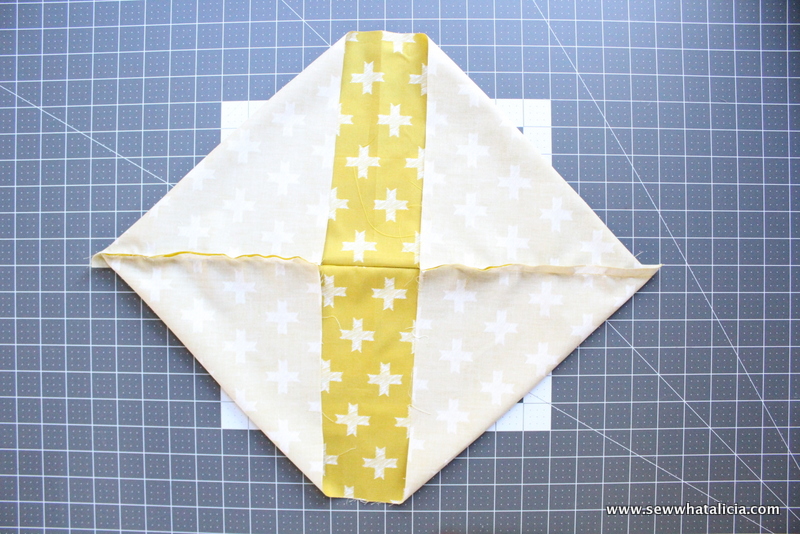
Now using a ruler measure one of the corners and find where it measures 4″.
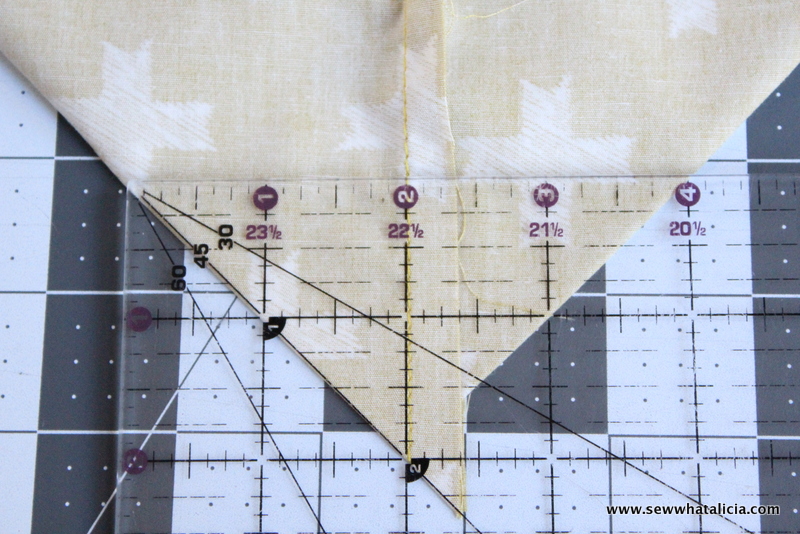
Mark this spot and pin in place. Do this on both sides.
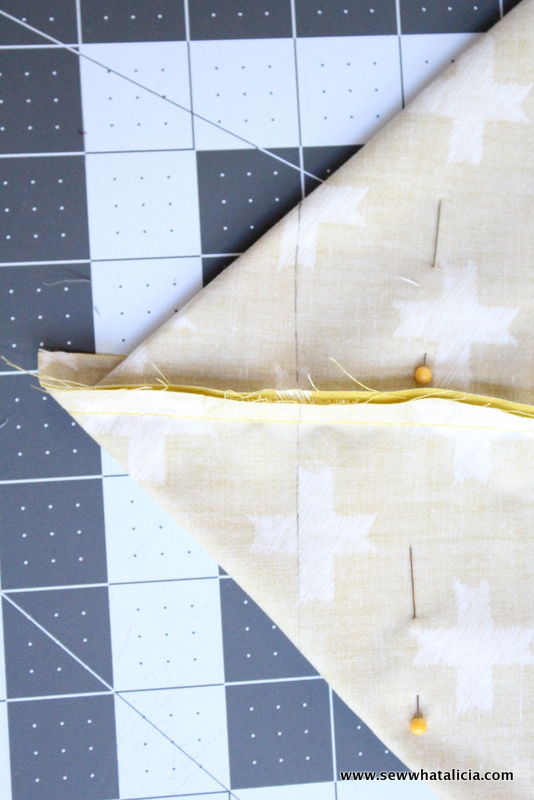
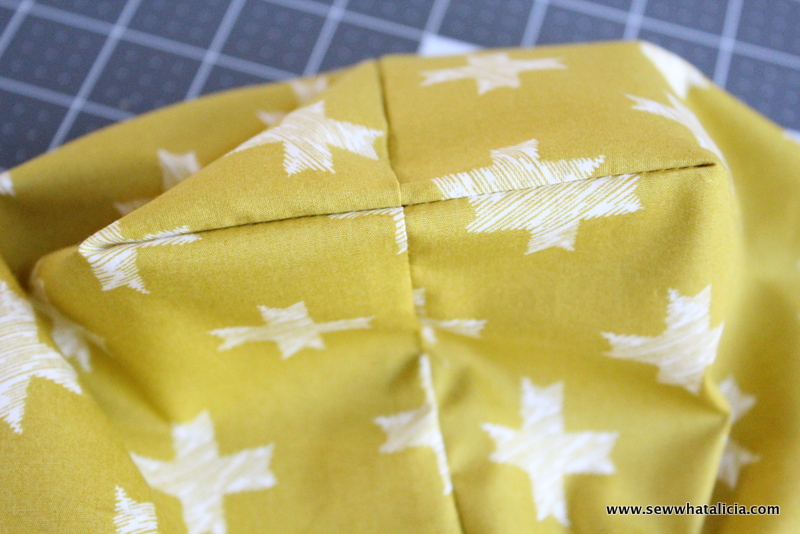
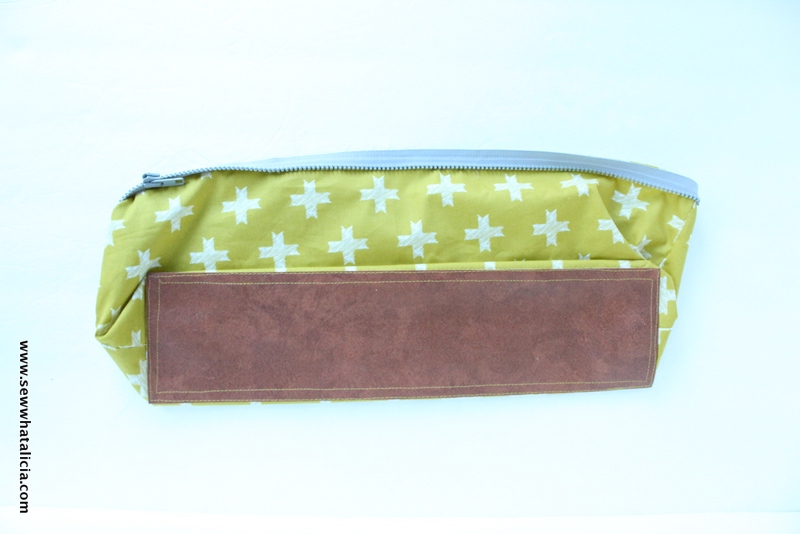
Sew along the two lines you just created. If you have lined your seams up correctly they should meet exactly (as mine do in the picture.) This is what your corner should look like when you turn it out. If it looks like this then trim the excess fabric.
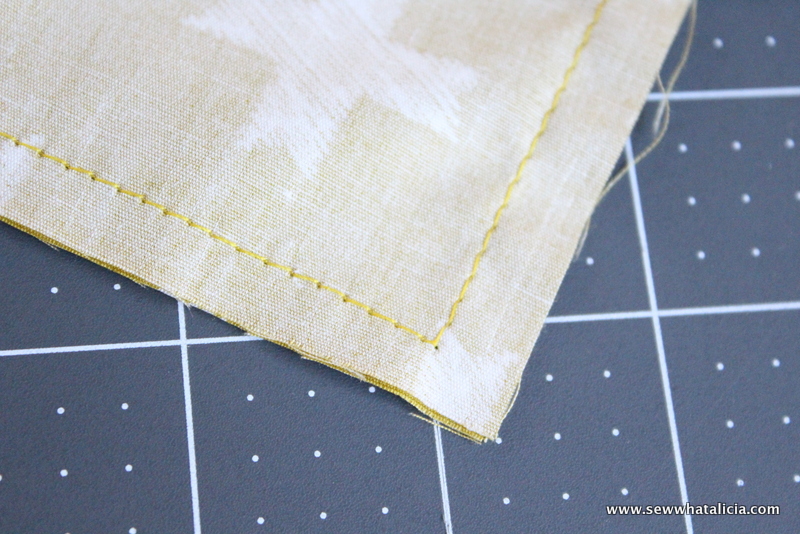
To give the bottom some structure and protection I added a piece of faux leather. Cut a piece that measures 4″ by 16″, remember we took some length off by creating the boxed corner. Leave the fabric inside out and place the faux leather inside, pin it in place.
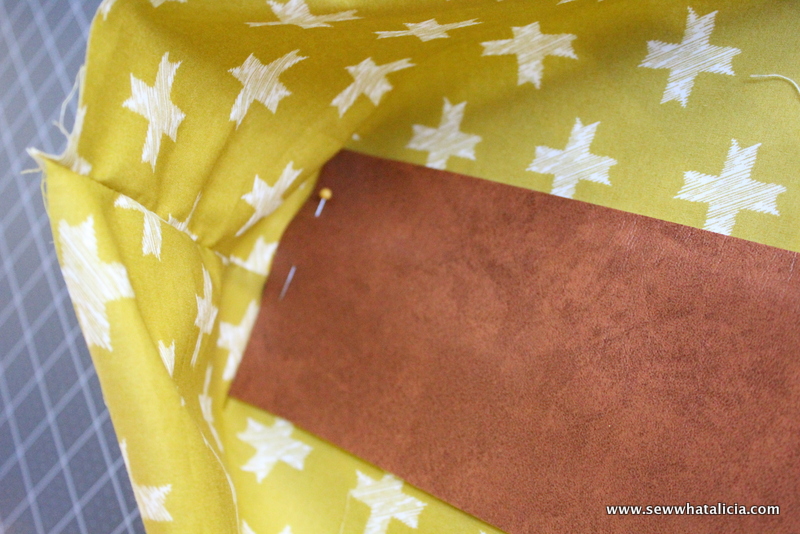
Now sew in place, I used a contrasting yellow thread and I love the effect.

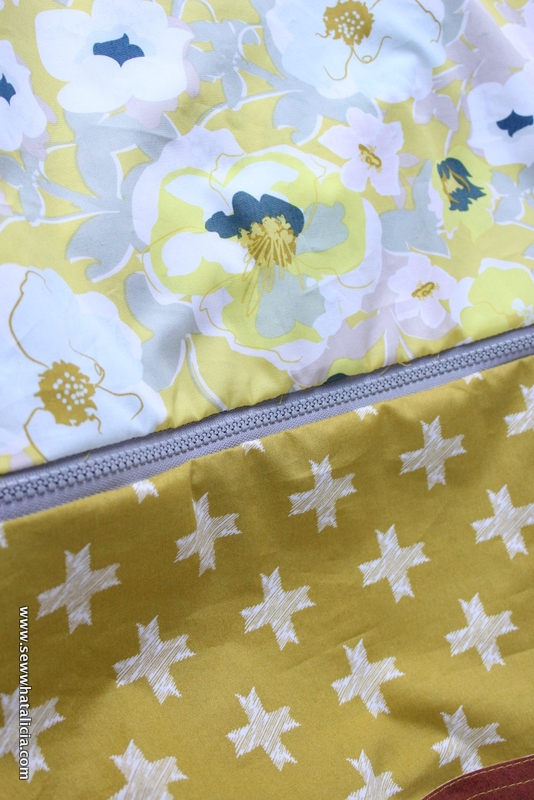
Now we are ready to start assembling the rest of the outside. The next step is to attach the zipper to the bottom piece that you just created. Place the zipper face down on the raw edge of the bottom piece. I placed the beginning and end of the zipper on the side seam.
Now grab the two pieces of fabric that are going to be the hidden portion of the tote. Place them right sides together and sew along each short edge. Press. Then pin it in place right side down around the zipper.
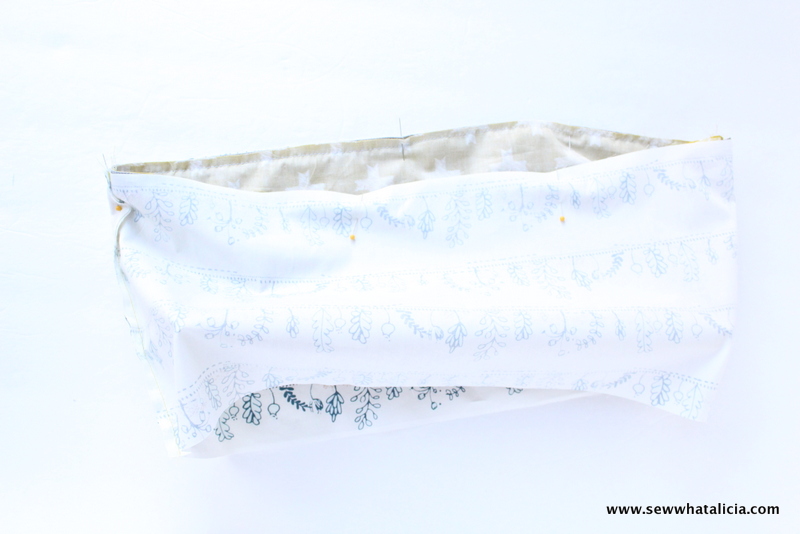
Use the seam you already created to guide where you sew as you sew around the zipper. Now it should look like this. Top-stitch around the zipper to keep it from snagging when you use the pull.
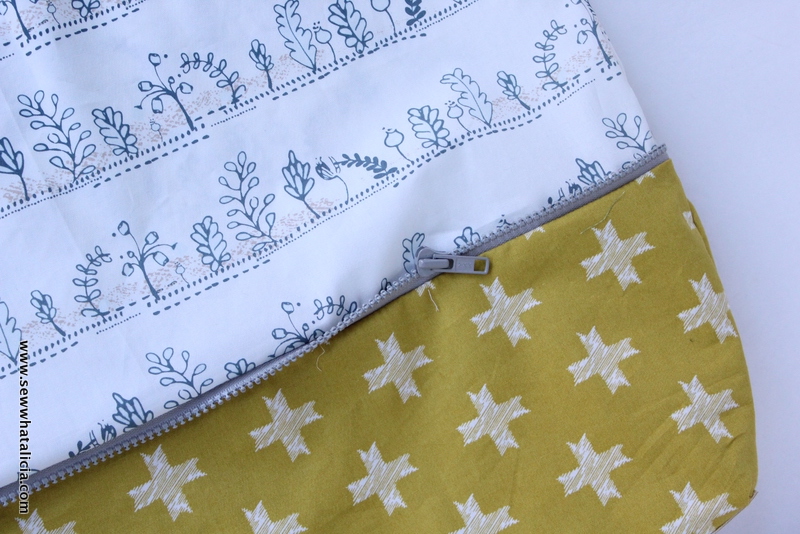
Next grab the two pieces of fabric that will be the top portion of the tote. Sew them together the same way you did with the last two pieces. (Right sides together along the short edges.) Grab the other side of your zipper. Pin it in place right side down on the bottom of this piece. Be sure to line up the zipper in the exact place you did on the bottom so that it is easy to attach and the seams will line up correctly on the bag. Now you have something that looks like this.
The last step for the front is to sew the zipper to the top portion of the hidden panel.
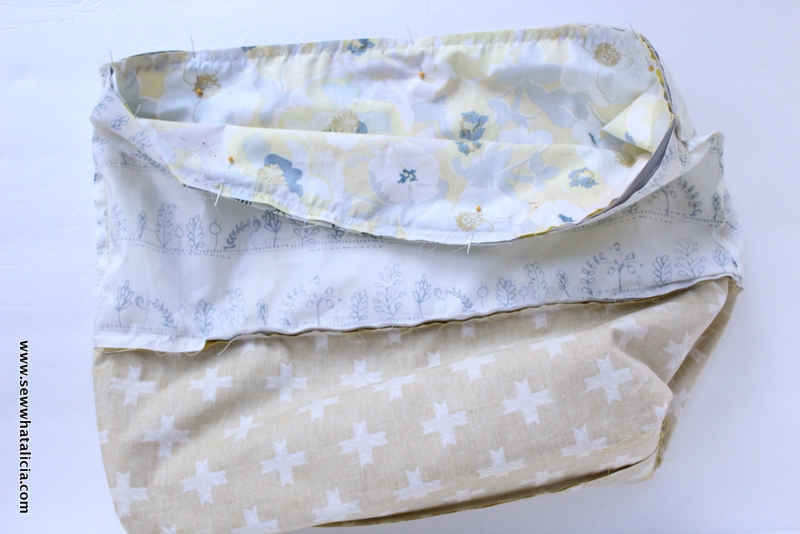
Now you are ready to create the lining. You will replicate the outside by creating a boxed bottom with one set of fabric. Then create two circles of fabric out of the remaining four pieces of fabric. Sew them all together. You should have something that looks just like the outside piece but without the zipper.

Now you are so close to being done. Fold the raw top edges under and press for both the lining and the outside. Then stuff the lining into the outside. Pin the two pieces together. I like to offset the lining just a tad so there is no risk of it showing on the outside of the bag.
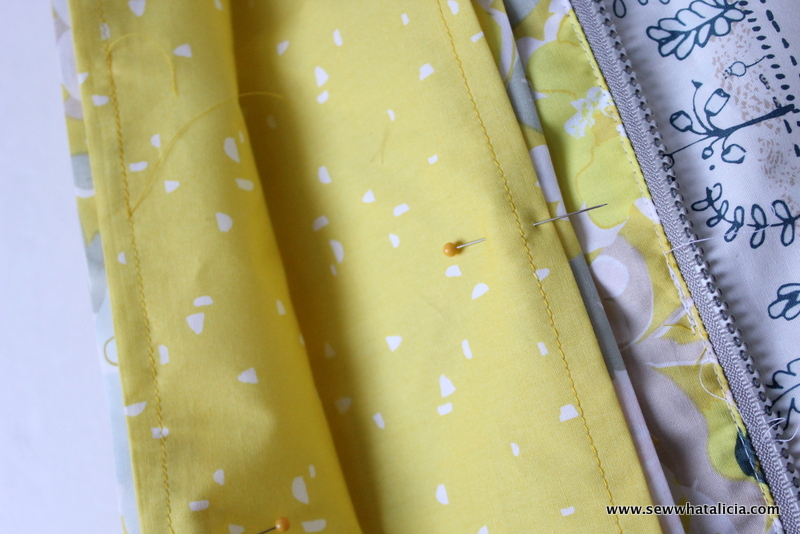
Sew these two together and then attach your handle.
Tada! Big finishing moment!
So fun right? Do you love this expandable bag pattern as much as I do?


Anne Weaver says
I need to make me one of these!! I’ve got a Craft Gossip post scheduled for tomorrow afternoon that features your expandable tote bag tutorial: http://sewing.craftgossip.com/?p=89921 –Anne
sewwhatalicia says
Isn’t it so cool?!?! Thanks Anne! <3
Margie says
I just saw this tutorial. I like the idea but I do have a question. When sewing the second side of the zipper, are you tucking the middle piece down into the bottom of the bag or do you take the two sides of the zipper completely apart then put the zipper pull back on after sewing the second side on? It is not at all clear in the tutorial, at least not to me.
For the lining, why not sewing the long sides of the three pieces of fabric together, then sew the sides? It would be easier than sewing circles together.
Thank you for making this tutorial.
sewwhatalicia says
Hi Margie, I did not take the zipper apart because I really hate putting zippers back together, but if it is easier for you to do that then go for it! I am not sure I understand your question about the lining. Adding the lining the way I did was actually very easy and it wasn’t really sewing a circle it is just a straight line where you keep adjusting the fabric. But as always if you think your way is better, then go for it! <3 Alicia
Margie says
I’m sorry if I seemed rude or know-it-all. I sometimes/frequently have trouble visualizing written directions.
After reading your reply and looking at the tutorial again, I think I can finally “see things in my head” and better understand what you’ve said.
Thank you for the tutorial on this neat bag. I hope to make one soon.
Jeri says
I love the idea of an expandable tote, but I am having problems visualizing how the zipper works. Is it a separating sipper or a regular zipper with the tab closing at the bottom?
sewwhatalicia says
It is a separating zipper. <3