Pillow Form – Make Your Own!
I don’t think I am telling you anything you don’t know when I tell you that making your own stuff is not cheaper than buying it. You knew that right? Now that we have that out of the way there are times when you want something custom and you want the joy that comes with making something of your own! So let’s make a pillow form, again not cheaper but fun and you can make whatever size you want!
This is just one of my 50+ easiest sewing tutorials. Check out the rest HERE.
Pillow Form – Make Your Own!
You can read the whole tutorial if you keep scrolling, but I made a quick video to show those of you who are visual learners exactly how to make this.
The main reason to make your own pillow form is because you want to make some custom sized pillow covers. Now you all may know that I am slightly obsessed with fat quarters. So I wanted to make a pillow cover that will perfectly use one fat quarter. So we need a pillow form that fits the pillow cover I want to make. You can make it any size you want. Mine was 9″ by 22″ which is the size of the pillow cover tutorial for next week!
You just need two things (besides your standard thread and notions.)
1 Fat Quarter of white fabric (You can totally use the wrong side of a scrap piece of fabric but if the pillow cover is too thin you might be able to see the pattern of the pillow form through the cover.)
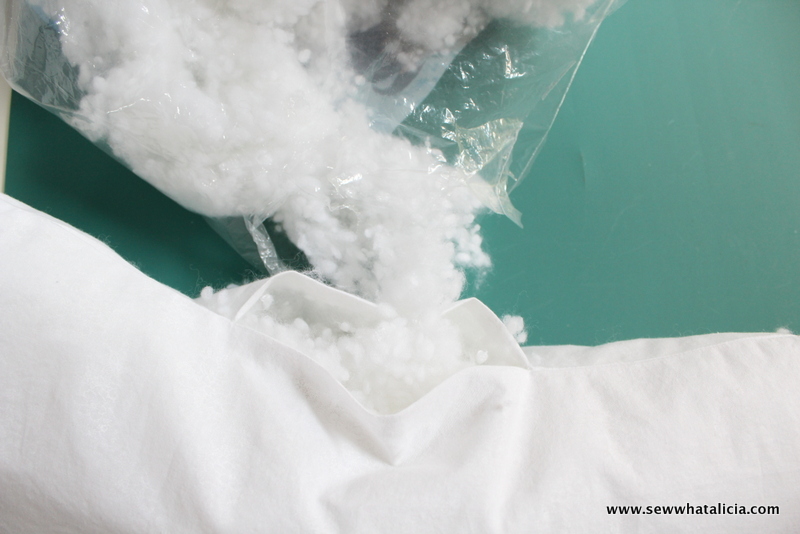
Pillow Stuffing (I used half a bag of this stuffing for this one pillow)
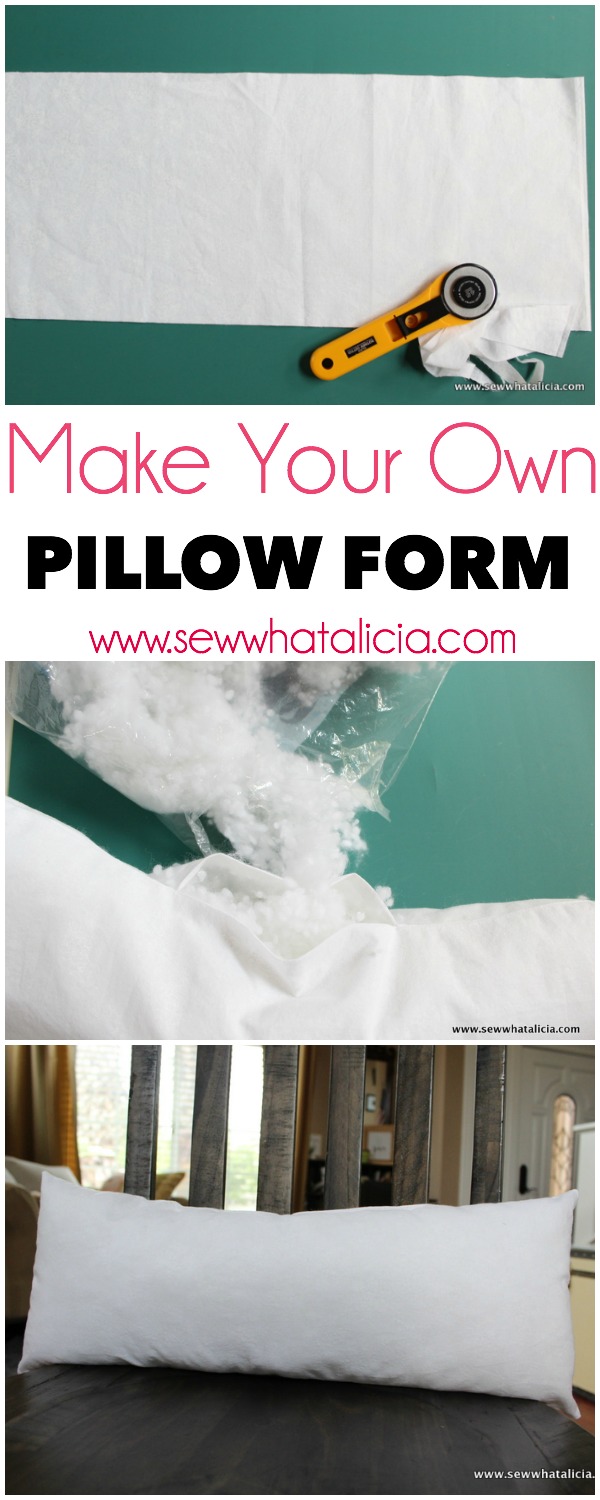
Cut the fabric so that you have two pieces that measure exactly the same. Mine were 9″ x 22″
Sew around almost the entire way. Leave yourself enough room to stick your entire hand into the pillow. Make sure that you don’t leave a corner un-sewn because that is hard to close up afterwards. I recommend leaving about 6 inches on one of the long sides open.
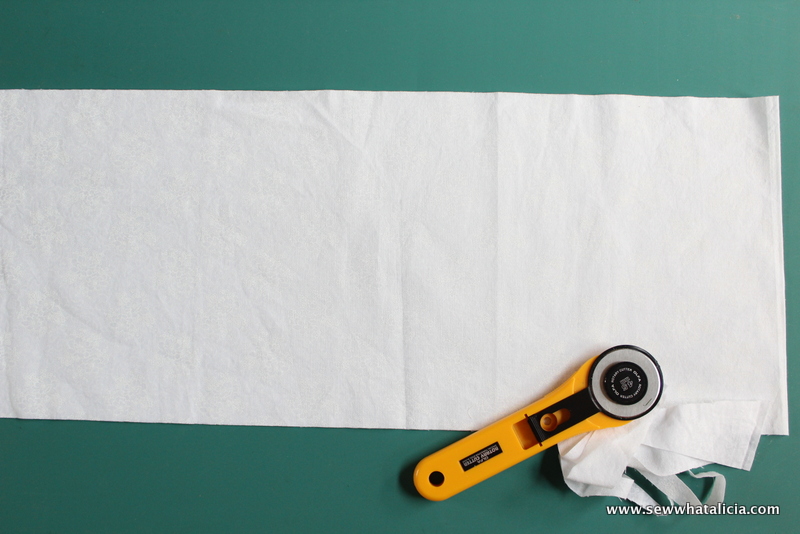
Trim the corners and turn the whole pillow out. Then press the seams. This is your last chance to get any wrinkles out of the pillow form so press it until it is nice and flat. While you are pressing go ahead and press the opening under so that the edges are all even (as you can see below.) Once it is stuffed it will be hard to press the edges under so go ahead and do it before you stuff.
Stuff it to the desired fullness. This is another perk to making your own pillow. Do you have a specific pillow firmness that you like? The firmness is totally within your control!
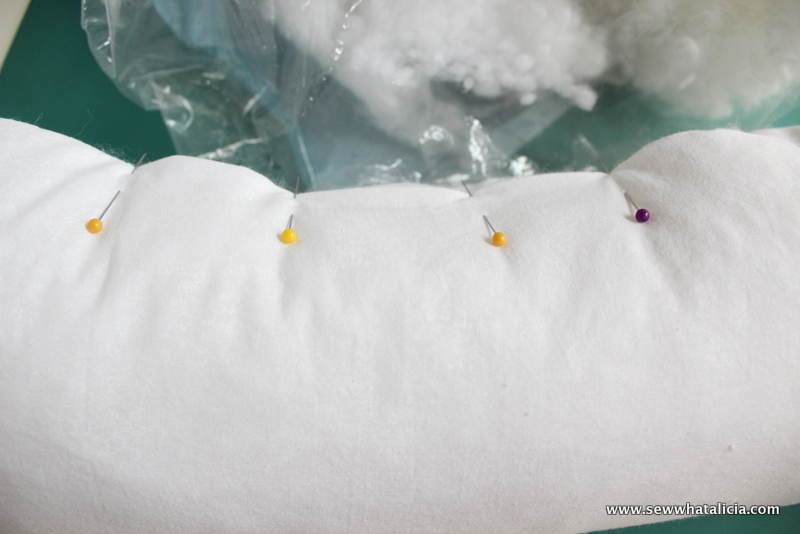
Pin the opening closed.
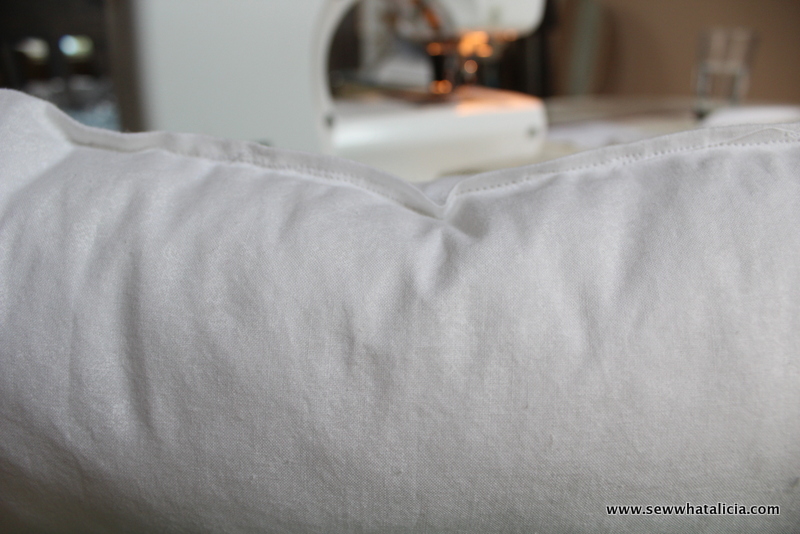
Sew the opening closed. Some people would use a ladder stitch and hand sew the opening closed (you can google that because you certainly won’t find hand stitching tutorials here!!) I am lazy and use the machine. If I was making something that people would see I would top-stitch around the entire pillow to make it look nice and even. But I am going to put a cover over it so I don’t care how ugly the opening is. If you are making it as a gift try one of those other techniques. If you don’t care like I don’t then just sew the bare minimum and simply close the opening. I do sew a few inches before the opening and after to make sure it will stay in place and not leak filling.
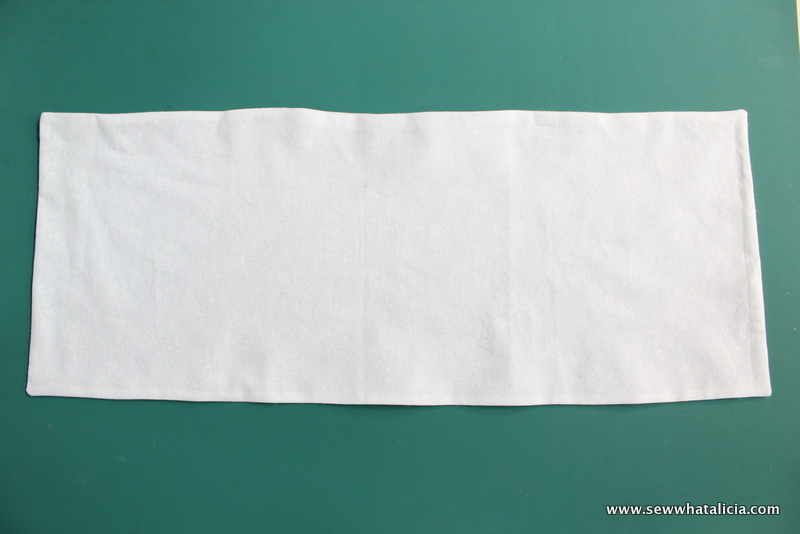
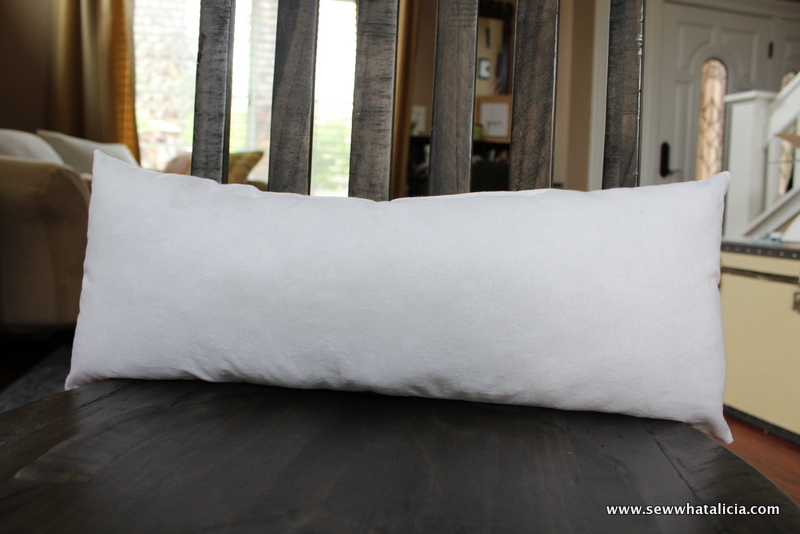
That is it! A custom sized pillow form.
This month in Sewing School we will be making several different types of pillow covers. Make sure and join Sewing School on Facebook so you can follow along and share your finished project with all my wonderful Sewing School friends!


Leave a Reply