How to Sew Easy Custom Pillow Cases
This is the easiest pillowcase you will ever make! There are tons of different methods for sewing a pillowcase but this one takes just one yard of fabric and a few minutes to achieve the best pillow case! Here is how to sew easy custom pillow cases. Scroll halfway down for another variation that takes a bit more time but gives a nicer finished product.

This is just one of my 50+ easiest sewing tutorials. Check out the rest HERE.
How to Sew Easy Custom Pillow Cases
Check out my amazon store for all the awesome gadgets you see me using in my tutorials.
Supplies:
One Yard of Fabric
Coordinating Thread
Instructions:
One yard of fabric measures 36″ by WOF (width of fabric). The width of the fabric often varies by a few inches. Typically it is between 42 and 44 inches. For this pillowcase you need one cut of fabric that has a width of 42-44.
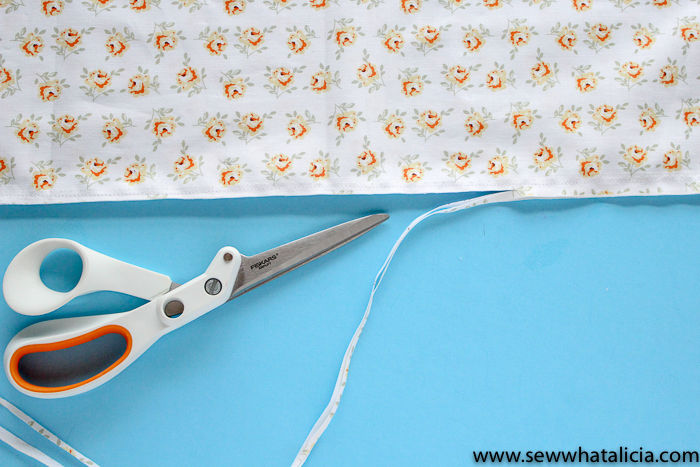
Find the long edge, we will call it the 44″ edge for the purposes of this tutorial. Fold the edge under by 1/2″ and press.
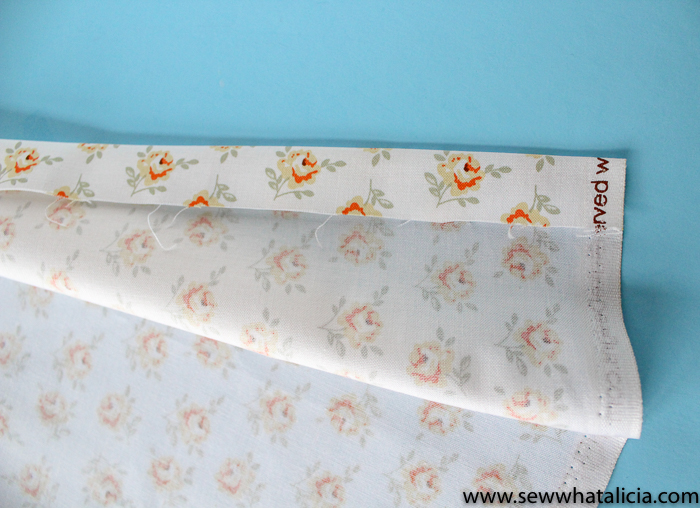
Now fold that same long side over again, this time 5″ and press. Pin this edge in place.
Using a zig zag stitch sew along the bottom edge. The zig zag should straddle the fold (as pictured below.)
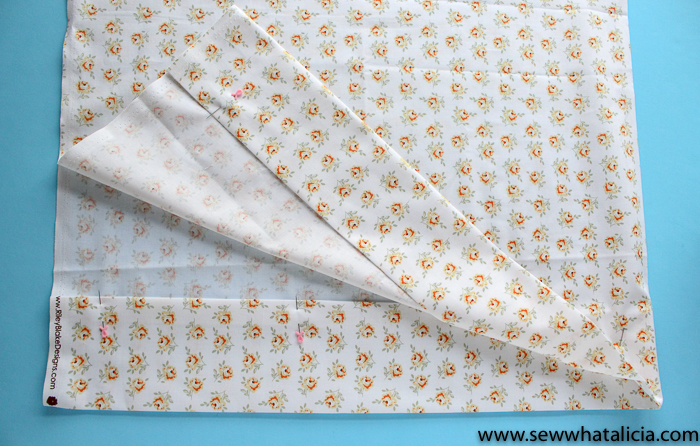
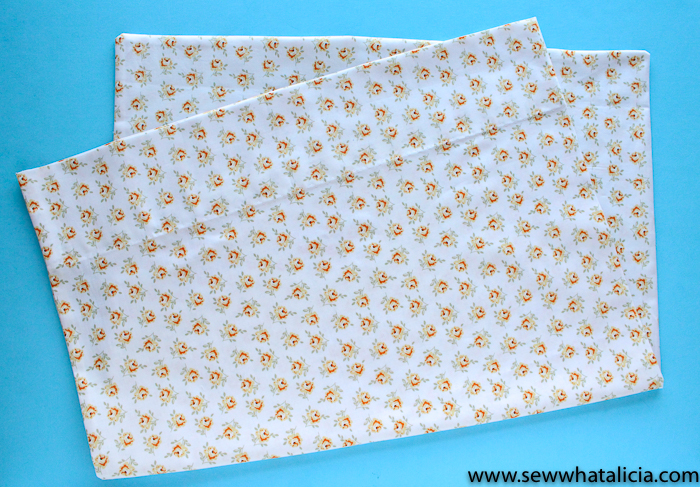
Now fold the fabric in half right sides facing. Pin along the long edge and the bottom edge. (SKIP DOWN IF YOU WANT TO CREATE A FRENCH SEAM )
Sew along the two pinned edges. Turn the pillow case out and you are finished!
French Seam Pillow Case:
Adding a french seam will give the pillow case a more professional finished look.
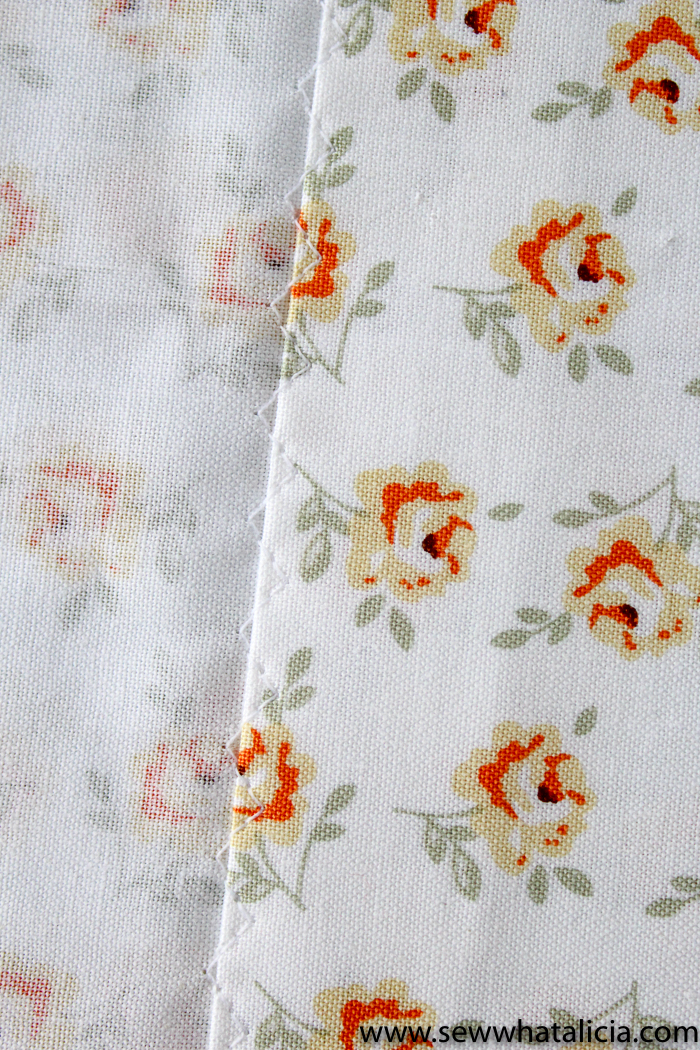
To create a french seam you will still fold the long edge under and zig zag stitch in place as we have done above.
Then fold your pillow case in half wrong sides facing. Sew along the long edge. Then trim the seam to 1/8″. Skip the bottom, there is no reason to add a french seam to the bottom edge of the pillow case.
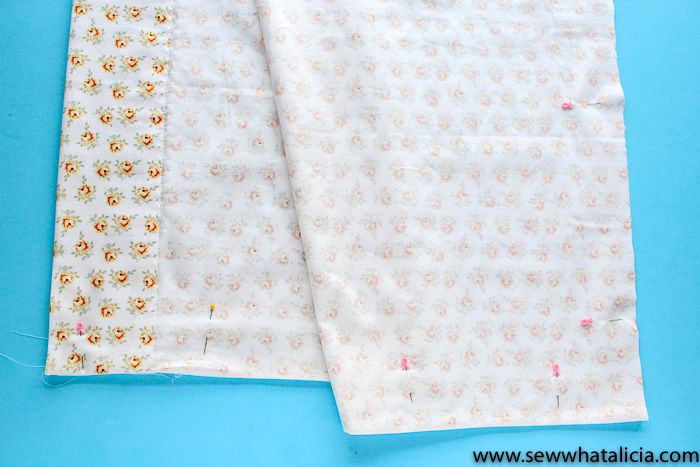
Now turn the piece so that the right sides face each other. Press the seams flat. Pin the long edge and the bottom edge and sew in place using a 1/4″ seam allowance. Now you have a finished pillowcase with a much cleaner finished inside edge.
For a shorter pillow simply trim the fabric to be 6-8″ longer than the pillow (you will still need the 44″ side to be the same size) and repeat the above steps.
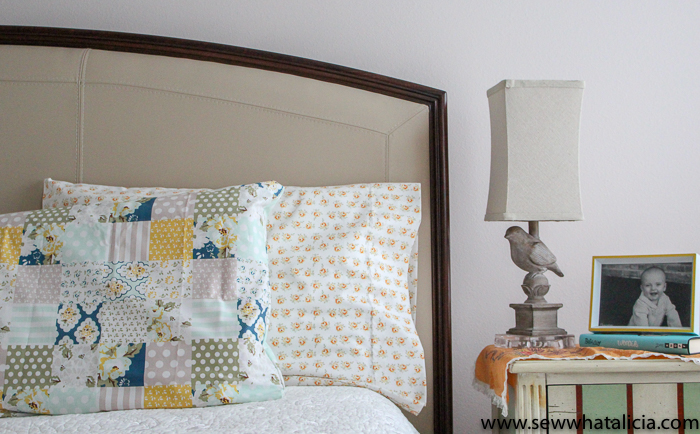
Now you can make all sorts of fun custom pillow cases! And yup my hubby totally loves these super floral pillow cases! Will you make your own custom pillow cases? Share with me in the comments below.


Louise Biedrzycki says
I have started to get together enough flannel for my granddaughters to make some pillow cases. Pre shrink! I am also going to make 3 for a friends granddaughters. Will be great to have for when the kiddos are going to sleep over. We are using 2 different fabrics, one for the body and another one for the cuff.
cheryl says
I️ Just caught the end of your live tutorial with the king size case with the cuff iof coordinating fabric .
What are the dimensions you cut & how much fabric of each color is needed?
sewwhatalicia says
For the king size pillowcase I cut a 10″ strip that I then pressed in half and attached to a yard of fabric, so the length comes out to 41ish inches by WOF.
Julie says
Why do you choose to use the stretch zig-zag stitch instead of a plain straight stitch?
sewwhatalicia says
I want to cover the edge of the seam so it doesn’t lift or move. I want the edge to lie flat. Does that make sense?
Julie says
Yes. I️ was just curious! Thanks.
Susie in the country says
Thanks for the instructions. I certainly do sew pillowcases for almost everyone I know. Grandsons, sisters, mom and me! When I first learned to make them several years ago, I love to sew them. There is so many faric choices for every occasion and holiday, especially grandsons birthdays♥ Again, thanks again.