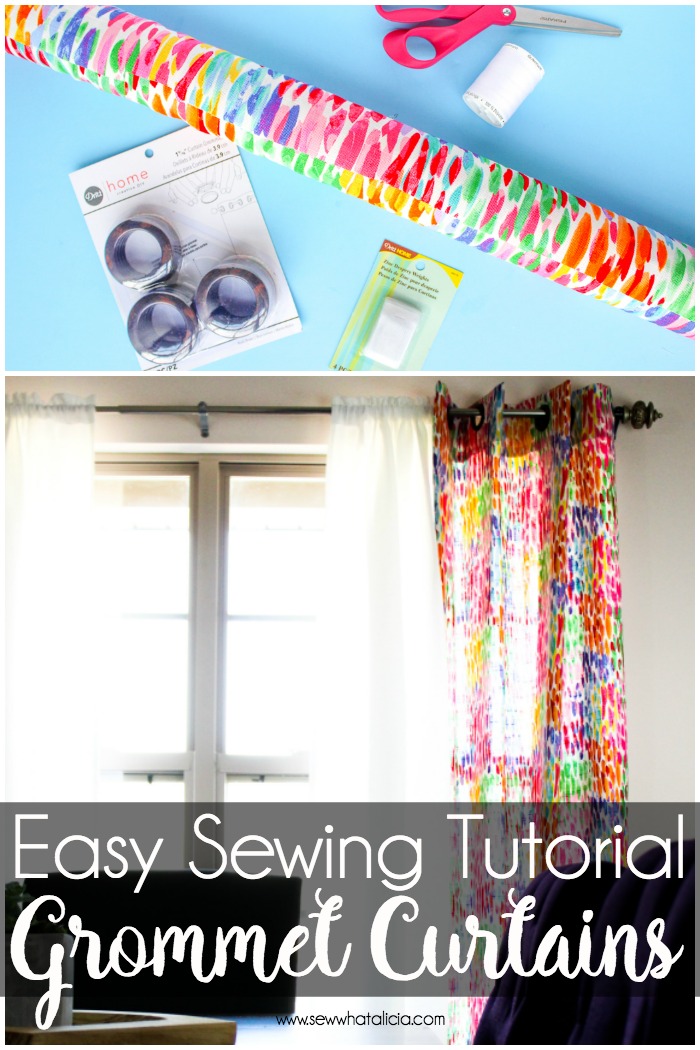
How to Make Curtains with Grommets
Learning how to make curtains can seem intimidating mainly because there is just so much fabric involved. But really making curtains is super straight forward and only requires a few straight seams. Creating custom curtains is an easy way to add a fun pop of color or accent to your existing decor. It is not always possible to find a great curtain set at the store that totally fits your aesthetic. In this post I will walk you through everything you need to know about how to sew curtains so you can start redecorating your house as often as I do!
How to Make Curtains with Grommets
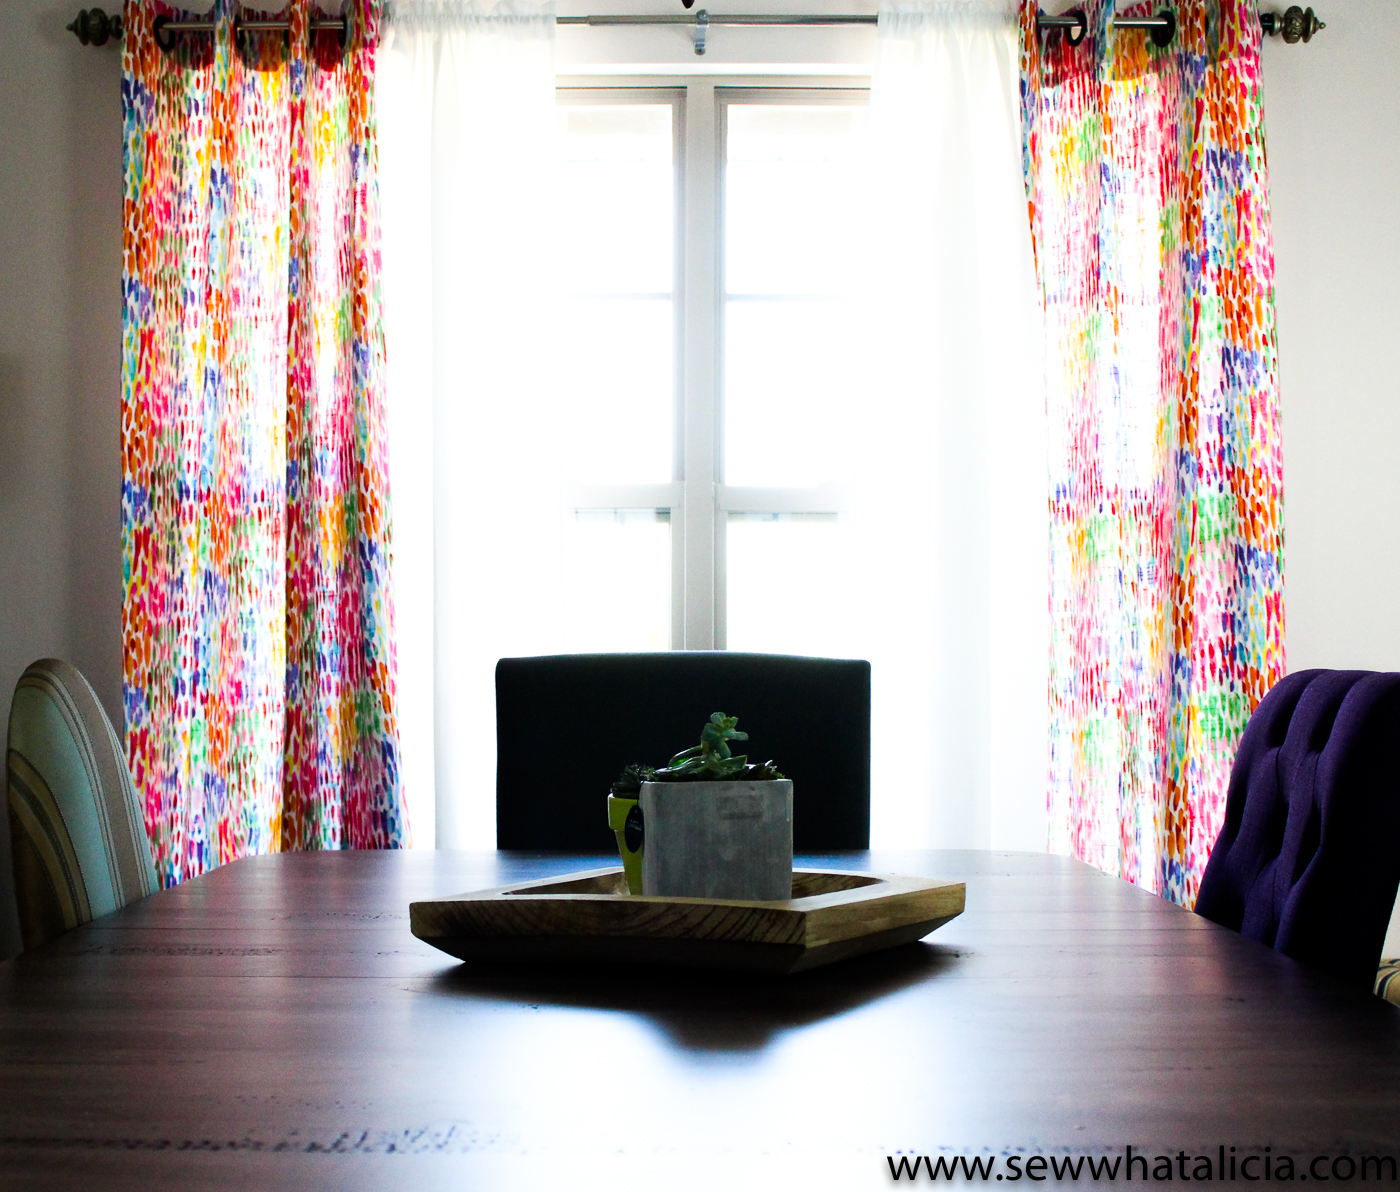
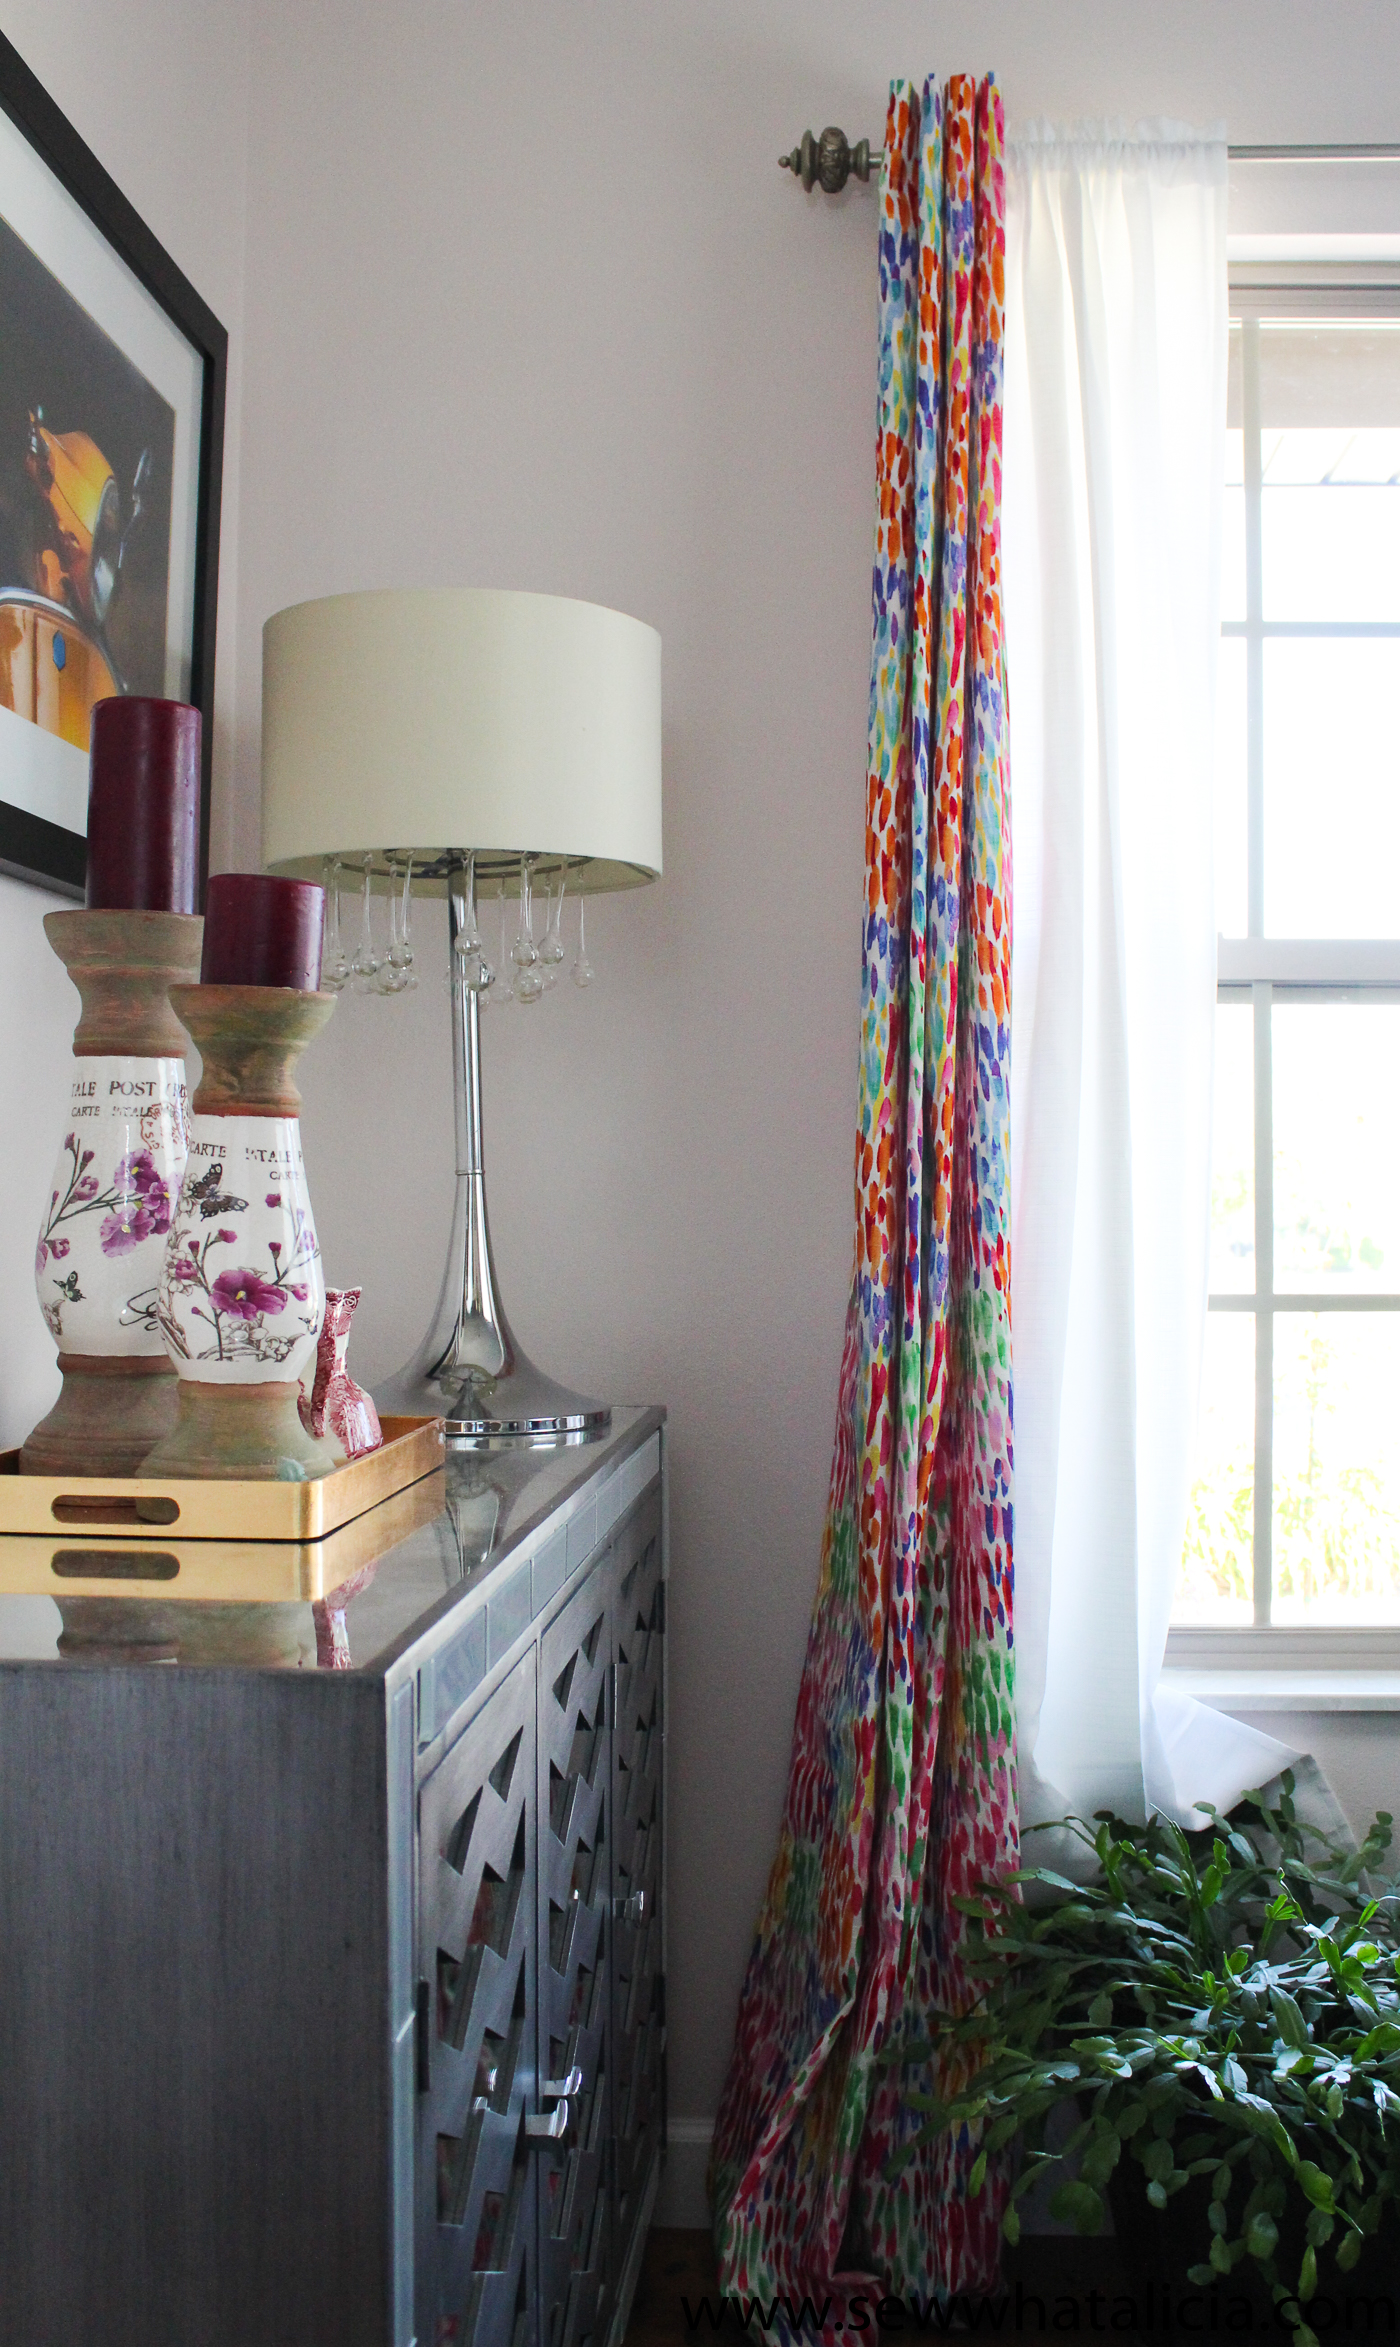
When I saw THIS gorgeous fabric at Joann I knew that I had to make some curtains with it. I love bright pops of color and this fabric is the perfect addition to my dining room. I have answered the most frequently asked questions first then scroll down to see the tutorial for how to make curtains with grommets.
What kind of material do you use to make curtains?
You can use multiple types of materials for curtains. But home decor and drapery fabric (<—-like those) is usually the best option. This fabric is typically 54″ wide which falls right into the range of a standard width for a drapery panel. I like a 54″ length because I am lazy and I like that I don’t have to make any long cuts. I simply cut the length of fabric I want and the width is already done for me!
There are other options for fabric. You can make curtains from just about anything but some fabrics will be harder to work with than others. Many people use drop cloths as a cheaper alternative but that can be a bit tedious. The drop cloth is often very wrinkled and requires lots of pressing. They are also usually a fairly bland color so many people bleach them to make drop cloth curtains. You can make them using this tutorial if you are interested in drop cloth curtains.
How many yard of fabric do you need to make curtains?
You need to measure to figure out how long you want your curtains. If you have the curtain rod already hung measure from the rod down to the floor. then you will need to add length to hem the curtain and add the grommet pocket. For example for the curtains in this post I added 5 1/2″ to the top to create the grommet pocket. Then I added 1 1/2″ to the bottom to create the bottom hem. From my curtain rod to the floor is 86″. So I used 86″ + 5 1/2″ + 1″ for a total of 92″.
Remember that a yard of fabric is 36″. So divide the number you come up with by 36 to figure out how many yards you will need. I always round up to the half yard. So I needed 2.6 yards per curtain panel. So I needed 5.26 yards and I purchased 5 1/2″ yards.
What is lining in curtains?
There is a special fabric called curtain lining. It is usually the same width as the home decor fabric which is 54″. However they do have a few that are wider so be sure to check the width when purchasing. Your lining needs to be the same size as your curtain panel minus a few inches at the top.
To add lining: Place the lining on the wrong side of your main curtain fabric. Use a baste adhesive or simply pin in place. The lining should be 1/2″ from the bottom, right, and left edges. It should be several inches below the top edge, it will be sewn under the hem of your grommet pocket. Once you have pinned the lining in place follow the directions for the curtains in this tutorial.
How wide do my curtains need to be?
The standard home decor fabric is 54″ wide so I almost always make my curtains that wide (minus a few inches for hemming the sides.)
You will want to measure the width of your window. Then you can decide if 54″ is the right width for your curtain. The drapery panels you buy at the store are typically 48″ wide (which is close to what yours will turn out when you use a 54″ wide piece of fabric.) Windows are typically 36-60″ wide. If you have a 36″ window one 54″ panel may suffice. If you have a larger window use two panels to create that full curtain look. This process is a totally subjective endeavor. You will probably need to do some trial and error to see what YOU like and what you think looks best in your space. I can give you all the numbers in the world but personal preference is what rules the day!
How to Sew Curtains
Supplies:
Curtain Weights (optional)
Home Decor Fabric – I used this Kelly Ripa Fabric from JOANN.

How to Make Curtains:
Measure your window and decide the length you want your curtain. Then add 1″ and 5 1/2″ for hems. You may notice that I added length so that my curtains would pool on the floor, that is a personal choice that you will want to factor in before purchasing and cutting your fabric.
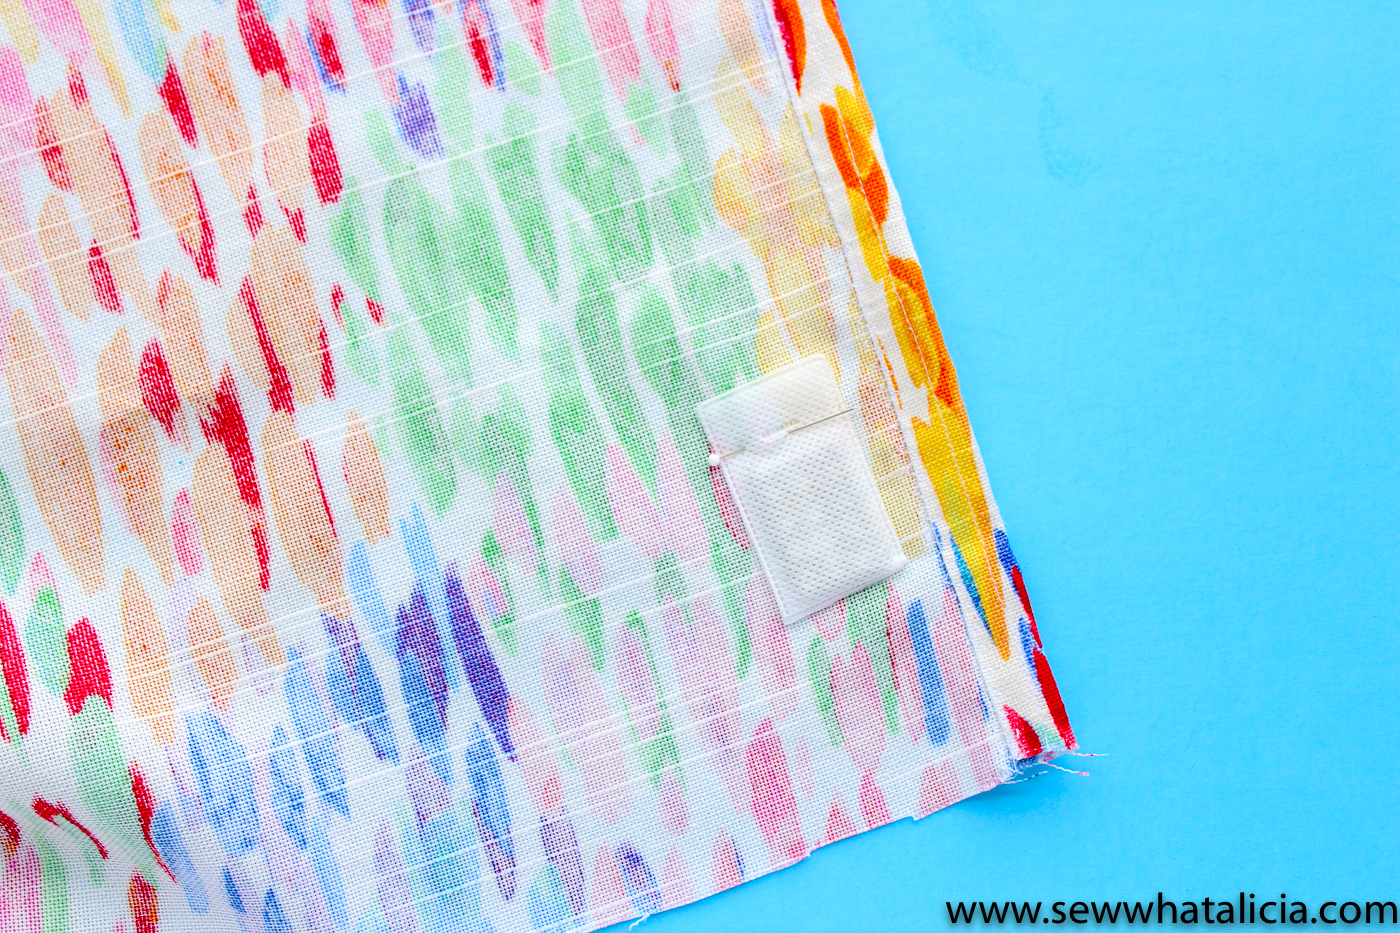
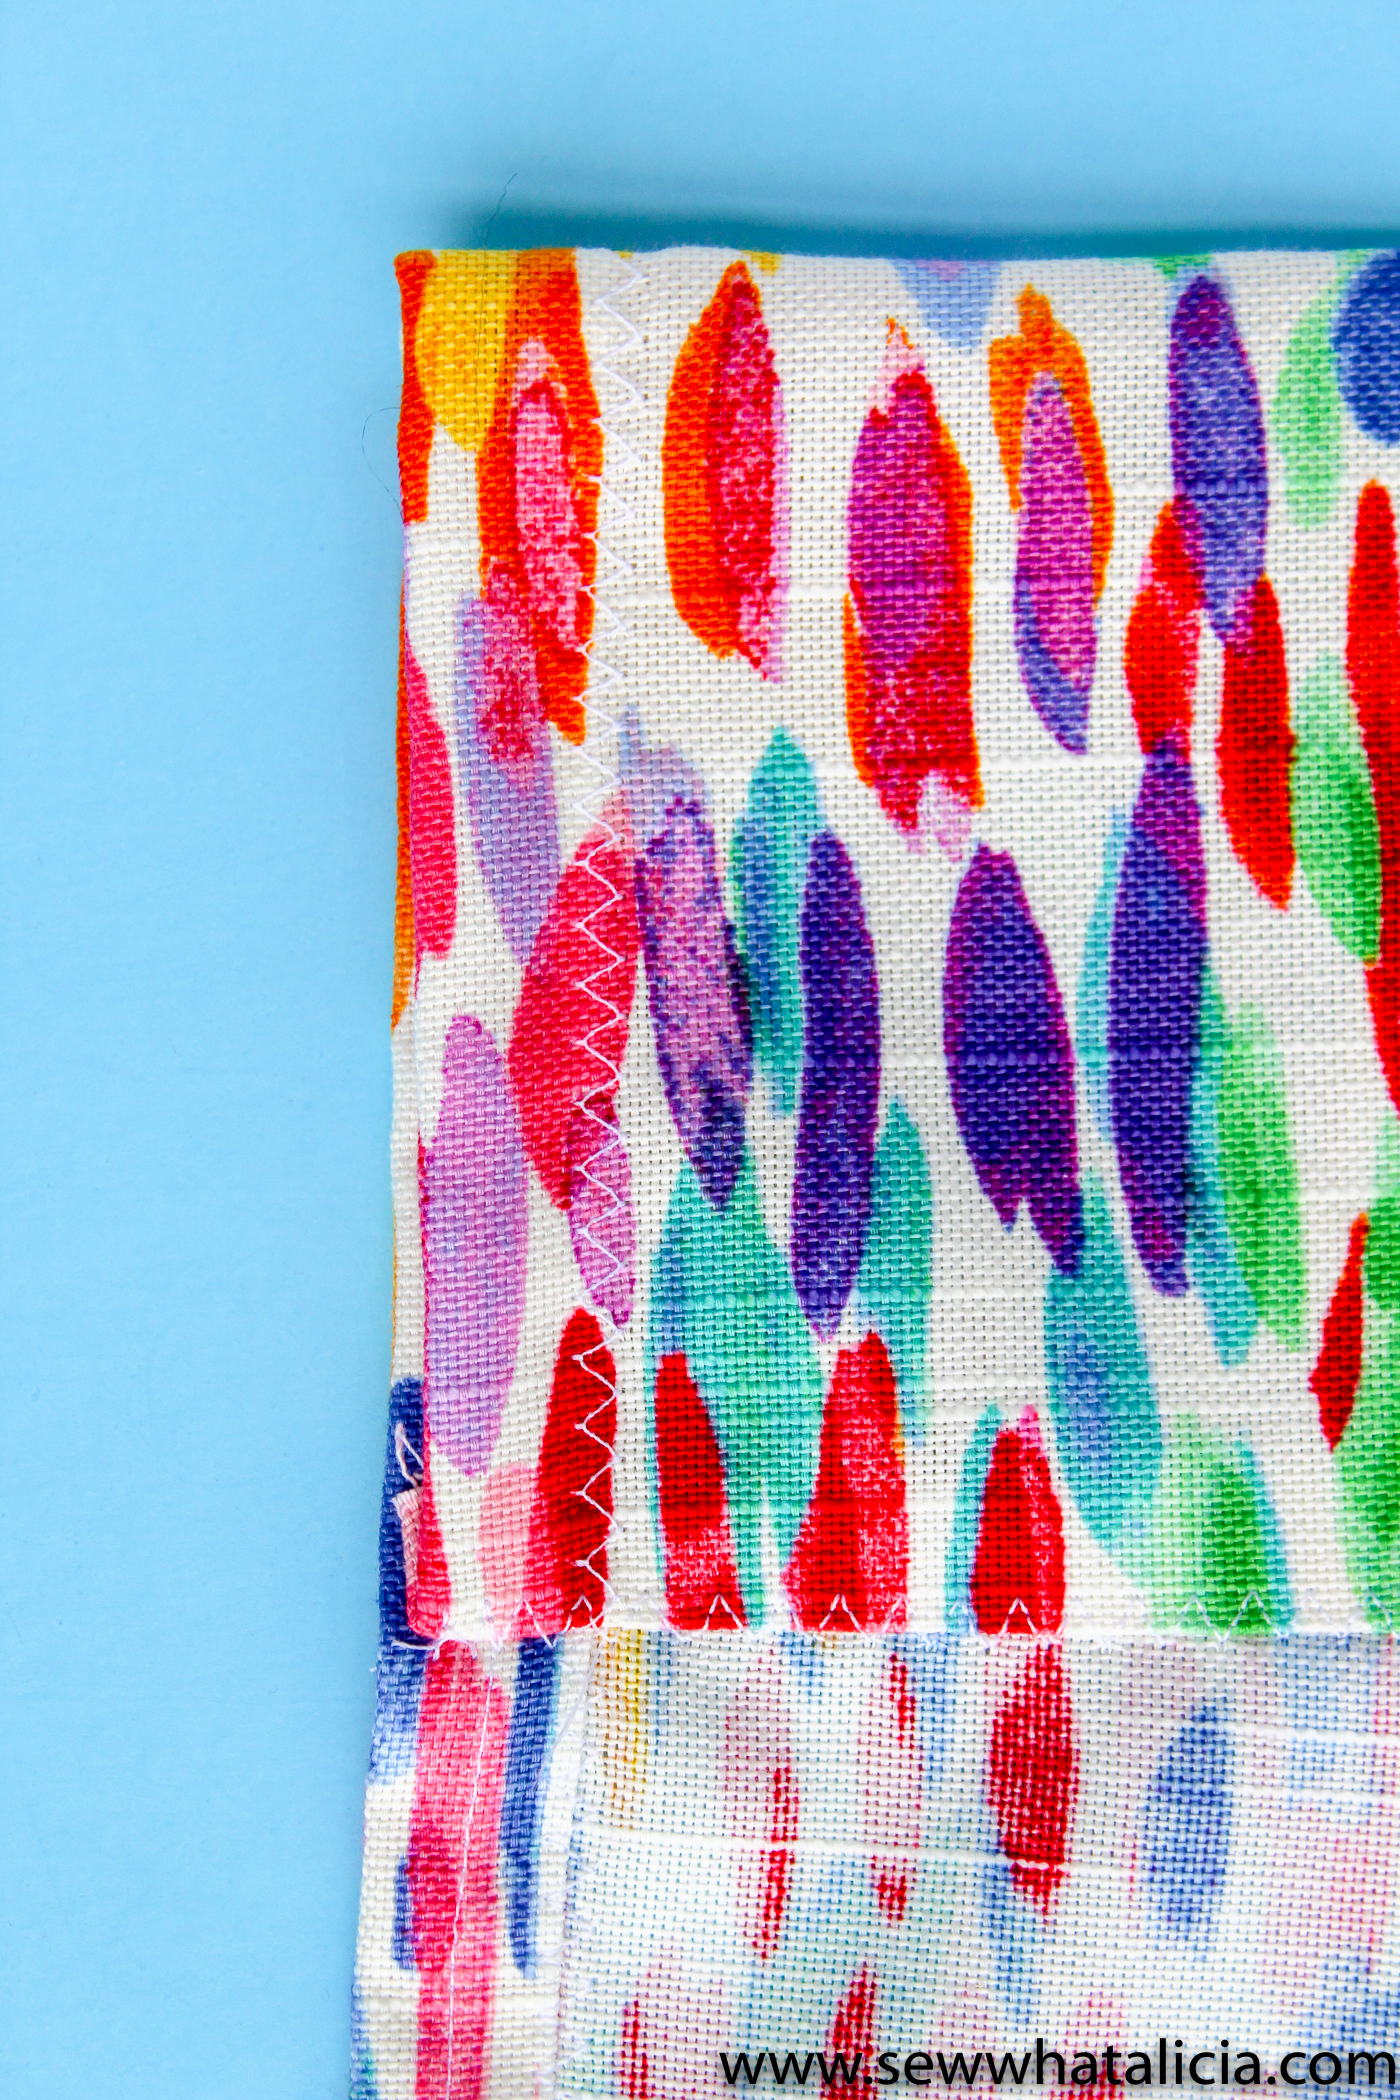
Press each side (not top and bottom) under 1/4″ and then press under again 1/4″ and stitch in place. I use a multi-step zig zag to ensure that the edges don’t lift up. When using a lining you will want to make sure that the raw edge of the lining is underneath the hem of the main fabric before stitching in place (see above for more tips on adding a lining.) If you are using a curtain weight you will attach it towards the bottom edge as pictured below. If you are adding a lining attach the weight before attaching the lining so that it won’t show (without a lining it will show but it blends in and is not very noticeable.)
Press the bottom edge up 1/2″ and then press up again 1/2″ and stitch in place.
Now press the top edge under 1/2″. Then fold the top edge down 5″. Use the same multi-step zig zag (or just a standard zig zag) to stitch this in place along the bottom edge. At this point you have created a pocket curtain. You could hang it on a rod just like this.
NOTE: If you are struggling to get the hem even try these hem clips to get a nice even hem.
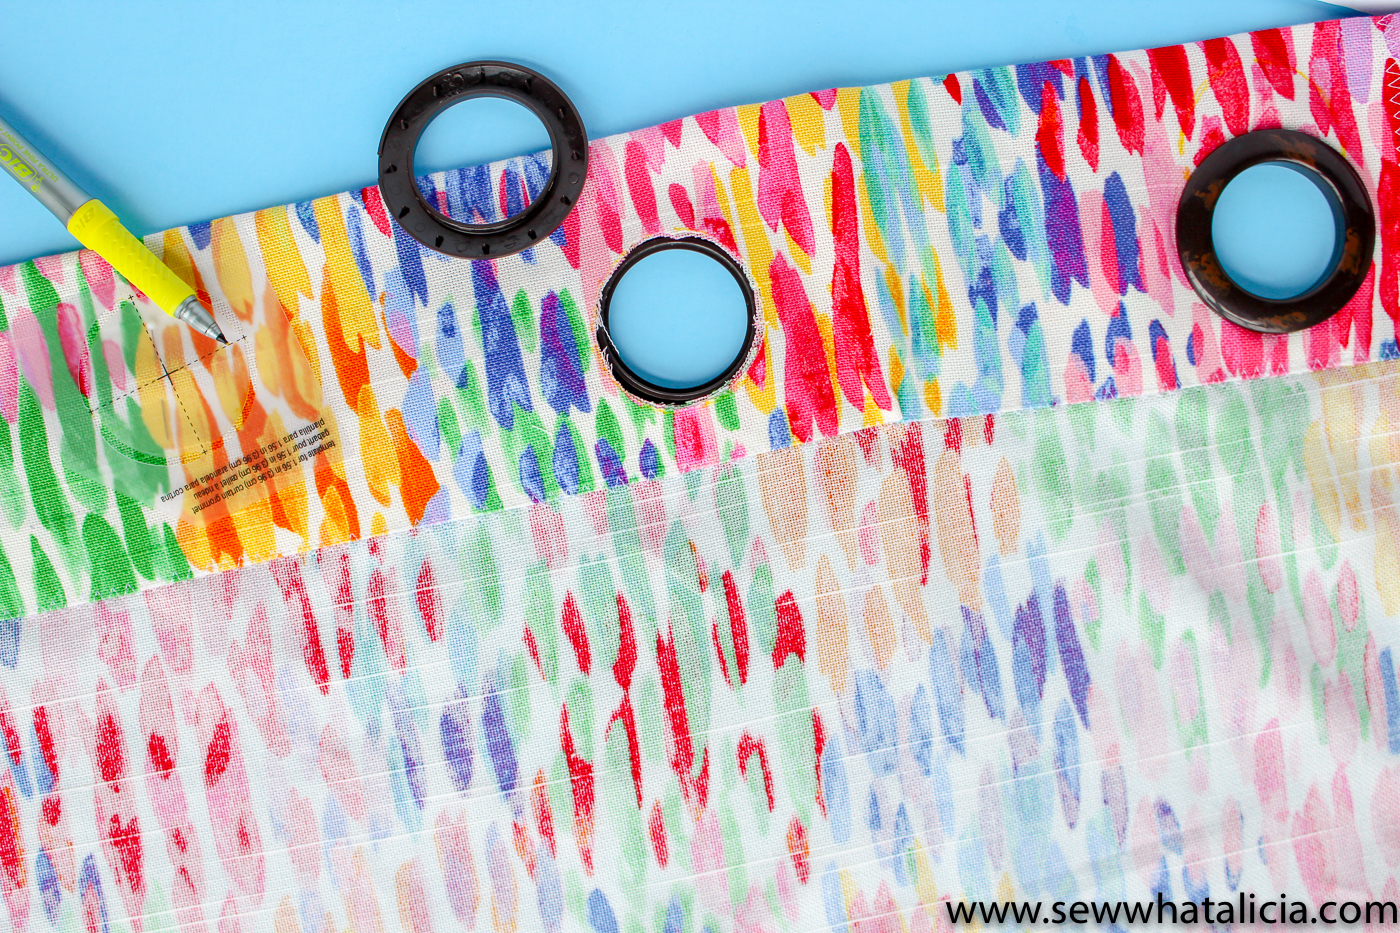
The last step is to add the grommets. For a 54″ wide panel you will want to use 8 grommets. Measure the width of your curtain (after hemming) and then divide this number by 8 to figure out what distance you want to use between your grommets. I recommend laying all 8 grommets out before you start attaching them to make sure that you have done your math correctly and that you like the look. You will also want to measure the distance from the top of the curtain to the grommet so that you can line the grommets up side to side and top to bottom.
Use the stencil that comes with the grommets to trace and cut the holes for the grommets. Then place the grommets. Be sure to close all of the raw edges into the grommet.
Now you are done with these diy curtains. See that wasn’t so hard was it??
Have any questions or tips for how to make curtains? Share with me in the comments below.


Jwan Joslin says
This is just the post I needed to see. I have dining room draperies in the planning stages.
sewwhatalicia says
Oh I am so glad!! You will be surprised how easy they are to make!! <3