How to Sew a Ruffle Zipper Pouch
You know I love my zipper pouches. Today I wanted to share a fun curved pouch with a ruffle because we all love a ruffle right?? This tutorial assumes you have a basic knowledge of adding a zipper, if you don’t check out my easy zipper pouch tutorial for a more in depth zipper explanation. Here is how to sew a ruffle zipper pouch. These would make adorable pouches for little girls to store their dolls and their clothes in! These pouches are just too precious!

This is just one of my 50+ easiest sewing tutorials. Check out the rest HERE.
How to Sew a Ruffle Zipper Pouch
Supplies: Click the link to be taken to the supply.
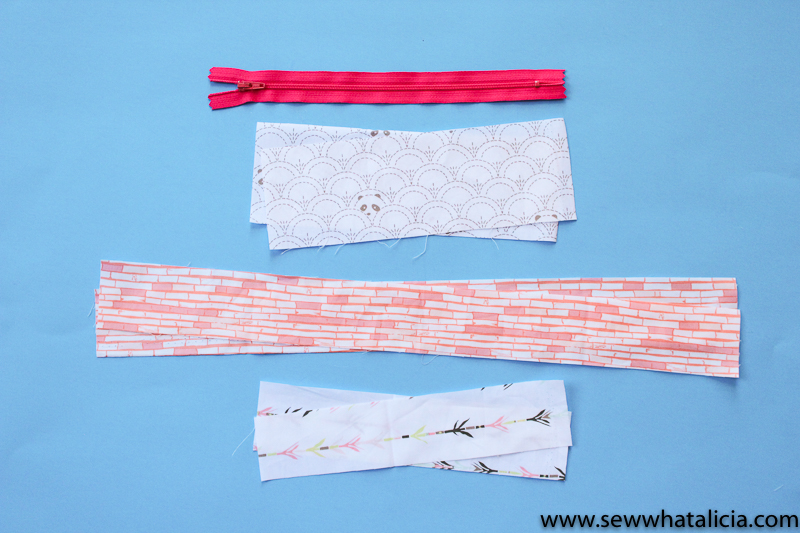
Fabric (Pandalicious by Katarina Rocella for Art Gallery Fabrics is pictured.)
-Cut Two Pieces Cut to 9″ x 3″ (Panda)
-And Two Pieces Cut to 18″ x 2″ (Pink Bamboo)
-Then Two Pieces Cut 9″ x 2″ (Arrow)
Optional: Fiskars Circle Cutter
Instructions:
Line up the top 3″x9″ strip with the edge of the 18″ strip. Sew a few stitches to hold the strip in place and then start scrunching the fabric to create a ruffle. Sew along the entire edge trying to keep the ruffle scrunches (yup that’s totally a technical term…not) even. Repeat for both sides of pouch.
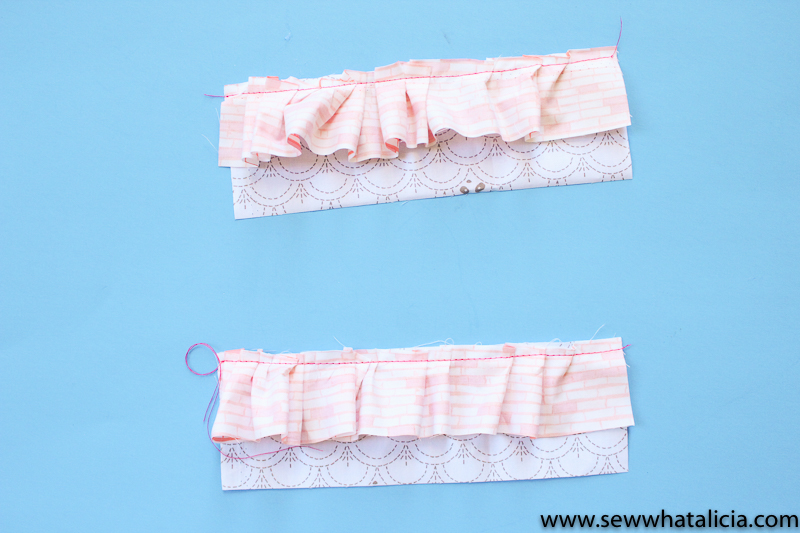
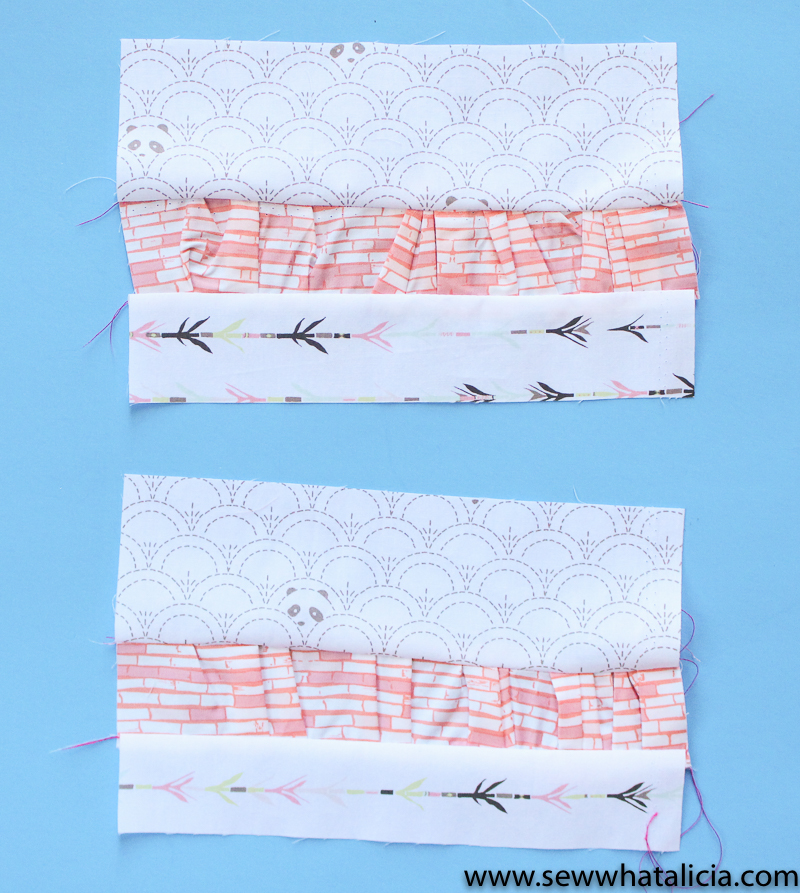
Use your iron to lightly press the seam. Then sew the 2″x9″ strip to the bottom of the ruffles. You will probably need to square your piece when this step is finished. The ruffle can cause some pulling and contorting.
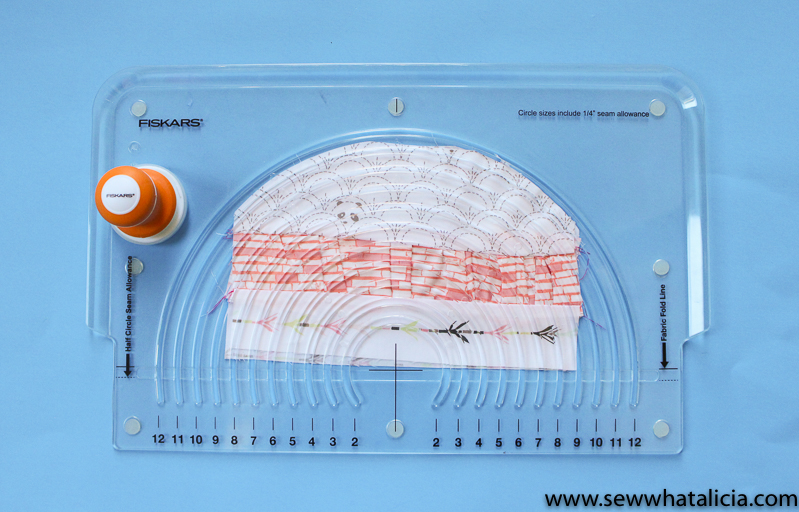
Using your circle cutter trim the top edges into a curve. Line the pieces up wrong sides facing so that the circle is the same on each. (You can also use a paper plate or circular item to trace and then cut a circle.)
Snip your zipper so that it curves easily. Add a scrap of fabric to each edge of the zipper to give it a nice finished look. Fold the piece in half and finger press the middle then fold the zipper in half and line it up with the middle so that your zipper is evenly placed. Then add the zipper to each curved edge.
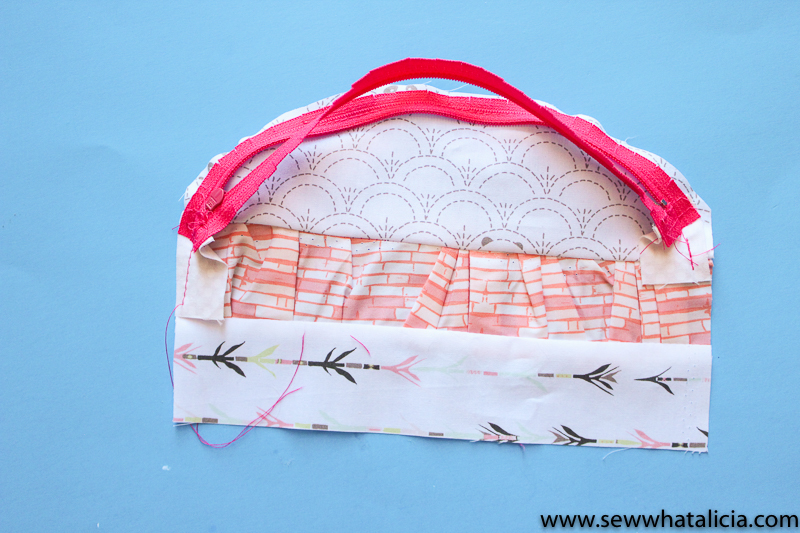
This is an unlined pouch but you could easily add a lining. Check out my lined zipper pouch tutorial for quick instructions on adding a lining. This is where you would add the lining so don’t move on from here unless you are ok without a lining.
With the right sides facing sew around the edge of the pouch. Start at the bottom of one side of the zipper, down the side, across the bottom, then up to the other edge of the zipper.
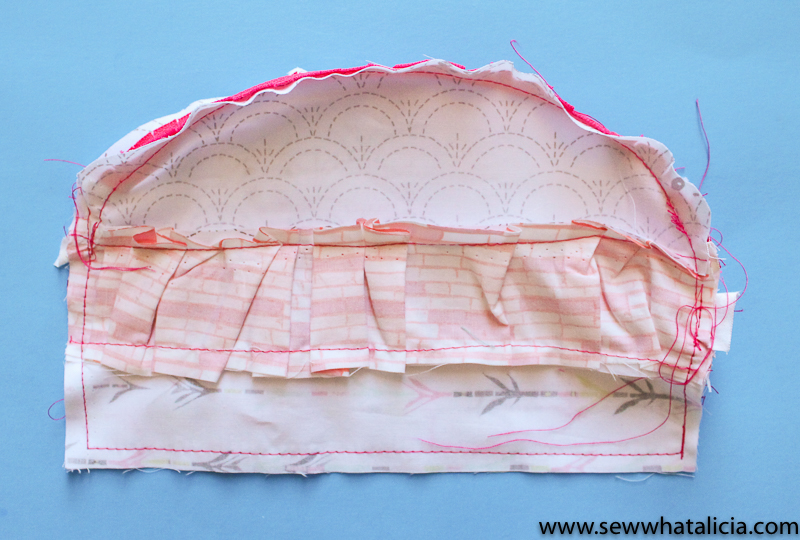
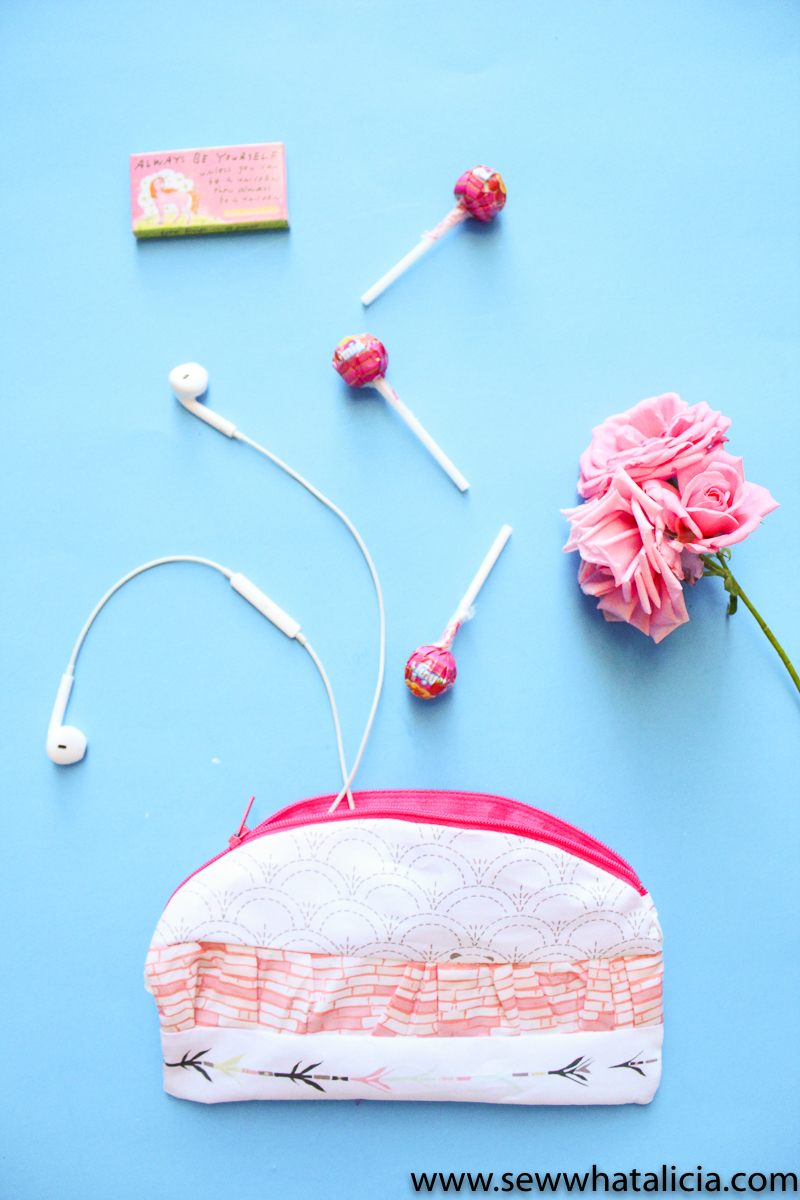
Trim the corners and turn the piece out. Tada all finished!! This one unlined is actually pretty quick to come together!
Do you love zippers yet?? I am trying my hardest to motivate you to add zippers to your sewing repertoire! Has it worked? Share your zipper stories and woes in the comments below.


Leave a Reply